
If you have ever spent an hour filtering forty samples one syringe at a time, you already understand the problem this device solves. Your thumb aches, your filter change rhythm gets sloppy around sample twenty, and somebody always walks off with the last box of filters. A filtration manifold is the boring piece of hardware that fixes most of that.
The Short Answer
A filtration manifold is a vacuum-assisted rack that filters 6, 12, or 24 samples at the same time through one vacuum source, instead of pushing each sample through a syringe filter by hand. It earns its keep once your lab filters roughly 20 or more samples a day.
Below I will walk through how it works, the volume math that justifies buying one, the cases where I would stick with syringe filters, and the mistakes labs make with their first manifold.
What a Manifold Actually Is
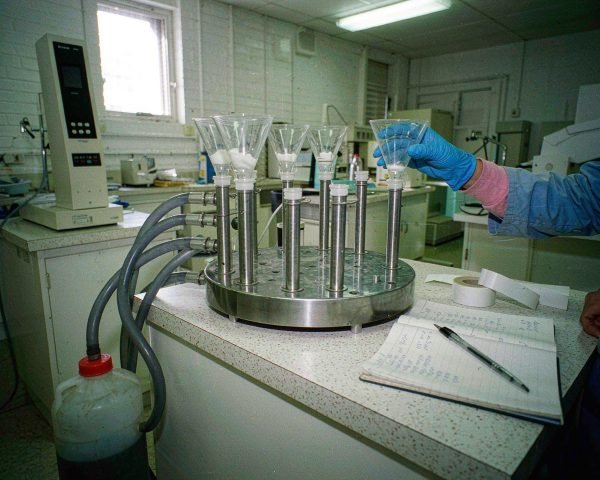
The hardware is simple. A manifold is a glass or polypropylene vacuum chamber topped with a lid that holds a row of funnel ports. You seat a membrane filter under each port, pour sample into the funnel, and switch on the vacuum. The pump pulls sample through each membrane and into a collection vial or tube underneath.
Most manifolds hold 6 to 24 positions, and decent ones give you an individual valve per port so you can seal off positions you are not using. That matters more than people expect. Pulling vacuum on eight empty ports wastes vacuum and dries out membranes on the ports you are actually using.
Think of it as the opposite workflow from a syringe filter. A syringe filter is hand pressure, one sample, disposable. A manifold is shared vacuum, many samples, and the membranes are the only part you throw away. Vendor filtration guides describe the same trade in terms of throughput versus setup time.
The Volume Math That Justifies One
Here is the back-of-napkin version from my own bench. Hand-filtering a 10 mL aqueous sample through a 25 mm 0.45 µm filter takes me about a minute, plus a few seconds to swap filters. Call it 90 seconds per sample with realistic fumbling.
Twenty-four samples is therefore about 35 minutes of pure thumb work. On a 24-position manifold, that same batch is maybe 6 minutes: load membranes, pour, pull vacuum, done. You save close to half an hour, and your hands get to keep feeling their fingertips.
The break-even point depends on your volume, but in my experience:
- Under 10 samples a day: skip it. A manifold is setup overhead you will resent.
- 10 to 20 a day: borderline. Worth it if batches arrive as one big pile.
- Over 20 a day, or regular 50-plus sample batches: buy one. It pays for itself in the first month.
The other hidden saving is consistency. When sample thirty gets hand-filtered by a tired analyst, the pressure applied varies, and so does the filtrate. Vacuum is the same for every port.
When I Would Stick With Syringe Filters
Manifolds are not automatically better. Four situations where I keep the syringe filters within reach:
Anything viscous stalls under vacuum. Oil-like or protein-heavy samples need steady hand pressure to force them through, which gentle vacuum never provides. For those matrices, read up on handling viscous samples in HPLC sample prep before you buy hardware.
Small volumes get eaten alive by dead volume. Every manifold position has some in the funnel and stem, so if you are filtering 200 µL fractions, the hardware will happily swallow half of your sample. Tiny-volume work belongs in a low hold-up syringe filter.
Volatile or air-sensitive samples are another mismatch. You cannot easily blank a manifold port from the atmosphere the way you can with a sealed syringe setup, and open funnels encourage evaporation.
And then there is the six-samples-on-a-Friday-afternoon case. Rigging the manifold, connecting the pump, and flushing the system takes longer than just filtering the six by hand. The hardware has a minimum batch size where it stops being worth the ceremony.
What to Look For Before You Buy
Not all manifolds are equal, and the cheap ones fail in annoying ways. My checklist:
1. Per-port valves. Non-negotiable. Without them, one leaky position ruins the vacuum for all of them. 2. Luer-lock connections on every port, so membranes and funnels seat properly. 3. Glass reservoir if you run anything solvent-containing. Polypropylene is fine for aqueous buffers, but it swells and clouds with strong organics. 4. A real vacuum source with control. House vacuum or a diaphragm pump with a gauge. Water aspirators work but they are slow and they dump solvent vapor into the sink. 5. Collection options that match your workflow, whether that is 2 mL vials, 15 mL tubes, or a 96-well plate. Check this against your autosampler trays before ordering.
Agilent’s sample preparation materials, such as their vacuum filtration station data sheet, make the same point I would: match the filtration hardware to the collection format, or you will buy everything twice. Their broader filtration approaches e-seminar walks through where filtration fits among sample prep options if you want the full picture.
The Mistakes I See With New Manifolds
The first week with a manifold is where the errors live. Three to watch:
Too much vacuum is the classic one. Cranking the pump to full pull can rupture a membrane or force sample past the seal, which is the same breakthrough you get from rushing a syringe filter. Start around 10 to 15 inHg and adjust. Our own guide on preventing syringe filter breakthrough covers the failure mode in detail, and it applies directly here.
Cross-contamination from splash-back is the second. If collection vials sit loose under the ports, vacuum fluctuation can spit filtrate between wells. Snug-fit the vials and keep the vacuum steady.
Dry membranes are the third. A membrane that pulls air mid-batch will give you inconsistent recovery on the next sample. Keep ports valved off when idle, and pre-wet aqueous membranes with a few drops of clean water first.
I learned the splash lesson the hard way, on a 96-well plate of plasma calibrators where wells in column 3 read suspiciously high. The culprit was a cracked manifold gasket that let vacuum wander. Half a day of reruns for a $4 gasket.
Conclusion
A filtration manifold is not a glamorous purchase, but it is one of the few that pays rent every single week. The rule I use: once your lab filters more than about 20 samples a day, or runs regular batches over 50, a manifold with per-port valves and a controlled vacuum source will save you hours and smooth out the consistency of your filtrates. Under that volume, decent syringe filters and a fresh supply of patience do the job fine. If you are still deciding between filtration approaches, our comparison of bottle-top filters versus syringe filters covers the other half of this decision, and our guide to reusing syringe filters safely is worth a read before you commit to any high-volume workflow. Pick the hardware that matches your daily sample count, not the one that looks most impressive on the bench.
Frequently Asked Questions
Can I use regular syringe filter membranes in a manifold?
Often yes, if the diameter matches the port design. Most manifolds take 25 mm or 47 mm disc membranes, and many accept luer-style filter cups. Check the port specification before you bulk-order membranes, because some manifolds need special preassembled cups.
What vacuum level should I use for sample filtration?
Start around 10 to 15 inHg and increase slowly until the flow is steady. If the filtrate comes out cloudy or the membrane bulges, you are pulling too hard. Gentle and steady beats fast and variable for recovery and reproducibility.
Is a manifold better than bottle-top filters?
They solve slightly different problems. Bottle-top filters handle one large volume at a time, while a manifold handles many small volumes at once. For 1 L of buffer, go bottle-top. For 48 autosampler vials of extracts, the manifold wins clearly.
How do I clean a filtration manifold between sample batches?
Flush all funnels and the reservoir with clean water, then with an appropriate solvent for your residues, then rinse again. Disassemble and autoclave only if the manufacturer says the unit is autoclavable. Keep a log of which residues touched which ports if you run shared instruments.