
# 8 Consumables That Belong in Every Emergency Kit
Most labs plan for instrument failure. Very few plan for the day a delivery truck doesn’t show up, a supplier recall wipes out your stock, or a backlog stretches a 3-day lead time into 3 weeks. A small emergency kit of lab consumables covers that gap.
The short answer
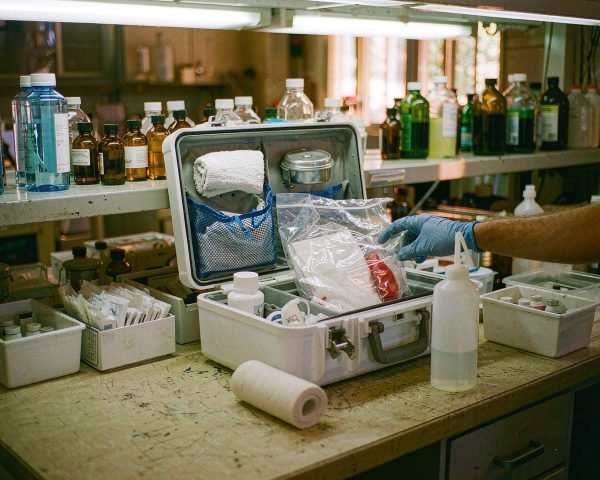
A lab emergency kit should hold spare syringe filters, spare septa and caps, sample vials, nitrile gloves, sterile sampling bags, wash bottles with deionized water, labeling tape and markers, and spill-absorbent materials. Keep it all in one labeled bin and rotate the stock on a set date.
Below I break each item down: what it is, why it earns a spot, and how much to store. I’ll also share the rotation habit that keeps a kit from quietly expiring.
The 8 consumables worth stocking
1. Spare syringe filters
Your syringe filter is the last barrier between the sample and the column. Skip it and particles settle at the column head, pressure climbs, and a column that should last months dies in weeks. Thermo Fisher’s chromatography guides describe syringe filters as the consumable that protects columns by preventing fine particles from forming premature blockages syringe filters that protect chromatography columns.
I’ve been on the wrong side of this lesson. A delayed shipment once left us rationing the last box of 0.22 µm filters across three studies. We re-filtered samples to stretch the supply, a client report went out a week late, and the instrument sat idle for two days while we waited. The filters cost about $40 a box. The delay cost us far more.
A practical floor for a busy HPLC bench: two boxes of 0.22 µm and one box of 0.45 µm per instrument, in the membrane your samples actually need. Nylon covers most routine HPLC work. Add PTFE to the kit if you run aggressive organics, because forcing an incompatible membrane just clogs it.
Size the filter to the job as well. The same selection guide pairs small 4 to 13 mm devices with sample volumes under 10 mL and larger 25 to 30 mm units with preps above 100 mL, so a drawer full of one size is a drawer that fails half the time.
Store filters sealed in their original packaging, in a drawer away from the window. Membranes have shelf lives, so check pack dates when you rotate the kit and promote older boxes into daily use first.
One last note on compatibility: keep the kit stock identical to what the bench already validates. An emergency is a bad time to introduce a new membrane chemistry, extractables profile, or housing color scheme into a validated method. Order the exact part number in daily use, in exactly the pore sizes the lab runs, and the swap stays invisible to your data. If other techniques share the room, like GC or ion chromatography, add their filter types to the same bin rather than running a second kit.
2. Spare septa and caps
The septum looks trivial until it fails. A worn or coring septum lets volatile samples evaporate between injections and can bend a fine needle mid-sequence. Thermo Fisher’s septa guide also ties a poor septum choice to needle blockages and instrument downtime septa selection guide.
Emergencies make this worse, not better. Rushed manual injections, a borrowed autosampler, or a needle swapped in a hurry all punish a septum that was already tired. Fresh septa are one of those spares you never regret buying.
Do the math on punctures. A full 96-vial queue with multiple syringe rinses per vial drives hundreds of punctures in a single day, which is why septa belong on the spares shelf rather than the reorder-when-empty list.
Match the cap and septum to your instrument. If your autosampler uses 9 mm screw caps with pre-slit silicone/PTFE septa, keep a full bag of 100 on the shelf. Pre-slit septa help thin needles enter cleanly and reduce coring across repeated injections.
One storage caution: don’t assemble caps and septa for long-term storage. A septum held under compression for months takes a set and may not reseal reliably afterward. Keep the parts separate in the kit and assemble as needed.
Headspace users should add a little more. Headspace vials run warmer, seal under pressure, and use wider 18 to 20 mm closures, so their caps don’t interchange with the standard 9 mm stock. If your lab runs volatiles, a second small bag of the right crimp caps costs little and saves a sequence that would otherwise wait on a courier.
Cap torque matters too. Hand-tight plus a quarter turn is usually plenty for screw caps, and overtightening deforms septa just as badly as months of compression. Write the rule on the kit lid if your team argues about it.
3. Sample vials
Running out of the right vial mid-sequence is a special kind of frustration. The queue is loaded, the run is timed, and slot 54 is empty. Keep a sealed case of your standard 2 mL vial in the kit: clear glass for routine work, amber if any of your analytes are light-sensitive, and polypropylene if your samples don’t suit glass.
My preference for emergency stock is screw-top vials. A good crimper makes a better seal, but during a scramble, hand-tight screw caps beat a borrowed crimper every time. If your method requires crimp vials, add a box of caps and confirm the crimper sits on the same shelf, because the wrong tool at 6 pm on a Friday is its own emergency.
Include a small pack of inserts if you ever run low-volume samples. A 200 µL sample in a 2 mL vial can sit below the needle reach on many samplers, and that mismatch wastes an entire evening of autosampler time.
Keep vials in their original boxes, and don’t stack cases three high on a top shelf. I’ve chased ghost peaks to a washed and reused vial before; since then I treat kit vials as single-use, because a mystery peak during a rush is one problem nobody needs.
Storage conditions are the quiet variable here. Glass vials don’t expire, but the boxed cases crush easily, cardboard absorbs damp basement air, and dust in an open box finds its way into a sample rack. A sealed case inside the emergency bin solves all of it for the price of a little shelf space.
How many to keep: enough for one full busy week. If your lab loads 60 vials a day, a case of 500 is roughly two emergencies’ worth, which is about the right number of emergencies to plan for at once.
4. Nitrile gloves and basic PPE
Gloves are the most-consumed item in any lab. A bench without gloves stops work faster than a bench without samples, so treat glove boxes as critical inventory rather than a comfort item.
NIOSH research gives a reason to stock good ones and handle them as consumables. In permeation testing, simulated hand movement cut the breakthrough time of disposable nitrile gloves by 6 to 33% across 28 products and pushed cumulative exposure up as much as threefold in a 30-minute window NIOSH nitrile glove permeation study. An exam glove handles a splash. It does not handle a soak. Change gloves immediately after any solvent contact and never re-use a pair that swelled.
Keep three boxes in your own size and two in the sizes your teammates wear, stored cool and dark, since heat and sunlight age the polymer. Add splash goggles and a spare lab coat to the same bin. If anyone on the team has latex sensitivities, make the whole kit latex-free so nobody has to read labels in a hurry.
Glove choice has more failure modes than most people expect. Our article on glove choice and sample contamination covers the mistakes labs repeat most.
Rotation for gloves is simple because you can feed the kit from daily consumption. Replace the bin boxes with fresh ones every quarter and roll the “old” boxes straight into normal bench use, where their age doesn’t matter. That way the emergency stock never sits long enough to embrittle, and nobody has to fund a separate glove budget.
Also count the rest of the PPE once a year. Safety glasses migrate, coat buttons vanish, and a kit that assumes PPE “should be around somewhere” is a kit that fails on the day of a splash.
5. Sterile sampling bags
For field sampling, a pre-sterilized polyethylene bag is hard to beat. EPA’s estuary monitoring manual notes that sterile bags and bottles both meet the basic criteria for bacteria sampling, and that bags are the convenient option because they arrive pre-sterilized and disposable EPA water sampling guidance.
They belong in an emergency kit because compliance sampling doesn’t wait for a supplier. If your sterile containers run out, a scheduled drinking-water or effluent check can’t simply move to next week. Twenty sealed bags in the bin keeps that obligation safe, and they weigh so little that storing them costs nothing.
If you sample chlorinated water, look for bags treated with sodium thiosulfate, which neutralizes residual chlorine at the moment of collection so the count reflects the source rather than the pipe. During rotation, check sterility dates and discard any bag whose seal looks broken or dusty along the fold.
Transport still matters. The EPA guidance above sends samples into a cooler held at 1 to 4 °C, so keep ice packs next to the bags in the same bin. Bags make collection easy; they don’t excuse warm storage.
Pair the bags with a couple of field extras and the kit covers a full sampling day: a permanent marker already in the tote, a printed copy of the sampling SOP, and one spare bag kept unopened as a blank. The blank is cheap QC. If it comes back contaminated, you learn something about your storage, not your water source.
We cover formats and use cases in more depth in what sterile sampling bags are and when labs use them.
6. Wash bottles and deionized water
The humblest item on this list might do the most good during an actual incident. A full wash bottle flushes a bench-top splash for minutes, rinses chemical dust off gloves, and tops up a buffer when the purification system is down. In a shutdown or spill scenario, water within arm’s reach matters more than chromatography.
Keep two 500 mL wash bottles filled, dated, and sealed in the kit, plus one closed 4 L container of deionized water as a refill. Label them like reagents. The 500 mL wash bottle on shelf 3 with no date on it is exactly how stale rinse water sneaks into a careful cleanup. Replace the DI water roughly every quarter.
Choose narrow tips for precise rinsing and a wide-tip bottle for bench washing, and resist the temptation to improvise with soda bottles, which leak and invite mislabeling. If you’re unsure which design suits which task, our guide to wash bottles and how to choose them compares the common types.
A note on water quality: deionized water is the right default because it leaves no mineral film on glassware and won’t add background to a rinse. Tap water belongs in an emergency kit only as a last resort, and only for jobs where trace contamination can’t hurt the result. When in doubt, flush with the kit’s DI supply and save the tap water for the floor.
One bottle lives at the bench, one stays sealed in the kit. That pairing means the emergency supply is untouched exactly when it’s needed most, and the dated refill container covers the second incident. Because there is always a second incident.
7. Labeling tape and markers
Emergencies scramble identities. A freezer failure forces everything into temporary storage. A flood moves boxes to a dry bench. Six hours later, nobody remembers which rack held the stability samples.
Waterproof markers and solvent-resistant labeling tape solve that for about $10 total. Keep two rolls of tape, one cryo-rated if you run freezers, and three markers in the kit. Color-coding by storage condition (blue for 4 °C, red for ambient, green for returns) takes no extra money and saves arguments later.
This is the cheapest line on the list and probably the highest leverage. Samples you can’t identify are samples you must re-collect, and some of them, like a one-time effluent grab, can’t be re-collected at all.
Markers have opinions too. Ordinary permanent marker ink smears on wet plastic and fades under UV on window shelves, so solvent-resistant or cryo markers are the ones to stock. Test whatever you buy against your worst solvent, not against paper, because the label that survives acetone on a bench is worth ten that don’t.
If your lab uses barcodes or printed labels, the tape still earns its place. Printers fail and label stock runs out at the worst moment, and a strip of tape plus a marker works in every one of those scenarios.
8. Spill-absorbent and cleanup consumables
Every spill response starts with the same few consumables. CDC’s laboratory spill job aid lists absorbent paper towels, biohazard bags, waterproof utility gloves plus nitrile, sharps-handling tools, and face protection as the core of a biological spill kit, with a 10% bleach solution left in contact for 15 minutes before wipe-down CDC biological spill kit job aid.
For chemical spills, match the absorbent to the chemistry. Universal pads and pillows handle most aqueous and solvent releases; keep enough to cover a 2 L spill rather than a coffee-cup dribble. Bag saturated absorbent as your SDS directs, because some absorbed solvents turn ordinary pads into regulated waste.
Check the kit monthly. Bleach loses strength in storage, and pads get borrowed for routine bench work and never returned. A spill kit that fails during a real event is worse than none, because it breeds false confidence right up until it doesn’t.
Skip the giant all-in-one kits full of items your lab never uses. Build the kit from your own SDS set instead, so every item in the bin has a job during a real response.
Then make sure at least two people per shift know where the bin is and what’s inside. Absorbents and bags only work if the person standing nearest the spill doesn’t have to search for them. A five-minute walkthrough twice a year is training enough, and it doubles as your monthly check reminder.
Wrap-up: build it once, rotate it forever
Pick a bin, tape a checklist inside the lid, and put a rotation date on the shared calendar. Ready.gov’s kit guidance applies to labs as much as households: store items where everyone knows the location, and replace expired items on schedule how to build and maintain a kit. Thirty minutes, twice a year, keeps the whole setup honest.
The checklist matters more than the bin. List all eight categories with quantities, note the date of the last rotation, and initial it. A bin nobody audits becomes a drawer of expired filters within eighteen months, and an audited bin stays an asset for years.
Conclusion
An emergency kit of consumables is inexpensive insurance against supply problems you can’t control. Eight categories cover nearly every bench: syringe filters, septa and caps, vials, gloves and PPE, sterile sampling bags, wash bottles with DI water, labeling supplies, and spill absorbents. The full kit costs less than one column and one lost batch, and it turns a supply crisis into a minor delay.
Start this week. Pull the spares you already own into one labeled bin, note the gaps, and order what’s missing. For a broader baseline beyond the emergency shortlist, our list of 12 consumables every HPLC lab should keep as spares pairs naturally with this kit. Your future self, mid-backlog and fully stocked, will be glad you did.
Frequently Asked Questions
How much should a small lab budget for a consumables emergency kit?
For most benches, $150 to $300 covers the core eight categories, with filters, septa, and gloves taking the largest share. After the first build, you only replace what rotation consumed, so the annual cost drops sharply.
What pore size syringe filters should I keep on hand for HPLC?
Stock 0.22 µm for UHPLC and fine-particle columns, plus 0.45 µm for routine HPLC samples. Match the membrane to your solvents: nylon for general aqueous and organic work, PTFE for aggressive solvents. Two boxes of each is a sensible floor.
How often should I rotate the supplies in my lab emergency kit?
Twice a year suits most labs, with a quick monthly glance at bleach, seals, and water bottles. Filters, sterile bags, and deionized water age fastest, so those drive the schedule.
Are sterile sampling bags better than bottles for emergency stock?
For urgent or occasional field sampling, bags usually win because they arrive pre-sterilized, weigh almost nothing, and dispose easily after collection. Bottles are cheaper long term but need sterilizing between uses. Choose bags when the priority is being ready tomorrow.