
# What Are Wash Bottles and How Do You Choose Them?
Every lab I have ever walked into has wash bottles on the bench, usually three or four per hood, and almost nobody thinks about them until one leaks, swells, or sprays solvent across someone’s glove. That is a small mistake with a real cleanup cost, and it is almost always a choice problem, not a quality problem.
A wash bottle is a squeezable plastic bottle, usually LDPE, with a nozzle cap that delivers a controlled stream for rinsing glassware or dispensing solvent. Choose by matching volume (250, 500, or 1000 mL), material to solvent, cap type (standard or vented), and safety labeling.
The details matter more than they look. A bottle that behaves perfectly with water can go brittle or drip when filled with a volatile solvent, and a cap without a vent turns a methanol bottle into a squeeze-triggered sprayer. Here is what actually separates a good bottle from a bench nuisance.
What a Wash Bottle Actually Does
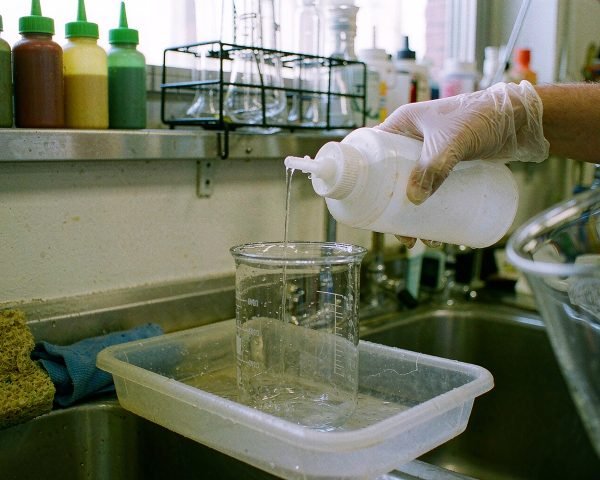
A wash bottle is a dispensing tool, not a storage container. You squeeze the flexible body, liquid travels up through a delivery tube or a molded channel, and a narrow tip puts a thin, directional stream exactly where you want it: inside a volumetric flask for the final rinse to the mark, over a pH electrode, across a bench spill.
That narrow tip is the whole point. Pouring from a reagent bottle splashes, and a pipette is overkill for a rough rinse. A wash bottle lets you rinse a beaker with one hand while you hold a funnel with the other, which is roughly 40% of wet chemistry work if you count it honestly.
Most bottles are translucent, so you can see the level without opening them, and the tip can often be cut back with scissors to increase flow when you want a faster stream for flushing large glassware. The standard two-piece design delivers single drops or a needle-sharp stream, so the same bottle that handles a careful final rinse can be trimmed for a full flush.
How to Choose: Five Decisions That Actually Matter
1. Match the material to the solvent
Almost every wash bottle body is low-density polyethylene (LDPE), chosen because it is soft enough to squeeze easily and resists most dilute acids, alkalis, water, and common lab solvents like ethanol, methanol, acetone, and isopropanol. The cap is usually polypropylene.
But LDPE is not universal. Strong oxidizers are off the list, and even the manufacturers warn about it: Bel-Art’s own guidance for their label-your-own bottles says to fill them only with solvents that are compatible with LDPE. Chlorinated and aromatic solvents are the gray zone; some brands sell pre-labeled LDPE bottles for dichloromethane and toluene, but others move those chemicals to different plastic bodies or colored variants. Before you decant anything into a wash bottle, check the compatibility chart for that specific resin, not “plastic” in general.
One more detail that catches people: sodium hypochlorite (bleach) attacks polypropylene slowly, so quality suppliers mold the bleach bottle cap in HDPE and use white LDPE that blocks light between 230 and 450 nm. Thermo Fisher’s Nalgene right-to-know line does exactly this, and it is a good example of why “same bottle, different label” is not always true.
2. One-piece vs two-piece construction
The classic wash bottle is two-piece: a cap with an integrated nozzle, plus a separate delivery tube that drops into the liquid. Sigma-Aldrich’s listing for the standard Bel-Art narrow-mouth bottle describes exactly this design, and it works fine, but the tube is a loose part. I once inherited a bench where a delivery tube had slipped out of its cap seal during refilling, so every “rinse” for two days dispensed nothing until someone finally pulled the cap and found the tube lying diagonally across the bottom. Two hours of re-rinsed glassware later, the lab switched to one-piece bottles.
One-piece (often called unitary) bottles mold the bottle and its internal channel as a single part, with no draw tube to assemble or lose. Thermo Fisher’s Nalgene unitary bottles are built this way, and the design point is also the practical one: nothing inside the bottle can come loose, and you never handle the dispensing stem over an open bottle mouth, which is where contamination and splash-back happen when you refill.
My default, if you are buying for a whole lab: pay the small premium for one-piece. The failure mode it removes (a lost or dislodged tube) is silent and expensive.
3. Standard cap or safety-vented cap
Fill a bottle with a volatile solvent, cap it, leave it on a warm bench, and pressure builds inside. A standard cap releases that pressure unpredictably, usually as a squirt out the tip when you squeeze, which is precisely the moment you do not want flammable methanol in the air near your hotplate. (If you are weighing vented vs solid caps on reagent bottles too, we cover that choice in a separate vented vs solid bottle caps guide.)
Safety-vented caps solve this with an internal valve and, in better designs, a membrane. The valve equalizes pressure without letting vapor escape uncontrollably, and it stops the “self-dispensing” drip that leaves solvent rings on your bench overnight. Vented designs also allow dispensing upright or inverted, and the Nalgene vented unitary line adds a PTFE membrane in the vent path. If your bottle will hold acetone, methanol, ethanol, isopropanol, ethyl acetate, or anything with a GHS flammable pictogram, vented is not optional in my view. Water and buffer bottles can live with plain caps.
4. Volume: 250, 500, or 1000 mL
The workhorse sizes are 250, 500, and 1000 mL, with 125 mL bottles useful for bench-top specialty solutions. My rule of thumb: 500 mL for water and daily solvents (heavy enough to squeeze firmly, light enough to control, and it fits a hood shelf), 250 mL for expensive or fussy reagents you do not want going stale, and 1 L only for water in high-volume rinse stations, because a full liter of acetone is a lot of fuel in your hand.
Mouth size follows volume. Small bottles often use narrow mouths around 28 mm with a screw-on cap and tube; larger wide-mouth wash bottles use a 53 mm opening that lets you refill straight from a solvent bottle without a funnel. Wide mouth also makes visual inspection and drying easier between chemical changes.
5. Labeling and color coding
The cheapest safety upgrade in this entire category is pre-printed labeling. Quality right-to-know bottles come printed with the chemical name and formula, the CAS number, GHS pictograms, the NFPA 704 four-color diamond, and suggested protective equipment, which satisfies OSHA hazard communication requirements for workplace containers (29 CFR 1910.1200). Bel-Art’s safety-labeled line and Fisherbrand’s GHS line both carry this full set of markings.
Color coding is the second layer: red caps for acetone, green for methanol, yellow for isopropanol, blue for water, white or natural for ethanol, and so on across suppliers, with color-coded polypropylene closures available from 125 mL up to 1 L. It sounds trivial until a colleague grabs the yellow-capped bottle expecting IPA and gets dichloromethane. If you buy unlabeled bottles for anything beyond water, label them yourself the day you fill them, every time.
What Goes Wrong With the Wrong Bottle
Three failure modes come up again and again.
Solvent attack starts when an incompatible plastic meets the wrong chemical. The bottle swells or goes brittle, and because degradation is gradual, it looks fine the week it starts failing.
Drips and pressure surprises follow from the cap. A plain cap on a volatile solvent builds vapor pressure that releases as a spray or a slow overnight weep, and solvent puddles near ignition sources are exactly what fire safety inspectors look for.
Valve and tube failure is the quiet one. A stuck vent valve makes the bottle hard to squeeze; a loose delivery tube dispenses nothing at all. Either way, the fix is the same: retire the bottle. Wash bottles are cheap. The re-rinsed batch of glassware, or the flash fire risk, is not.
Buying Tips From the Supply Side
Since we ship lab consumables for a living, here is what I would check before ordering a case.
Buy per chemical, not per bench. Order pre-labeled vented bottles for each solvent you actually use, plus a couple of label-your-own units for water and odd solutions. Assortment packs (typically acetone, IPA, ethanol, and bleach) are the fastest way to standardize a new lab.
Check the closure spec, not just the bottle. PP caps are standard; HDPE caps belong on bleach bottles. Vented caps should state whether they include a membrane.
Confirm temperature limits. LDPE softens around 80 °C (the spec sheet for a typical Kartell integrally molded LDPE bottle states this outright), and these bottles are generally not autoclavable; if you need sterile dispensing, look at autoclavable polypropylene alternatives instead of guessing.
If you refill wash bottles from a larger container or reservoir, keep an eye on growth in stored water too; our guide on stopping algae in solvent reservoirs and media bottles covers the upkeep that keeps dispensed water clean.
Order spares in the same chemical color so a replacement never breaks your color code. And when your solvent line changes, retire the old pre-printed bottle rather than repurposing it. A methanol bottle that once held water is fine; a water bottle refilled with methanol is a mislabeled chemical container.
Conclusion
Wash bottles sit at the bottom of the consumables budget and the top of the everyday-use list, which is exactly why choosing them deliberately pays off. The decision set is short: match the plastic to the solvent, prefer one-piece construction for anything refilled often, insist on vented caps for flammables, pick 500 mL as your daily workhorse, and let pre-printed GHS labels and color-coded caps do your safety paperwork for you. None of these choices adds meaningful cost, and each one removes a specific, well-known failure mode. If you only change one thing this week, replace any plain-capped bottle holding a volatile solvent with a safety-vented, pre-labeled version. For the wider bottle picture, our guides to glass vs plastic reagent bottles and what to look for in solvent reservoir bottles cover the containers that sit next to your wash bottles on the shelf.
Frequently Asked Questions
What are wash bottles made of?
Most wash bottle bodies are low-density polyethylene (LDPE) for flexibility and solvent resistance, with polypropylene caps. Bleach bottles often use white LDPE for light protection and an HDPE cap, and vented safety bottles add PTFE membranes in the vent path.
Can I put acetone or methanol in an LDPE wash bottle?
Yes, common lab solvents like acetone, methanol, ethanol, and isopropanol are routinely dispensed from LDPE wash bottles, which is why suppliers sell pre-labeled versions for each. Always confirm the compatibility of your specific solvent with the resin, and use a vented cap for anything volatile.
Why do wash bottles have vented caps?
Volatile solvents build vapor pressure inside a sealed bottle, especially on a warm bench. A vented cap equalizes that pressure safely, prevents the bottle from squirting or dripping when squeezed, and lets you dispense upright or inverted.
Are wash bottles autoclavable?
Standard LDPE wash bottles are not autoclavable; LDPE softens near 80 °C. If you need sterile dispensing, look for bottles made of autoclavable polypropylene or sterilize the solution before filling.
What size wash bottle should I buy?
Buy 500 mL bottles for daily water and solvent use, 250 mL for small or expensive solutions, and 1 L only for water at high-volume rinse stations. Most suppliers offer 250, 500, and 1000 mL with 125 mL as an extra small option.