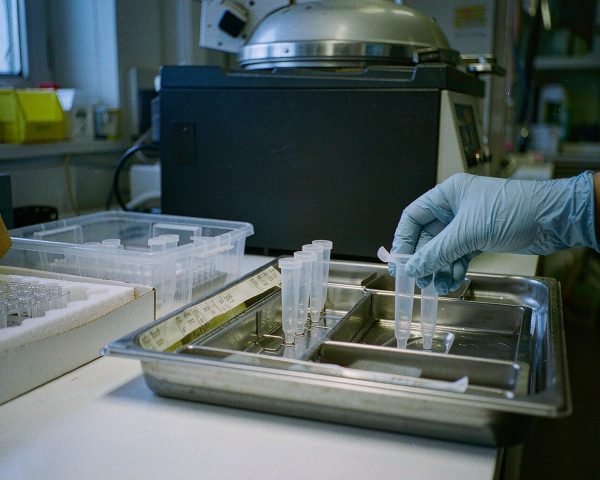

The autoclave is the lab’s default answer to “is it clean?” But centrifuge tubes are exactly where that default fails, because the answer depends on the plastic. Autoclave the wrong tube and you get a warped, leaking, or shattered mess. Autoclave the right one wrong and you get almost the same result.
Answer: Yes, polypropylene (PP) centrifuge tubes can be autoclaved at 121°C for 15-20 minutes, and major manufacturers rate them for exactly that cycle. Polycarbonate (PC) and polyethylene (PE) tubes should not be autoclaved at standard conditions. Loosen or vent caps, never fill above about 70%, and let the load cool fully before removing it.
Which Tubes Can Take the Heat
The material is the whole decision. Here’s the practical breakdown:
- Polypropylene (PP): The standard choice. Autoclavable upright at 121°C for 20 minutes, functional from roughly -86°C to 100°C in use. Eppendorf’s tube instructions for use specify exactly this cycle for their PP tubes.
- Polycarbonate (PC): Clear and strong, but not for standard autoclaving. It’s for visible work at moderate temperatures, and repeated heat embrittles it.
- Polyethylene (PE): Softens well below autoclave temperature. Never autoclave.
- Glass (borosilicate): Handles heat fine; the risk is mechanical breakage, not melting.
The catch most people miss: “PP tube” and “PP tube with its cap” are different claims. Caps often use a different polymer or contain a silicone gasket. Eppendorf’s 3810X tube page states the key condition plainly: autoclavable when open, 121°C, 20 minutes. Closed tubes trap expanding air and steam, which is where the bursting happens.
The Rules That Keep Tubes Alive
Autoclaving tubes isn’t hard. It’s just unforgiving about four specific things.
- Vent the caps. Leave caps loose, or use vented closures. Steam needs to enter, and expanding air needs to escape. A sealed tube is a small pressure vessel.
- Fill to about 70%. Liquids expand when heated, and headspace is your shock absorber. A full tube pops its cap or splits its seam.
- Use the liquid cycle if you have one. Liquid cycles cool slowly and depressurize gently. Fast exhaust on a tube load invites implosion and boiled-over caps.
- Let it cool completely. Removing a hot tray drops the pressure around soft plastic in a hurry. Tubes that looked fine in the chamber arrive warped. Patience is part of the protocol.
One more: stand tubes upright, especially anything with a screw cap. Side-lying tubes deform against the rack and seal unevenly afterward.
What Autoclaving Does to Tubes Over Time
Even within spec, each cycle costs the plastic a little. Repeated autoclaving can slightly embrittle PP and gradually stiffen hinged caps, and any residual solvent from previous use accelerates that. Manufacturer guidance for centrifuge bottles is telling: a typical rotor manual’s sterilization table shows 121°C for 20 minutes as the standard cycle, alongside life-expectancy tables that assume a limited number of reuse cycles at maximum speed.
Practical translation: an autoclaved tube is fine for media prep, buffer storage, and routine spins. Don’t put a twice-autoclaved tube into a max-speed run with a dense gradient. Mechanical strength and thermal history are connected.
If your reuse program extends to bottles, our article on how many autoclave cycles media bottles survive covers the same physics at bottle scale, and our autoclaving guide for vials and septa covers the consumables that definitely should not go in.
Caps, Racks, and the Details Nobody Mentions
The tube gets the attention; the accessories start the fires.
Screw caps with silicone gaskets often tolerate a cycle, but hinged caps and any cap with a paper or fiber component do not. When in doubt, autoclave caps separately in a steam-safe pouch, or replace them after the cycle; caps are cheaper than the samples they protect.
Racks matter more than they should. A dense rack traps steam pockets and slows heat-up, which lengthens the effective cycle for the tubes in the middle. Spaced racks cost nothing and make the load behave like the validation says it should. And the autoclave tape you ignore on glassware earns its keep here: a strip per tray is the cheapest cycle record you will ever keep.
When to Skip the Autoclave Entirely
Three situations where buying sterile beats autoclaving:
- Certified-clean applications. Cell culture, molecular biology, and anything touching low-bioburden or low-endotoxin specs. A gamma-irradiated, lot-certified tube arrives cleaner than your autoclave can make it, with paperwork to prove it. Our breakdown of DNase- and RNase-free claims covers why nuclease cleanliness can’t be autoclaved in at all.
- Small volumes. Autoclaving a sleeve of 25 tubes to save a few dollars rarely survives contact with the labor cost.
- Solvent-exposed tubes. Tubes that held phenol, chloroform, or strong organics shouldn’t be re-autoclaved or reused; residues concentrate and plastics weaken.
The middle ground exists too: tubes for buffer storage that were never exposed to anything nasty can be washed and autoclaved once, then retired rather than re-entering the cycle. One reuse is defensible with inspection. Indefinite reuse is where the risk compounds.
A colleague of mine ran a monthly ritual of autoclaving boxes of 50 mL tubes for media day. Worked fine until someone loaded them capped and upright in a closed rack. The tubes were fine. The caps, steamed shut and distorted, no longer sealed, and a week of “why is my buffer evaporating” followed. The fix cost nothing: vented caps, spaced racks.
Quick Autoclave Checklist for Centrifuge Tubes
- Confirm the tube is PP and the manufacturer rates 121°C/20 min
- Caps loose or vented; nothing sealed
- Fill level at or below ~70%
- Upright in a spaced rack, not touching
- Liquid cycle with slow exhaust
- Full cool-down before removal
- Inspect after: any warp, haze, or stiff cap retires the tube
- Log the cycle if your quality system expects it
Conclusion
Yes, you can autoclave centrifuge tubes, as long as they’re polypropylene and you respect the four rules: vent, don’t overfill, use a gentle cycle, and cool fully. Polycarbonate and polyethylene stay out of the chamber, and closed tubes stay out of it too. For critical cleanliness, remember that sterile-certified disposable tubes arrive cleaner than any cycle you can run, with documentation attached. If reuse is your goal, match the material first and inspect every cycle after. For the adjacent consumables, read our guide on media bottle autoclave cycles, and our piece on DNase- and RNase-free claims explains when certification beats sterilization.
Frequently Asked Questions
Can I autoclave centrifuge tubes with liquid inside?
Yes, with limits: use the liquid cycle, fill to no more than about 70%, and leave the cap loose or vented. Sealed, full tubes risk bursting or cap failure as liquid and air expand.
What happens if I autoclave a polycarbonate tube?
At minimum you shorten its life; at worst it clouds, embrittles, and cracks in service. PC tubes are meant for clear viewing at moderate temperatures, not for steam sterilization.
How many times can I autoclave a PP tube?
Manufacturers don’t publish a fixed number because history and load matter, but treat repeated autoclaving as cumulative wear. Retire tubes that show warp, haze, or stiff caps, and don’t push thermally worn tubes to maximum g-force.
Is autoclaving enough to make tubes RNase-free?
No. Autoclaving destroys RNase activity on surfaces but doesn’t guarantee nuclease-free plastic, and recontamination happens fast. For nuclease-sensitive work, buy certified DNase/RNase-free tubes and keep them sealed until use.