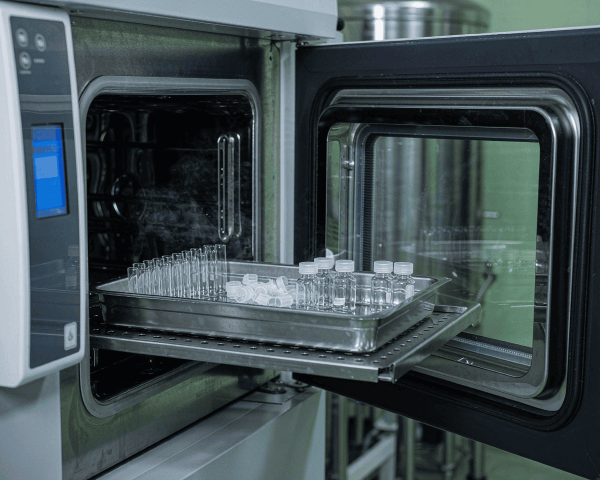

Every now and then a lab decides its autosampler vials need to be sterile, for a microbiology-adjacent workflow, an aseptic sample prep line, or a stability study where contamination would wreck the data. The first question is always the same: can you just autoclave the vials and caps you already use? The answer is yes for the right materials, no for the wrong ones, and “only with caveats” for the assembled closures.
The Short Answer
Yes. Borosilicate (Type I) glass vials, polypropylene caps, and PTFE-faced silicone septa generally survive a standard 121 °C gravity autoclave cycle without damage. Autoclave glass vials loose-capped or uncapped, never with fully tightened seals that trap expanding air, and treat septa as inspect-after-every-cycle components: replace any that deform, discolor, or fail to reseal. If your vials are made of polystyrene, PET, or unspecified “crystal” plastic, don’t autoclave them at all.
Why You’d Autoclave Vials in the First Place
Most HPLC and LC-MS runs don’t need sterile vials; they need clean vials, and a certified clean vial straight from the pack delivers that without an autoclave. But sterile conditions become genuinely necessary when samples interface with live systems: cell-based assays, microbiology work, aseptic media preparation, or long stability studies where microbial growth in an aqueous sample would create peaks that look like your analyte.
For those workflows, autoclaving is the standard, economical sterilization method. It uses saturated steam under pressure, typically 121 °C at about 15 psi for 15–20 minutes, to kill bacteria, viruses, fungi, and heat-resistant spores. The science is well established: autoclaving works by denaturing microbial proteins and coagulating their cellular components, which is why it remains the default for heat-stable laboratory materials. The catch is that the same heat and pressure that kill microbes also stress every material in the chamber, so compatibility is the real question.
What Survives 121 °C and What Doesn’t
Material compatibility is where most autoclave mistakes happen. Here’s the short list that matters for vial users:
Borosilicate glass: yes. Type I borosilicate (the standard for HPLC vials) handles repeated autoclave cycles comfortably. General lab guidance puts its working limit well above 160 °C, which is why Pyrex-style glass is the default for autoclave-safe containers. Inspect for scratches and chips first, though; surface damage concentrates stress, and a damaged vial can fail under thermal cycling.
Polypropylene (PP) is the classic autoclavable plastic, rated to roughly 135 °C, which covers standard 121 °C cycles. Most screw-cap vial caps and many plastic vial options are molded from PP. The JoVE autoclave protocol lists polypropylene alongside borosilicate glass as autoclave-compatible, and it’s the standard material for autoclave-safe secondary containers.
Polycarbonate (PC): yes, with a lifespan. PC survives autoclaving but degrades over time; guidance commonly cites roughly 30–50 cycles before it becomes brittle. Fine for occasional sterilization, not ideal for a high-turnover reuse program.
Polystyrene, PET, LDPE/HDPE, PVC: no. These melt, warp, or leach under steam sterilization. If a plastic vial or cap doesn’t say “autoclavable” on the pack, don’t risk it; the failure mode is a deformed vial that leaks in the autosampler or, worse, sheds material into your sample.
The metal itself is fine, but watch the assembly. Aluminum crimp and screw caps tolerate the temperature, but the assembled closure includes a septum and sometimes a liner, and that is where the caveats start.
The general rule from autoclave safety guidance: when in doubt, check the material code, run a single test cycle on one sample, and inspect it before committing a whole batch.
The Septa Question
Septa are the part people worry about most, and for good reason; they’re an engineered laminate of elastomer and PTFE, and heat is hard on elastomers. The good news is that a standard 121 °C gravity cycle sits well within the limits of common septum materials.
Chromatography component manufacturers have actually tested this. MicroSolv’s technical data on autoclaving AQR caps shows screw caps with PTFE-faced septa surviving a validated gravity cycle of 121.1 °C with a 15-minute sterilization phase: no warping, no loss of thread engagement, preserved seal integrity, and, critically for chromatography, no new extractable peaks in before-and-after chromatograms. Their guidance also notes the septa typically don’t need replacing after a single cycle unless you see visible damage, leakage, or a sealing problem.
So the honest answer for septa is: one standard cycle is usually fine, but treat it as a consumable with a shortened life. Silicone softens and takes a set under repeated heating, so a septum that’s been autoclaved five times won’t reseal like a fresh one. Inspect every septum after cooling; if it’s deformed, discolored, or no longer seals snugly, replace it. That’s also the rule I recommend for bonded caps: autoclaving doesn’t automatically destroy the bond, but it’s exactly the kind of stress cycle where a marginal cap will reveal itself.
How to Autoclave Vials Correctly
If you’ve confirmed your materials, the process itself is straightforward. These steps come straight from standard autoclave protocols and manufacturer guidance:
1. Clean first. Remove any residual solvent or sample; organic residues can react or carbonize under steam and pressure. Let solvent traces fully evaporate before loading. 2. Cap loosely or not at all. This is the step everyone gets wrong. A fully tightened cap on an empty vial traps air that expands during heating and contracts during cooling, which can crack glass or deform caps. Fisher Scientific’s PYREX guidance makes the same point for bottles: loosen caps before autoclaving, or use vented closures designed for the job. 3. Use a secondary container. Place vials upright in a polypropylene or stainless steel autoclave-safe tray so steam circulates and nothing tips over. 4. Run a gravity cycle. 121 °C for 15–20 minutes at ~15 psi is the standard for glass and PP. Use autoclave indicator tape or a biological indicator to confirm the cycle actually sterilized. 5. Cool slowly. Leave the load in the chamber for about 10 minutes after the cycle ends, then cool to room temperature before handling. Rapid cooling is what shocks glass and condenses moisture into caps. 6. Dry and inspect. Invert or air-dry to shed trapped moisture; moisture under a septum is a contamination risk later. Inspect vials for cracks and septa for deformation before use.
When Autoclaving Is Overkill
For a plain analytical run, autoclaving adds cost and risk without adding value. Steam sterilization can introduce extractables into a brand-new membrane or septum, warp marginal plastics, and shorten the life of components that were perfectly fine as supplied. If your method doesn’t demand sterility, a certified clean vial from the pack is the better choice, and for methods that do need sterility without the autoclave, pre-sterilized vials exist for that purpose.
There’s also a validation angle. If you autoclave vials or caps and then use them in a regulated method, re-check the background: run a solvent blank after your first autoclaved batch and compare it with your normal blank. If new peaks appear, the sterilization step is adding something to your system, and you need a different approach.
Conclusion
So, can you autoclave HPLC vials and septa? Yes: borosilicate glass, polypropylene caps, and PTFE-faced silicone septa will take a standard 121 °C gravity cycle, and manufacturers’ own testing shows caps survive with their sealing performance and chromatographic cleanliness intact. The conditions are non-negotiable though: clean before you sterilize, loosen the caps, use a proper tray, and inspect everything after it cools. And remember that autoclaving is a tool, not a default; most HPLC work is better served by clean single-use vials, while autoclaving earns its place in aseptic and stability workflows that genuinely require sterility. If you’re building one of those workflows, my guide to sterilizing reagent and media bottles covers the same principles at bottle scale, and the article on when to use sterile HPLC vials helps you decide whether pre-sterilized consumables are the smarter route.
Frequently Asked Questions
Can I autoclave glass HPLC vials?
Yes. Type I borosilicate glass handles repeated 121 °C autoclave cycles without damage. Clean the vials first, cap them loosely or leave them uncapped, and inspect for cracks or chips before loading; surface damage can cause failure under thermal stress.
Do septa survive autoclaving?
Standard PTFE-faced silicone septa survive a single 121 °C gravity cycle in manufacturer testing, with no loss of seal integrity and no new extractable peaks. Repeated cycles shorten their life, so inspect each septum after autoclaving and replace any that are deformed, discolored, or no longer reseal.
Can plastic HPLC vials be autoclaved?
Only if the plastic is autoclavable. Polypropylene vials and caps are fine to roughly 135 °C, and polycarbonate survives with a limited number of cycles. Polystyrene, PET, and polyethylene melt or warp under steam sterilization; if the packaging doesn’t say autoclavable, don’t risk it.
Should caps be tightened before autoclaving?
No. Fully tightened caps trap expanding air that can crack glass or deform caps during heating and cooling. Loosen caps to about half a turn, use vented closures if your workflow requires a tight seal, and let the load cool slowly before handling.
Why do my samples need sterile vials at all?
Most HPLC analyses don’t require sterile vials; clean vials are sufficient. Sterility matters when samples interface with live systems, like cell-based assays, microbiology work, or long stability studies where microbial growth in aqueous samples would create interfering peaks.