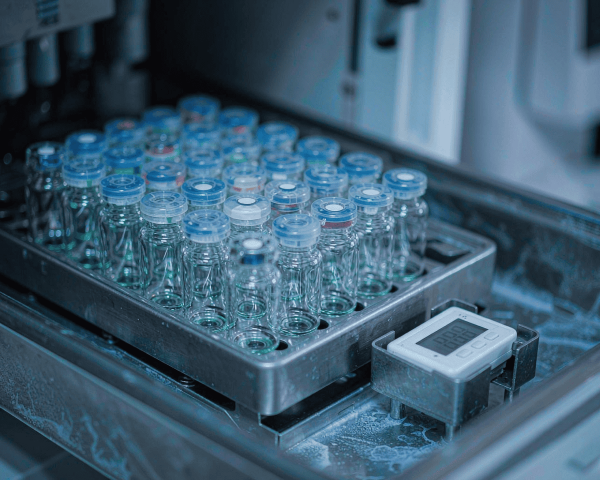

If you’ve ever re-injected a batch the next morning and watched the peak areas drift, you’ve asked this question the hard way. There’s no single “expiry date” printed on a sample; stability in an autosampler vial depends on the compound, the solvent, the seal, and the temperature. Here’s how to estimate the window for your samples, and how to stretch it when you need to.
The Short Answer
For most organic compounds in properly sealed HPLC vials, expect 24–48 hours of reliable stability at room temperature, and roughly 24–72 hours in a chilled autosampler (4–10 °C). Volatile, reactive, or light-sensitive analytes may only last a few hours. Freezing at −20 °C or −80 °C extends stability to weeks or months. The only way to know your exact window is to validate it under your own conditions.
What “Stable” Actually Means
Before you track hours, define the target. In regulated bioanalysis, stability is judged against the freshly prepared sample: if the stored sample’s measured concentration stays within ±15% of nominal (85–115% recovery), it’s considered stable. The FDA’s bioanalytical method validation guidance explicitly requires labs to demonstrate autosampler stability: the time a processed sample can sit in the injection queue before the result is no longer trustworthy.
That’s the mindset to borrow even if you’re not GLP-regulated. Decide an acceptable recovery window (10% is a common internal bar), then test: inject the same stored sample at 0, 6, 12, 24, 48, and 72 hours, and plot the response. That curve is your lab’s real answer, and it beats any generic rule I can give you.
Room-Temperature Autosampler: Hours to a Couple of Days
On the bench, evaporation is usually the first clock to run out. A pierced septum lets solvent escape molecule by molecule, the sample concentrates, and peak areas inflate even when the analyte itself is perfectly stable. Solvent loss also shifts composition in mixed mobile phases, which changes retention.
For ordinary organic compounds in a well-sealed vial, published work shows you usually have at least a day. In one validated LC-MS/MS method for drugs in plasma, processed samples sat in the autosampler at 10 °C for 36 hours with no significant degradation, and bench-top stability at ~25 °C held for 10–24 hours depending on the analyte. The pattern across the literature is consistent: room temperature buys you hours to a day; cooling buys you days.
The trap is assuming every analyte behaves that way. Esters hydrolyze in aqueous solvents. Thiols oxidize. Light-sensitive compounds photodegrade on the bench. If your molecule has reactive functional groups, treat the room-temperature window as hours until proven otherwise.
Refrigerated Autosamplers: Buy Yourself Days
Modern autosamplers with sample trays cooled to 4–10 °C exist for exactly this reason. Lowering the temperature slows evaporation, enzymatic degradation, and most hydrolysis and oxidation reactions.
The numbers back it up. In a metabonomics study of human urine, samples were stable for at least 20 hours at 4 °C while queuing for LC-MS analysis, and samples stored at −20 °C or −80 °C for up to a month were indistinguishable from fresh ones on re-analysis. When you combine a chilled tray with a good seal, most processed samples comfortably last a working day, an overnight queue, or even a weekend.
Two practical notes on chilled storage. First, condensation: let sealed vials warm to room temperature before opening them, or you’ll introduce water droplets that dilute the sample edge. Second, don’t assume the autosampler cooler is actually at its setpoint; verify with a thermometer, because a drifting chiller silently erases your stability margin.
Freezer Storage: Weeks to Months, With Caveats
If you need longer than a few days, freeze the samples. The same study above found frozen urine indistinguishable from fresh after a month, and long-term matrix stability at −70 °C is routinely demonstrated for 60 days or more in method validation reports.
But freezing has its own failure modes. Aqueous samples expand on freezing, and in a sealed vial that pressure can loosen caps or crack glass, especially in cold rooms where the freezer door cycles. Solvents like DMSO freeze at inconvenient temperatures and can crash analytes out of solution. And repeated freeze-thaw cycles degrade sensitive compounds and stress the vial itself.
Practical freezer rules I’ve picked up the hard way: use vials rated for low temperature with intact seals, freeze upright, avoid freeze-thaw by aliquoting samples you’ll need repeatedly, and never freeze a vial that’s filled past about 80% of its volume. For samples you’ll re-inject on an autosampler, transferring to a fresh vial after thawing avoids the condensation problem entirely.
The Four Ways Samples Go Bad in a Vial
Whatever the timeline, degradation happens through a handful of mechanisms. Knowing them tells you which clock to watch.
Evaporation is the most common and the most silent. It concentrates the sample and changes solvent composition. The fix is a high-integrity seal (screw caps with PTFE-faced septa are the practical default) and a chilled tray.
Adsorption steals analyte onto the vial wall or the septum. It hits low-concentration and high-logP compounds hardest, and it’s why labs use low-adsorption or silanized glass for trace work. If your response drops with storage time but the peaks stay clean, suspect adsorption before degradation.
Chemical degradation covers hydrolysis, oxidation, and photolysis. Solvent choice matters: water accelerates hydrolysis, while some additives deliberately stabilize. If you’re storing for days, verify the solvent system actually preserves the analyte rather than slowly destroying it.
Contamination can come from a degraded septum, a dirty vial, or sample-to-sample carryover through the needle. It produces mystery peaks that grow with queue time, a signature that points at the seal or the wash cycle rather than the sample itself.
Solvent and Chemistry Dictate the Clock
Stability is a property of the solution, not the vial. An analyte that lasts a week in pure acetonitrile might survive only hours in aqueous buffer at the same temperature. Reactive functional groups, pH, and the presence of water or oxygen all set the real limit.
This is why published stability data is only a starting point. A method that works for one lab’s urine samples or plasma extracts is a hint about your matrix, not a guarantee. If your samples contain biological matrix, enzymes can keep working even at fridge temperature, which is why protein precipitation or extraction before storage is such a common workflow choice.
How to Make Samples Last Longer
If you need to stretch the window, stack these measures in order of payoff:
1. Seal it properly. Use a screw cap with a PTFE/silicone septum and check that it’s snug. A good seal is your first defense against evaporation. For volatile work, be aware that open-top caps and slit septa leak faster than solid equivalents. My comparison of solid caps vs open-top caps explains the trade-off. 2. Chill the tray. 4–10 °C roughly doubles to triples most stability windows. 3. Protect from light. Amber vials or tray covers block photodegradation for light-sensitive analytes. 4. Minimize punctures. Every needle pass through the septum is a potential leak path. Pre-slit septa reduce coring but don’t reseal as tightly. 5. Fill sensibly. Small fill volumes in a big vial mean a large headspace of solvent vapor; that’s evaporation waiting to happen. 6. Validate your own window. Run the time-course test once per method and you’ll never guess again.
For re-injection planning, my guide to top tips for vial storage covers the storage side in depth, and remember that the way you fill a vial sets the headspace, and headspace sets how fast evaporation can act.
Conclusion
“How long can samples stay in a vial?” never has a one-number answer, because the vial is only one variable in a system that also includes the solvent, the seal, the temperature, and the chemistry of your analyte. The practical defaults are simple though: a day or two at room temperature, several days in a chilled autosampler, and weeks to months in a freezer; with evaporation and adsorption usually biting before true chemical degradation does. The professional move is to stop guessing and validate the window once per method, then schedule re-injections inside it with margin to spare. Pair a reliable cap and septum with a documented storage protocol, and your stored samples will tell the same story next week as they did on day one. For the broader picture of protecting samples over time, read my vial storage checklist and the guide to maximizing the shelf life of lab consumables.
Frequently Asked Questions
How long can samples stay in an autosampler?
At room temperature, most organic samples in sealed vials are reliable for 24–48 hours. In a chilled autosampler at 4–10 °C, validated studies typically show stability of 24–72 hours, and often longer for robust analytes. The exact window depends on your compound and solvent, so confirm it with your own time-course test.
Do HPLC samples expire overnight?
Many are still fine after one night, but it depends. If the vial seal is intact and the analyte is stable in its solvent, an overnight queue at 4 °C is usually acceptable. Volatile samples or compounds prone to hydrolysis can drift within hours, which is why regulated methods validate autosampler stability rather than assuming it.
Does refrigeration slow down sample degradation in vials?
Yes. Cooling to 4–10 °C slows evaporation and most chemical reactions: hydrolysis, oxidation, and enzymatic breakdown. Published studies show processed samples stable for 20 hours or more at 4 °C, while the same samples degrade faster on the bench.
Can I freeze samples in HPLC vials for later re-injection?
Yes, with care. Use sealed vials rated for low temperature, freeze upright, and avoid filling past about 80% volume because aqueous samples expand. Avoid repeated freeze-thaw cycles, and warm sealed vials to room temperature before opening to prevent condensation from diluting the sample.
What causes peak areas to change when samples sit in vials?
The usual suspects are evaporation (which concentrates the sample), adsorption (analyte sticking to the glass or septum), and chemical degradation. Evaporation and adsorption usually show up before degradation does; a good PTFE-faced seal and a chilled tray address the first two directly.