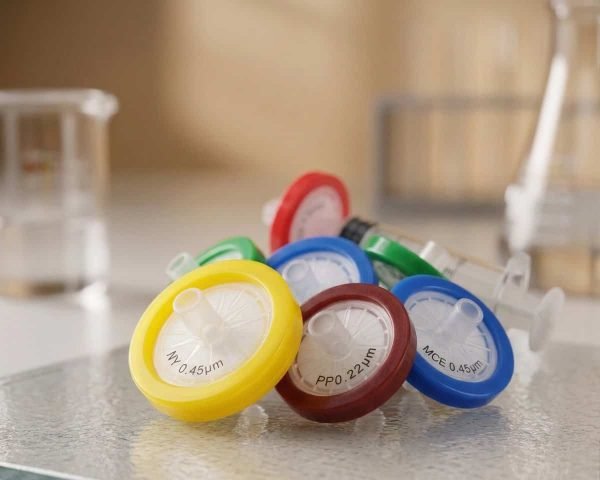

Most “mystery” HPLC problems (ghost peaks, clogged columns, drifting baselines) start at a $1 syringe filter. I’ve watched labs chase instrument faults for days when the real culprit was a membrane mismatch or a filter being forced past its limit. Here are the seven mistakes I see most often, and how to avoid every one of them.
Quick answer: The big syringe filter mistakes are choosing the wrong membrane for your solvent, guessing the pore size, forcing liquid through a clogged filter, reusing single-use filters, skipping the pre-rinse, ignoring hold-up volume on precious samples, and filtering something a syringe filter was never meant to handle. Fix those seven and your injections will thank you.
—
1. Picking the Wrong Membrane Material
The membrane decides whether your sample survives contact with the filter. Use the wrong one and you get adsorption (analyte sticks to the membrane), extractables (filter chemicals leach into your sample), or outright membrane breakdown.
The chemistry is simple once you know it:
- PTFE: the broadest chemical resistance; the default for organic solvents and aggressive mobile phases. Standard PTFE is hydrophobic, so aqueous samples need pre-wetting with methanol or ethanol first.
- PES and nylon: hydrophilic, so water-based samples flow through naturally. PES is the first choice for biological samples because it binds little protein.
- PVDF: a middle ground with low binding and decent solvent resistance.
- Cellulose acetate: extremely low protein binding for biological work, but weak against strong solvents.
When I see labs using nylon on protein samples and wondering why recovery dropped, it’s almost always this mistake. A protein sample filtered through the wrong membrane can lose a measurable fraction of the analyte to the filter itself, and you’d never know it from the chromatogram alone. Manufacturer charts confirm that PTFE suits organic solvents while PES and nylon suit aqueous samples; check compatibility before you filter anything valuable. My nylon vs PTFE vs PVDF vs PES guide walks through the full material comparison if you want the details behind each membrane.
One more layer to this mistake: membrane compatibility isn’t binary. A membrane can be “compatible” with a solvent yet still swell slightly, extract trace compounds, or adsorb your specific analyte. That’s why I recommend a small-scale test before you commit an expensive batch: filter a portion of your actual sample through the candidate filter and compare the result with an unfiltered aliquot. If you see recovery loss, extra peaks, or a pH shift, the membrane is telling you something the compatibility chart didn’t.
Also watch the housing. The membrane isn’t the only plastic your sample touches; the filter housing and any support layers can contribute extractables too. For trace work, choose filters with low-extractable housings and pre-rinse them (more on that in mistake five).
2. Guessing the Pore Size
Pore size controls what gets through, and how fast. Too coarse and particles reach your column; too fine and the filter clogs or you fight the plunger.
The working standard across the industry: 0.45 µm for routine HPLC sample prep, 0.22 µm for UHPLC, LC-MS, and sterile filtration. The reasoning is that sub-2 µm UHPLC columns and mass spectrometers tolerate far less particulate matter than conventional 3–5 µm HPLC columns.
If your sample is viscous or particle-heavy, don’t reach for a finer pore size; reach for a pre-filter or a larger filter diameter. Forcing a 0.22 µm filter to process a dirty suspension is how filters burst and particles end up on your column. There’s also a middle ground people forget: 0.2 µm and 0.45 µm aren’t the only options. Coarser grades like 1 µm and 5 µm exist for the heavy lifting, and 5 micron vs 20 micron filters have their place in removing visible particles before the final polishing step.
One more trap: pore size claims on the box aren’t all equal. A “0.22 µm” rating usually means the filter retains 99.98 percent of particles at that size (the bacterial-retention standard), while a “0.45 µm” grade is a nominal retention rating. For sterile work, buy filters that state the retention rating explicitly rather than assuming all 0.22 µm membranes perform identically.
And pore size interacts with what’s downstream. If you’re analyzing by UHPLC with a sub-2 µm column, a 0.45 µm-filtered sample can still contain particles large enough to shorten column life, because the column’s frit is finer than the filter’s pores. That’s not a filter failure. It’s a spec mismatch between your filtration step and your instrument. The more sensitive your detector and the finer your column media, the finer your final filtration should be.
3. Forcing Liquid Through a Clogged Filter
A syringe filter is a consumable, not a challenge. When it slows down or stops, some labs push harder, and that’s exactly when things go wrong.
Excess pressure can rupture the membrane, push already-captured particles through the damage, or spray sample past the seal. Every filter manufacturer says the same thing: apply slow, steady pressure and replace the filter when flow drops instead of forcing it.
If you’re constantly fighting slow filtration, the fix isn’t more muscle. It’s a bigger pore size, a larger diameter filter, a pre-filtration step, or diluting the sample. Slow filtration is a diagnostic, not an obstacle: it’s telling you the filter is loading up, and the sample needs a different path. I explain the rupture and breakthrough failure mode in detail in my syringe filter breakthrough article.
There’s also a speed-versus-quality instinct worth resisting: “slow and steady” doesn’t just protect the membrane, it protects the sample. Fast, jerky plunger strokes create pressure spikes that can push particles through a membrane that’s still intact. If you’re filtering dozens of samples, use a consistent, moderate pace rather than racing each one; the ten seconds you save per filter isn’t worth the rerun later.
4. Reusing Single-Use Filters
I understand the temptation: filters aren’t free, and the used one “looks fine.” But a syringe filter is engineered for one sample, one solvent, one pass.
Reuse creates two problems. First, cross-contamination: residues from the previous sample bleed into the next one, and you can’t see it. Second, structural damage: the membrane was stressed by the first filtration, so its retention is no longer trustworthy. Even if it looks intact, its pore structure has changed and its extractables profile is no longer the one you validated.
The cost calculus never works out. One ruined HPLC run or one re-injected batch costs more than a box of filters. Treat syringe filters as strictly single-use and your data will be consistent.
5. Skipping the Pre-Rinse
Here’s a mistake even experienced chemists make: they filter, inject, and then chase ghost peaks for a week. The culprit is often extractables: trace compounds released by a brand-new membrane into the first few drops of solvent.
The fix is embarrassingly simple: discard the first 0.3–0.5 mL of filtrate, or pre-rinse the filter with your solvent before collecting the sample. That first fraction carries most of the membrane and housing extractables, and it matters most in trace analysis and low-wavelength UV detection (below ~220 nm) where even tiny contamination shows up as extra peaks or a raised baseline.
Some membranes release more extractables than others; regenerated cellulose and PES are known for low extractables, which is why they’re favored for trace work. If you run sensitive methods, pre-rinse every time and watch your blanks improve. And if your blank injections still show mystery peaks after pre-rinsing, the filter isn’t the only suspect, but it should be the first thing you rule out.
6. Ignoring Hold-Up Volume on Precious Samples
Every syringe filter traps a small volume of liquid inside its housing. On a 25 mm filter that dead volume can be significant, and for a precious 200 µL sample, losing 50–100 µL to the filter is a disaster.
Two rules fix this:
- Use 13 mm filters for small sample volumes; the hold-up volume is much lower than 25 mm.
- Prime the filter with solvent or sample first, then collect your actual filtrate.
Filter diameter is a trade-off, not a “bigger is better” game. A larger filter gives more area and faster flow for dirty or high-volume samples, but it costs you sample in hold-up volume. For small, precious samples, 13 mm is the right call. If your sample is particle-heavy, centrifuge it first instead of relying on a big filter.
There’s a related loss channel people miss: adsorption. Even with the right diameter, some analytes bind to certain membranes. If you’re working with proteins, peptides, or other sticky molecules, pick a low-binding membrane and run a quick recovery check: filter a known standard and compare the response to an unfiltered one. That one test tells you whether your filter is quietly eating your analyte.
A practical note on priming: to collect a full-volume sample through a 13 mm filter, wet the membrane first with a small amount of your sample or solvent, then discard that first drop before collecting. This displaces the air in the housing and prevents the first collected microliters from being diluted or lost to the dry membrane. With very small volumes, you can also filter directly into a micro-insert or a low-volume receiver so the filtrate isn’t lost to a big collection vessel you can’t fully retrieve from.
7. Filtering What a Syringe Filter Was Never Meant to Handle
Syringe filters are for final polishing of a few milliliters, not for heavy particulate loads, not for emulsions, not for concentrated suspensions.
When I see labs trying to push cloudy fermentation broth or precipitated protein solutions through a 0.22 µm syringe filter, the filter clogs in seconds, the pressure spikes, and the sample goes nowhere. The right answer is a stepwise approach: centrifuge or coarse-filter first, then finish with the syringe filter. Trying to do the whole job with one fine filter creates exactly the breakthrough and contamination problems from mistakes three and five.
Match the tool to the sample: syringe filters polish samples that are already mostly clean. If your sample isn’t, clean it up before it ever meets the filter. And remember that sample preparation is a chain; the filter is one link, and upstream steps like protein precipitation, centrifugation, and dilution decide how hard the filter has to work. Vendors who dig into why HPLC results keep failing usually land on the same conclusion: most filtration failures trace back to a sample that should have been cleaned before it reached the syringe filter.
If your sample volumes are larger (tens of milliliters or more), a syringe filter is also the wrong geometry. That’s the territory of vacuum filtration or centrifuge-based filters, which give you more membrane area without the hand fatigue and without the pressure spikes of a manual syringe. Picking the right tool for the volume is the last piece of the puzzle: syringe filters for milliliters, vacuum or centrifugal filtration for tens of milliliters, and inline or bottle-top filtration for anything bigger.
Why Syringe Filter Problems Fail Silently
Before the checklist, it’s worth understanding why these mistakes are so dangerous: they fail silently. A bad injection volume or a broken instrument announces itself. A filter problem usually doesn’t.
Here’s the pattern I see in real labs. The calibration is perfect, the method hasn’t changed, and yet the results drift over weeks. Recovery creeps down. The baseline gets noisier. A few “mystery peaks” show up on the blanks. Nobody suspects the filter because the filter is supposed to be the boring part.
When labs finally audit their filtration step, they usually find a combination of the mistakes above: a membrane chosen “because that’s what we always used,” a batch of filters stored open on the bench for months, a tech who reuses a filter to save time, or a sample that was always too dirty for the pore size. Each one is small. Together they quietly corrupt data.
The uncomfortable truth: if your filtration step is unexamined, you’re probably committing at least one of these mistakes right now. The fix is a five-minute audit. Look at what you actually use: membrane, pore size, diameter, handling, and storage. Check whether the person at the bench knows why those choices were made. If nobody can explain the filter spec on your method sheet, that’s your answer.
And catch it early with controls. Run a filtered blank through your most sensitive method every so often. Filter a known standard and compare recovery against an unfiltered one. Those two checks turn a silent failure into a visible one, and a visible problem is a fixable problem.
How to Pick the Right Syringe Filter in 30 Seconds
If you take nothing else from this article, memorize this quick sequence:
1. Solvent first. Organic → PTFE. Aqueous → PES, nylon, or CA. Protein → PES or RC (low binding). 2. Detector second. HPLC → 0.45 µm. UHPLC/LC-MS or sterile → 0.22 µm. 3. Volume third. Under ~10 mL → 13 mm. Larger or dirtier → 25 mm. 4. Sensitivity fourth. Trace or low-UV work → pre-rinse and discard the first drops. 5. Never fifth. Never reuse, never force, never filter something that needs real cleanup first.
Conclusion
Syringe filters look like the simplest consumable in your workflow, but they sit between your sample and your instrument, which makes them a silent source of error when chosen or handled badly. Nail the membrane to your solvent, pick the pore size for your detector, never force or reuse a filter, and pre-rinse for sensitive methods. Do that, and your syringe filter becomes what it should be: a boring, reliable guard that protects your column and your data.
If you want the full picture before your next purchase, my complete syringe filter buyer’s guide walks through every spec, and the checklist above will keep you out of the seven traps that ruin samples.
Frequently Asked Questions
What pore size syringe filter should I use for HPLC?
Use 0.45 µm for routine HPLC sample preparation and 0.22 µm for UHPLC, LC-MS, or sterile filtration. Sub-2 µm UHPLC columns and mass spectrometers need the finer filtration to stay clean.
Can I reuse a syringe filter?
No. Syringe filters are single-use devices. Reusing them risks cross-contamination between samples and membrane damage that lets particles through, which costs more in ruined runs than a box of filters saves.
What is the difference between 13 mm and 25 mm syringe filters?
The diameter controls filtration area and hold-up volume. 25 mm filters process more volume and clog less easily; 13 mm filters hold less liquid and lose less sample, making them better for small precious samples.
Why does my sample flow through PTFE filters so slowly?
Standard PTFE is hydrophobic, so aqueous samples won’t pass until the membrane is pre-wetted with methanol or ethanol. Use hydrophilic PTFE for aqueous samples, or pre-wet standard PTFE before filtering.
Do I need to rinse syringe filters before use?
For trace analysis and low-wavelength UV detection, yes. Discard the first 0.3–0.5 mL of filtrate to remove membrane extractables that otherwise show up as ghost peaks or a raised baseline.