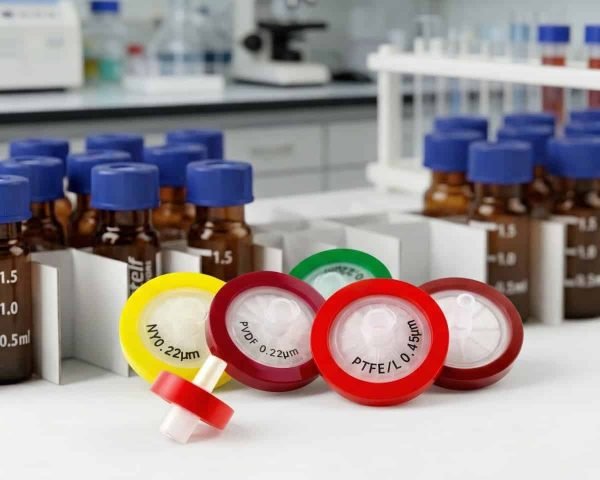

What Is a Syringe Filter, Really?
A syringe filter looks like a tiny plastic wheel, but it is a precision device with three working parts.
The membrane in the middle does the actual separating. It is a thin polymer sheet — nylon, PTFE, PVDF, PES, cellulose acetate, or polypropylene — with millions of controlled pores. The housing around it is usually polypropylene, chosen because it shrugs off most HPLC solvents without contributing extractables. The fittings on each end follow the luer standard: a female luer inlet that screws onto your syringe and a male luer outlet that drips into your vial.
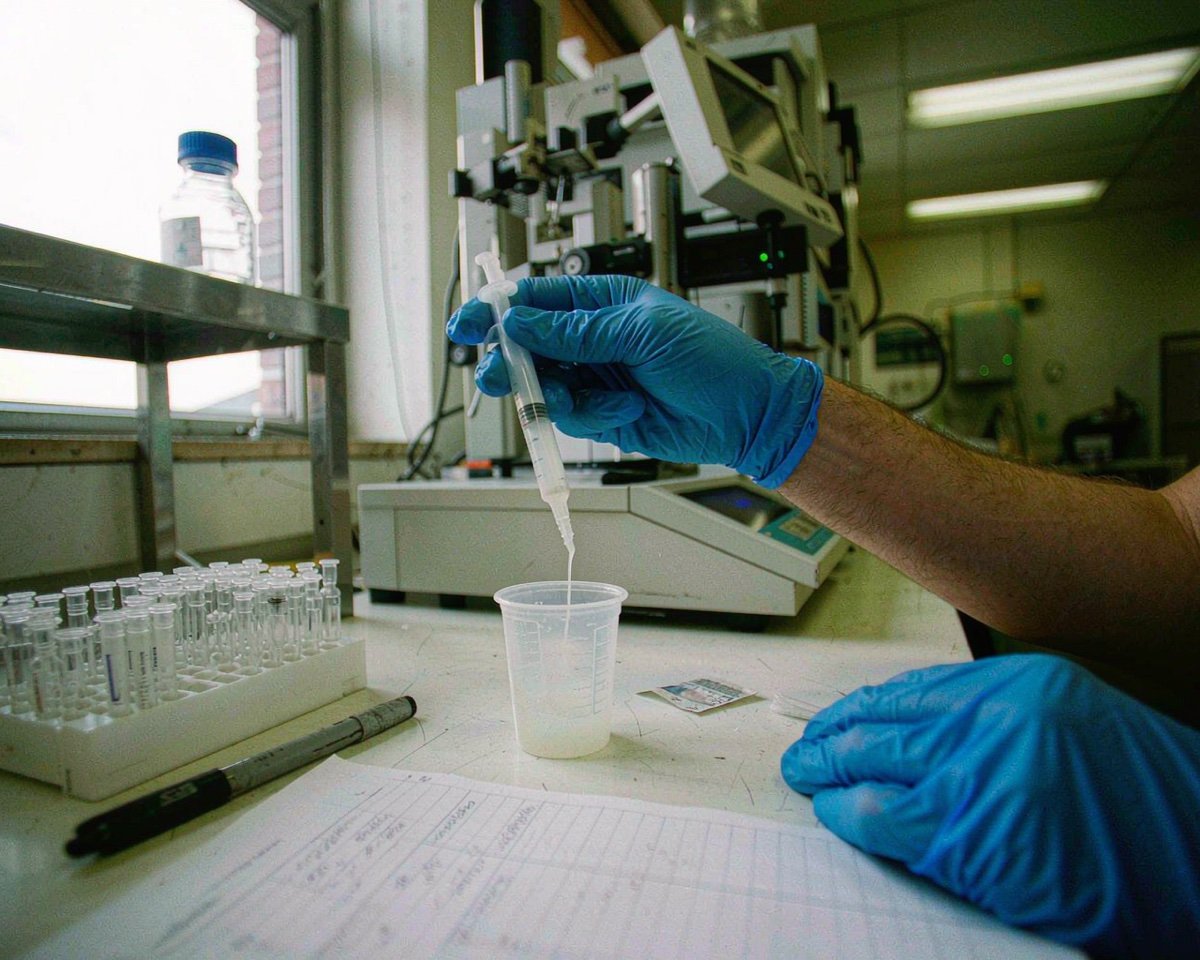
You press the plunger, the sample passes through the membrane, and particulates stay behind. That is it. The engineering lives in the pore structure, the membrane chemistry, and the welding of the housing — and that is exactly where cheap filters cut corners.
There’s also a related format worth knowing: the filter vial, which welds a membrane directly into an autosampler vial so you filter and inject in one squeeze, eliminating transfer loss entirely. Restek carries a whole family of them for low-volume and high-particulate work. For most labs, though, the classic syringe-plus-wheel-filter setup remains the most flexible and economical route, because one box of filters works with every syringe you already own. That flexibility is why this guide focuses on the classic format — master it, and every other filtration device is a variation on the same logic.
Why a One-Dollar Filter Protects a Three-Thousand-Dollar Column
Let’s talk about what happens when you skip filtration or use a bad filter.
Particulates in unfiltered extracts plug chromatographic columns, injectors, detectors, and narrow-bore tubing. Even when plugging doesn’t happen overnight, particles accumulate slowly, shift flow rates, and add interferences that quietly wreck reproducibility — a point Restek’s own filtration specialists make in their sample filtration guide.
I did the math for a customer last year. Their lab ran 40 samples a day through a sub-2 µm column. One fouled column plus a day of downtime cost them more than a full year of filters. The filter is not a consumable expense; it is column insurance. Thermo Fisher makes the same argument on its syringe filter catalog page: a filtration step before injection protects delicate instruments and prolongs column life.
That is the business case. Now let’s get into the specifications, because this is where buyers actually lose money.
Specification #1: Membrane Material — the Decision That Matters Most
The membrane is 80% of the buying decision, because it decides chemical compatibility, protein binding, extractables, and flow. Here is the honest breakdown of the six membranes you’ll encounter.
Nylon
Hydrophilic, mechanically strong, and compatible with most HPLC solvents — acetonitrile, methanol, alcohols, and many polar organics. It is the workhorse for routine HPLC sample prep. The catch: nylon binds proteins, so it is a poor choice for peptide or protein samples, and it dislikes strong acids. Agilent’s filter selection FAQ specifically warns against nylon with strong acids, methylene chloride, and DMF.
PTFE
The most chemically resistant membrane on the market. Naturally hydrophobic PTFE handles aggressive organic solvents, strong acids, and strong bases that dissolve other membranes. The trade-off: water will not pass through hydrophobic PTFE without an alcohol pre-wet, or you can buy hydrophilic PTFE grades treated to run aqueous samples. If your samples swing between organic and aqueous, hydrophilic PTFE is a safe one-membrane policy.
PVDF
Low protein binding and broad compatibility with aqueous and mild organic solvents. This is the membrane I recommend when analyte recovery matters — protein assays, biomolecule work, trace analysis. It handles alcohols well but is not the membrane for esters, ethers, ketones, or aggressive halogenated solvents.
PES (Polyethersulfone)
Fast flow, low extractables, and very low protein binding — Thermo Fisher’s Nalgene syringe filter brochure rates PES as its lowest-protein-binding, fastest-flow membrane, and the first choice for culture media. The weakness is organic solvent resistance: PES is happy in water and buffers, not in high-organic HPLC samples.
Cellulose Acetate (CA)
Hydrophilic, low protein binding, and intended for aqueous solutions only — organic solvents attack it. CA shines for tissue culture media, buffers, and biological fluids where protein recovery matters more than solvent versatility.
Polypropylene (PP)
A hydrophilic, low-binding membrane with genuine solvent resistance and good thermal behavior. PP is the membrane for biological samples in mixed solvents or when you want one membrane across very different matrices.
The comparison table I send to customers
| Membrane | Wetting | Best for | Avoid |
|---|---|---|---|
| Nylon | Hydrophilic | Routine HPLC, polar organics, acetonitrile | Proteins, strong acids |
| PTFE | Hydrophobic (hydrophilic grades exist) | Aggressive organics, acids, bases | Aqueous samples unless pre-wet |
| PVDF | Hydrophilic grades common | Proteins, biomolecules, trace recovery | Esters, ethers, ketones |
| PES | Hydrophilic | Buffers, culture media, fast aqueous flow | High-organic solvents |
| CA | Hydrophilic | Tissue culture, aqueous biologicals | Organic solvents |
| PP | Hydrophilic | Solvent-tolerant biological work | Strong oxidizing acids |
If you want a deeper comparison of the big four, I wrote a full nylon vs. PTFE vs. PVDF vs. PES selection guide that goes matrix by matrix.
Specification #2: Pore Size — 0.45 or 0.22 µm
Two pore sizes dominate analytical work, and the choice is simpler than suppliers make it look.
0.45 µm is the clarification standard. It removes the particles that damage most HPLC columns and does it with faster flow and less backpressure. If your goal is a clean injection for conventional HPLC, 0.45 µm is the default.
0.22 µm removes finer particles. You need it when running sub-2 µm packings and narrow tubing, where UHPLC hardware tolerates almost nothing. It is also the pore size associated with sterilizing-grade filtration — but be careful with that word. A filter labeled 0.22 µm is not automatically sterilizing-grade. The FDA’s aseptic processing guidance ties sterilizing claims to validated filtration, which is why a supplier’s validation documentation matters more than the number printed on the box.
There is a practical middle ground many labs miss: if your samples carry heavy particulate loads, don’t just drop to a finer pore. Use a glass fiber prefilter, or a combination filter with a built-in prefilter, so the coarse particles never reach the membrane. Agilent’s membrane syringe filter selection FAQ recommends exactly this for difficult-to-filter samples — the prefilter catches the big debris, the membrane does the fine work, and your hand doesn’t cramp from backpressure.
I cover the full 0.22 vs. 0.45 trade-off, including flow and recovery data, in Syringe Filter Pore Sizes: 0.22 vs 0.45 Micron Explained.
Specification #3: Diameter — Match It to Your Volume
Diameter is the most commonly overspent specification in the business. Bigger is not better; bigger is just more membrane, more hold-up volume, and more dead sample.
The volume guidelines that filter manufacturers actually publish:
| Diameter | Sample volume | Typical hold-up volume |
|---|---|---|
| 4 mm | under 1 mL | under 10 µL |
| 13 mm | 1–10 mL | under 10 µL |
| 25 mm | 10–100 mL | under 50 µL |
| 30 mm | large volumes, solvent filtration | under 50 µL |
Those hold-up numbers come straight from Agilent’s selection FAQ, and they explain why diameter choice is a recovery decision, not just a convenience decision. A 4 mm or 13 mm filter holds back only microliters — negligible for a 2 mL sample. Push the same sample through a 30 mm filter and you can strand enough volume to matter at trace levels.
My rule of thumb for HPLC autosampler prep: 13 mm for volumes under 10 mL, 25 mm when you filter 10–100 mL or the sample is visibly dirty. Save 4 mm filters for precious sub-milliliter samples where you refuse to lose a microliter.
Specification #4: Sterile vs. Non-Sterile
Non-sterile filters are fine for analytical sample prep — HPLC, GC, ion chromatography. Your chromatogram doesn’t care about microorganisms; it cares about particles.
Sterile filters — individually wrapped, ethylene oxide or gamma sterilized, with lot numbers and expiry dates — belong in any workflow where biology is the product or the threat: culture media preparation, buffer sterilization for cell culture, sterile filtration of reagents. If sterility matters to your process, buy sterile and demand the certificates. Sterile filters also carry printed expiry dates and lot traceability, which auditors in pharma and food labs expect to see.
One warning from the quality side: sterile is not the same as low-extractable. A sterile filter can still shed compounds into your sample. For LC-MS work, ask suppliers for extractables data regardless of sterility claims.
Specification #5: Housing, Fittings, and Pressure Ratings
Three details that look like fine print but decide whether filtration is pleasant or miserable.
Luer lock beats luer slip. A luer lock inlet screws onto the syringe and stays sealed under pressure; a slip tip just pushes on and can blow off mid-push. Restek highlights the leak-tight luer lock inlet as a core feature of its filters for exactly this reason. Buy filters with female luer lock inlets and match them with luer lock syringes.
Housing material. Polypropylene is the standard because it resists common HPLC solvents with low extractables. If you filter at elevated temperature or exotic solvents, check the housing spec, not just the membrane spec — the membrane may survive a solvent that attacks the housing.
Pressure rating. Quality 25–30 mm filters carry pressure ratings around 100–120 psi. If you routinely need gorilla force to push sample through, the answer is a prefilter or a bigger diameter — not a stronger thumb. Forced filtration stresses the membrane, and stressed membranes shed particles or rupture.
Prefilters and Combination Filters: When Samples Fight Back
Some samples don’t want to be filtered. Dissolution samples loaded with excipient, herbal extracts, fermentation broths, food homogenates — push any of these through a plain membrane and you’ll be at the sink washing plasma out of your sleeve.
The engineering answer is layered filtration. A glass fiber prefilter sits upstream of the membrane and grabs the coarse particles — the 2–3 µm debris that would blind a 0.45 µm membrane in seconds. Because glass fiber is chemically inert and holds a huge particle load at low flow resistance, it takes the punishment so the membrane doesn’t have to.
You have three formats to choose from. A standalone glass fiber filter works when you only need coarse clarification. A 2-in-1 combination filter bonds a glass fiber prefilter and a membrane into one housing — one device, two stages, less handling and less sample loss than filtering twice. Agilent’s FAQ notes that these combination devices cost less than two separate filters and push difficult samples through with less force, which protects both your sample and your syringe.
When should you specify one? My threshold is simple: if you can see haze or sediment in the sample, or if a plain 0.45 µm membrane takes real effort before half the syringe is through, move to a prefilter format. Your throughput doubles, your membranes stop clogging at sample three, and the per-sample cost usually drops because you stop wasting filters on failed attempts.
One caution for trace analysis: every additional layer adds surface area that can adsorb analyte. Qualify combination filters with a recovery check, same as any new membrane.
Matching Filters to Your Application
Specifications in the abstract are hard to internalize, so here is the shortcut table I use for real quotes.
Routine reversed-phase HPLC: 13 mm nylon or PVDF, 0.45 µm, non-sterile. Add glass fiber prefilter for dirty matrices.
UHPLC with sub-2 µm columns: same membranes, 0.22 µm, and filter every sample — the hardware has no tolerance for particulates.
LC-MS: PVDF or PES for low extractables and low binding, 0.22 µm. Ask for extractables documentation. Skip nylon if your analyte binds proteins.
Ion chromatography: PES — Thermo Fisher specifically recommends PES for ion chromatography samples because it contributes minimal ionic background.
Proteins, peptides, biomolecules: PVDF or PES, low-binding, 0.22 µm. Validate recovery with an unfiltered control before you commit to a lot.
Culture media and buffers (sterile): PES or CA, 0.22 µm, sterile, individually wrapped.
Strong organic solvents, acids, bases: hydrophobic PTFE (pre-wet for aqueous) or hydrophilic PTFE.
Dissolution testing (pharma QC): PVDF or PTFE, 0.45 µm is common — but confirm against your method, because dissolution filters must not adsorb the active ingredient.
Environmental and food samples: expect heavy particulate. Combination glass fiber/membrane filters, 25 mm, 0.45 µm, with nylon or PTFE membranes depending on your extraction solvent.
Sterile media for microbiology: PES or CA at 0.22 µm, sterile packaged, autoclave-confirmed workflow.
If you’re starting from zero, my colleague’s basic how to choose a syringe filter walkthrough covers size, material, and everyday use in a lighter format.
The Hidden Costs Most Buyers Miss
The unit price of a filter is the smallest number in the equation. Here is what actually costs money.
Lost analyte. A membrane that binds 15% of your protein doesn’t just lose sample — it biases every result until someone notices. Always compare recovery against an unfiltered control when validating a new filter type.
Repeat preparations. A filter that clogs on sample three of forty forces re-preps, and re-preps cost analyst time and solvent. A prefilter-equipped filter that costs 30% more and never clogs is cheaper per accepted sample.
Extractables. Filter-borne contaminants elute as ghost peaks and baseline noise. Low-extractable membranes and housings exist for a reason; pay the premium for LC-MS and trace work.
Over-specification. Sterile individually-wrapped 25 mm filters for routine HPLC prep is money burned. Buy sterile only where sterility is real.
Wrong-box ordering. The most expensive filter is the one that arrives and can’t touch your solvent. Keep a one-page compatibility chart taped to the ordering portal. Membrane compatibility data is published by every major manufacturer — use it.
How to Run a Simple In-House Filter Qualification
You don’t need a validation department to compare filters. Here’s the protocol I give customers; it takes an afternoon on an idle instrument.
Step 1 — Recovery. Prepare a standard at a realistic concentration. Split it into three aliquots: one unfiltered control, one through filter A, one through filter B. Inject all three and compare peak areas. Anything below about 95% recovery means the membrane is eating your analyte — or adding something that changes the response.
Step 2 — Extractables. Push clean solvent through each filter into a vial and inject it as a blank. Ghost peaks in the chromatogram are extractables, and now you can see them yourself instead of trusting a datasheet.
Step 3 — Flow and clogging. Time how long it takes to filter 5 mL of a representative (dirty) sample through each filter. If one filter takes three times longer or stalls halfway, you’ve learned more than any brochure will tell you.
Step 4 — Lot consistency. Repeat step 1 with filters from a second lot. Lot-to-lot variation is where inconsistent suppliers reveal themselves, and it’s the single best predictor of whether your next 500 filters will behave like the sample pack.
Run this once per supplier per matrix, and you have objective numbers instead of marketing claims. In my experience, this afternoon of work pays for itself the first time it prevents a bad purchase.
Bulk Buying, Packaging, and Price Per Real Sample
Filters ship in standard packs — typically 100 units, with bulk packs of 500 or 1,000 for high-throughput labs. Manufacturers like Restek publish quantity break pricing, and the discount curve is steep: the per-filter price at bulk volumes can drop dramatically versus buying packs of 100.
Three packaging decisions actually affect your lab:
Individually wrapped sterile units cost more but give you traceability and expiry dates on every filter — non-negotiable in pharma QC and cell culture.
Color-coded housings (a different color per membrane, as Restek and Nalgene both do) prevent cross-contamination of membrane types on a busy bench. Blue PES next to pink nylon next to white PTFE is a mistake-proofing system that costs nothing.
Shelf life and storage matter more for sterile filters — three years is typical when stored sealed, but always check the printed expiry. Non-sterile filters in bulk packs are stable for years if you keep them closed, dry, and out of direct sunlight.
On price: treat the quoted unit price as a starting negotiation point, not a fact. What you should calculate is cost per accepted sample — filter price plus the re-prep rate. A filter that’s 20% cheaper but fails on 10% of dirty samples is more expensive than the premium one. Suppliers who understand this metric will help you optimize it; suppliers who only talk unit price are telling you something.
How to Vet a Syringe Filter Supplier
Whether you buy from a global brand or a cost-effective OEM-compatible manufacturer, ask the same five questions.
1. Can you provide lot certificates? Lot traceability with certificates of conformity is the baseline of serious filtration supply. The Nalgene brochure, for example, prints lot number and expiry on every individual sterile filter — that’s the standard to expect.
2. Is the membrane HPLC-certified or at least performance-tested? Membranes certified under actual HPLC conditions give you confidence that extractables were checked, not assumed.
3. What’s the real hold-up volume and pressure rating? Suppliers who publish these numbers have measured them. Suppliers who don’t… haven’t.
4. Can I get samples for a recovery study? Any supplier confident in their product will send a sample pack. Run your matrix through three filters and compare against an unfiltered control.
5. What’s written on the box? Membrane, pore size, and diameter should be printed or color-coded on every filter. Color coding isn’t decoration — it prevents the wrong-filter-wrong-solvent mistakes that ruin samples.
For labs purchasing from China, supplier vetting has extra layers — audits, documentation, logistics. Our 10 tips for purchasing HPLC consumables from China covers that process end to end.
Your Pre-Order Checklist
Paste this into your next RFQ and you’ll out-spec most procurement departments:
– Sample solvent(s) — list every mobile phase and diluent the filter will touch
– Sample volume per filtration — sets the diameter
– Particulate load — clean, moderate, or heavy (heavy = prefilter or 2-in-1)
– Pore size — 0.45 µm clarification, 0.22 µm for UHPLC or fine removal
– Analyte sensitivity — any proteins or trace analytes? Low-binding membrane required
– Sterility requirement — genuine process need or habit?
– Fittings — female luer lock inlet, matched luer lock syringes
– Documentation — lot certificates, extractables data, expiry dates
– Validation plan — recovery check against unfiltered control on first lot
Three Buying Mistakes I See Every Month
One filter for everything. The lab that runs buffers through nylon because nylon is what they’ve always ordered. It works until it doesn’t — usually on the most important sample of the quarter.
Buying on unit price alone. The cheapest filter that clogs twice a week is the most expensive filter you own. Price per accepted sample is the only metric that matters.
Assuming 0.22 µm means sterile-grade. Sterilizing-grade filtration is a validated claim under the FDA’s aseptic processing framework, not a pore size. If your process needs sterility assurance, demand the validation documentation.
Conclusion
Buying syringe filters comes down to five decisions, and now you can make all of them with confidence: membrane matched to your solvent chemistry, pore size matched to your column hardware and particle load, diameter matched to your sample volume, sterility matched to a genuine process need, and a supplier who can back every lot with documentation. The filter itself costs a dollar or two. The column it protects, the analyst time it saves, and the clean baselines it delivers are worth hundreds of times more — that’s the real return on getting this purchase right. When you’re ready to go deeper, start with our pore size comparison guide and the membrane material showdown — between those two, you’ll have every filtration question covered.
Frequently Asked Questions
Which syringe filter is best for HPLC samples?
For routine reversed-phase HPLC, a 13 mm nylon or PVDF filter at 0.45 µm handles most samples. Use 0.22 µm for UHPLC systems with sub-2 µm columns. If your samples are protein-rich, switch to low-binding PVDF or PES to protect recovery.
Can I use a 0.22 µm filter instead of 0.45 µm?
You can — 0.22 µm removes everything 0.45 µm does, plus finer particles. The trade-offs are slower flow, higher backpressure, and faster clogging on dirty samples. If your samples carry visible particulate, pair the 0.22 µm membrane with a glass fiber prefilter.
What happens if I don’t filter my HPLC samples?
Unfiltered particulates accumulate in your column frit, injector, and tubing. The result is rising backpressure, shifted retention times, distorted peaks, and eventually a plugged column. Filtration costs cents; column replacement costs thousands.
How many times can I use a syringe filter?
Once. Syringe filters are single-use devices. Reusing a filter risks cross-contamination between samples, membrane rupture under repeated pressure, and particles washed from a loaded membrane into your next injection.
Do syringe filters add extractables to my sample?
Every membrane and housing contributes some extractables; the question is how much. Quality filters use low-extractable membranes and polypropylene housings that keep contamination negligible. For LC-MS and trace analysis, request extractables data and pre-rinse the filter with your sample solvent.