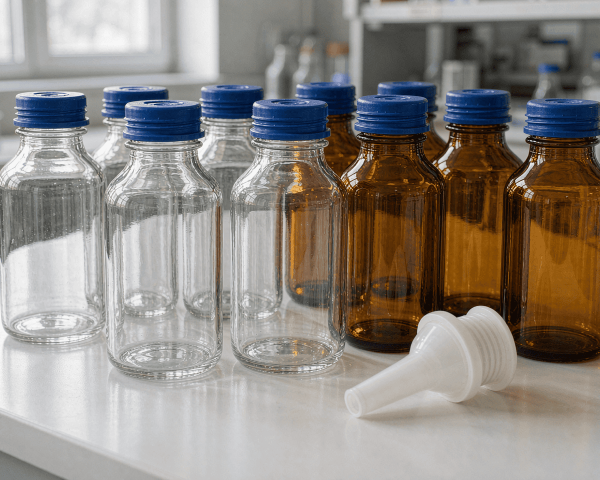

If you store reagents, buffers, or cell-culture media, the bottle you choose quietly decides how long those liquids stay usable. I’ve spent years helping labs pick reagent and media bottles, and the honest truth is that most contamination, evaporation, and “my media went bad” problems trace back to a bottle mismatch nobody noticed.
This guide walks you through everything that matters: glass vs plastic, USP glass grades, GL45 threads, cap liners, pouring rings, sterilization, cleaning, and the exact buying checklist I use. By the end, you’ll know precisely which bottle belongs on your shelf.
Quick answer: For most labs, start with Type I borosilicate glass media bottles with GL45 polypropylene screw caps, PTFE-faced liners, and a pouring ring. Choose amber glass for light-sensitive reagents, PETG or HDPE for single-use sterile workflows, and PP when you need an unbreakable, autoclavable plastic. Match the material to the chemical, the cap to the thread, and the size to how you actually pour.
—
What Are Reagent Bottles and Media Bottles?
People use the two names interchangeably, but there is a real difference. Reagent bottles are built for chemical storage: solvents, acids, bases, buffers, and prepared solutions that need a stable, leak-tight home for weeks or months. Media bottles are built for biology: cell-culture media, sera, and sterile buffers that must survive autoclaving and stay contamination-free.
Both usually share the same glass body and the same GL45 thread family. In fact, most manufacturers sell one bottle that serves both roles. The practical split is in the cap: media bottles favor caps with silicone or PTFE-faced liners and vented options for autoclaving, while reagent bottles lean on liners that resist aggressive solvents.
One thing I always tell buyers: don’t overthink the label. Think about your liquid, your temperature, and your sterility requirement. Those three questions answer 90 percent of bottle selection.
Glass vs Plastic: Choosing the Right Material
This is the first fork in the road, and it’s the one most labs get wrong in one direction or the other.
Borosilicate glass is the workhorse. It resists almost every solvent, survives autoclave cycles at 121 °C, and releases almost nothing into your liquid, which is why borosilicate glass media bottles remain the default in microbiology and analytical labs. Glass’s weakness is obvious: it breaks. Drop a 1 L bottle on a tile floor and you lose the reagent *and* clean up a hazard.
Plastic bottles solve breakage but introduce compatibility questions. Polypropylene (PP) autoclavable bottles handle aqueous solutions, buffers, and many weak solvents, and they weigh far less than glass. High-density polyethylene (HDPE) is cheap and impact-resistant but can’t be steam-sterilized. PETG bottles arrive sterile and gamma-irradiated, which makes them ideal for single-use media workflows where you never want to autoclave at all.
A few rules I lean on:
- Strong organic solvents → borosilicate glass.
- Hydrofluoric acid → plastic only, never glass.
- Routine sterile media → glass (reusable) or PETG (single-use).
- Field work or frequent handling → PP or HDPE.
- Trace analysis and pH-sensitive media → certified Type I glass with low extractables.
When labs ask me whether they can save money with plastic everywhere, I point out that glass pays for itself through reuse, provided you clean it properly. Plastic is cheaper per unit but is usually single-use, and the “cheaper” math only works if you never have to redo a contaminated batch.
Bottle Glass Grades: Type I, II, and III
If you buy pharmaceutical-grade or analytical-grade reagents, you’ll see “Type I” stamped on bottles and datasheets. That refers to the glass’s hydrolytic resistance: how much alkali the glass releases into water-based liquids. The US Pharmacopeia general chapter USP 〈660〉 Containers—Glass defines the system:
- Type I: borosilicate glass with high hydrolytic resistance. Suitable for almost any product, including parenterals.
- Type II: soda-lime-silica glass whose inner surface has been treated to raise its resistance.
- Type III: untreated soda-lime-silica glass, fine for many non-parenteral uses.
Here’s what most people miss: “Type I” is a *performance* claim, not a brand claim. It means the glass was tested and passes defined limits for alkali release. That’s why reputable suppliers certify their Type I borosilicate bottles rather than just printing “borosilicate” on the label.
Why does this matter for a routine media bottle? Because water and mild solutions slowly leach alkali from glass. With a low-quality bottle, that leaching can shift the pH of sensitive media, buffer systems, or trace standards over weeks of storage. For high-risk liquids, the extra cost of certified Type I glass buys you predictability.
For routine lab storage of buffers and media, Type I borosilicate is the safe default and rarely the wrong answer. If a supplier can’t tell you the glass grade on request, treat that as a red flag. The grade is the single most important spec on the bottle.
Cap Threads: GL45, GL32, and Other Neck Finishes
Here’s the single most useful fact in this entire guide: GL threads are standardized, which means a GL45 cap from one manufacturer generally fits a GL45 bottle from another.
GL stands for “Gewinde” (German for thread), and the number is the nominal thread diameter in millimeters. GL45 media bottles dominate the 500 mL to 5 L range, which is exactly where most media prep and reagent storage happens. GL32 shows up on smaller bottles around 100–250 mL, and GL25 on very small units. GL45’s popularity isn’t accidental: the wide opening accepts pouring rings, vented caps, PTFE-lined closures, multi-port process caps, and bottle-top filter units, so one bottle family works across an entire workflow.
Three practical notes:
1. Check the thread, not the bottle shape. A 1 L “media bottle” with GL45 is not the same as a 1 L Boston round with a 38-430 thread. Caps don’t cross over. 2. Match caps to the liquid. PP caps handle autoclaving; PTFE-faced caps resist aggressive solvents; vented caps equalize pressure during autoclaving or hot-fill. 3. Bottle-top filters need GL45. If you plan to filter media or solvents directly into the bottle, confirm the neck is GL45 before you buy.
When people ask me whether GL32 or GL25 is “better,” the answer is: they’re just smaller. Buy the thread size that matches your volume and your accessories, and standardize so caps and pour rings stay interchangeable across the lab.
Caps, Liners, and Pouring Rings
The cap is where bottles fail, not the glass. A great bottle with a cheap, incompatible cap leaks, evaporates, or contaminates your contents.
Cap material. Polypropylene screw caps are the standard because they survive repeated autoclaving and resist most chemicals. Phenolic caps appear on some traditional reagent bottles and handle heat well, but they’re less common in modern media workflows. Some premium lines use PBT caps rated for dry-heat sterilization above 140 °C.
Liners matter more than the cap. A plain PP cap against a glass neck rarely seals well enough for volatile or precious liquids. That’s why quality closures use liners: silicone for flexibility and resealing, PTFE for chemical inertness, and silicone/PTFE combinations that give you both. When you store aggressive solvents, a PTFE-faced liner is close to mandatory.
One more closure detail deserves a special mention: vented caps. They use a hydrophobic membrane that lets air and steam pass while blocking contaminants. Labs that autoclave media in sealed bottles often switch to vented caps so pressure doesn’t build up and bottles don’t implode or deform on cooling. The same caps help when you’re hot-filling liquids that release vapor.
Pouring rings are the unsung heroes. A drip-free PP pouring ring snaps onto the neck and stops liquid from running down the side of the bottle, which stops cross-contamination between bottles sharing a shelf. I covered the practical differences in my screw cap vs pour ring bottles article. If you pour from a bottle more than once a day, put a pouring ring on it.
Sizes and Shapes: From 100 mL to 5 L
Volume selection sounds trivial until you realize it changes your autoclave load, your shelf footprint, and your evaporation losses.
For everyday media prep and buffer storage, 500 mL and 1 L bottles are the most-used sizes. Small bottles (100–250 mL) suit working aliquots of precious reagents; 2–5 L bottles suit bulk buffers and media stocks. My advice: buy the size you actually use daily, not the biggest that fits your shelf.
Shape matters more than most people think. Square bottles take up noticeably less shelf and autoclave space; PYREX notes that its square media bottles save roughly 13–20 percent of space compared with round bottles of the same volume. The trade-off: some square bottles shouldn’t be used with bottle-top filters or vacuum because the flat walls handle pressure less evenly. Round bottles are the safer pick if you plan vacuum filtration.
Also pay attention to mouth style. Wide-mouth bottles make it easy to scoop powders and drop in stir bars, and they accept bottle-top filters. Narrow-mouth bottles pour more controllably and lose less liquid to evaporation.
Finally, think about headspace. A bottle that’s filled to the brim leaves no room for thermal expansion and risks leaking or cracking when contents warm up. A bottle that’s barely filled leaves a large air volume that promotes evaporation and, for oxygen-sensitive liquids, slow oxidation. The practical target is filling to about 80–90 percent of nominal capacity, leaving enough headspace for expansion but not so much that the liquid degrades faster than it should.
Clear vs Amber: Protecting Light-Sensitive Contents
Not every liquid needs amber glass, but for the ones that do, clear glass is actively destructive.
Light in the ultraviolet-to-blue range drives photodegradation of many compounds: silver nitrate, some vitamins, certain antibiotics, light-sensitive dyes, and several HPLC reagents. Amber glass filters most of that light before it reaches your liquid. The 300–500 nm range is the usual culprit, and amber bottles block the bulk of it.
My rule of thumb: if the product datasheet says “protect from light” or the compound is known to be photosensitive, buy amber and skip the hassle. If you’re storing ordinary buffers or salts, clear glass is fine and lets you see turbidity and contamination.
One subtlety worth knowing: amber glass protects against light, not against oxygen or moisture. A light-sensitive reagent still needs a proper seal and, in some cases, a nitrogen blanket. The bottle color is one layer of protection, not the whole strategy. I’ve written a full comparison of when each makes sense in my amber vs clear reagent bottles guide — including why some labs keep both on the same shelf.
Sterilization: Autoclaving Media Bottles Safely
If you work with media, you will autoclave bottles, often daily. Done wrong, autoclaving cracks glass, deforms plastic, or leaves you with a vacuum-sealed bottle you can’t open.
The non-negotiable rules:
1. Loosen the cap before autoclaving. Sealed bottles can implode as they cool because the internal vacuum fights the glass. If you’re using vented caps, you’re covered; otherwise, loosen the cap one quarter turn. 2. Never tighten the cap while the bottle is hot. PYREX explicitly warns that tightening caps immediately after autoclaving can cause breakage as the cooling vacuum forms. 3. Confirm your plastic is autoclavable. PP and PPCO bottles handle 121 °C. HDPE and PETG generally do not. PETG media bottles are single-use and gamma-sterilized instead. 4. Autoclave at 121 °C on a liquids cycle. Glass media bottles are built for it; check each manufacturer’s datasheet for cycle limits. 5. Cool slowly and open away from your face. A bottle that has just finished a cycle is under partial vacuum; opening it too fast can spray contents.
For the full protocol (including how to sterilize plastic bottles and how to dry them afterward), read my step-by-step guide on how to sterilize reagent and media bottles.
Cleaning and Care Between Uses
A reusable glass bottle is only as clean as your last wash, and “rinsing with water” doesn’t cut it for media or trace work.
My standard routine for glass media bottles:
1. Empty and rinse immediately after use so residues don’t dry onto the glass. 2. Wash with a lab-grade detergent and a brush, and pay attention to the neck threads, where media hides. 3. Rinse with tap water, then three times with deionized or purified water. 4. Invert to drain, or dry in a clean oven at 60–80 °C. 5. For trace-metal or analytical work, add an acid wash step (a brief soak in dilute nitric acid) before the final water rinses. 6. Autoclave or dry-heat sterilize when the next use demands it.
Avoid abrasive scrubbing that scratches the glass; scratches become harbors for residue and weak points for cracking. And never put a bottle away wet: standing water in a capped bottle is an invitation for biofilm.
One habit I recommend: label each bottle for its contents and don’t switch chemicals casually. A bottle that stored concentrated acid once may not be safe for trace analysis next week, no matter how well you rinsed it.
Applications: Where Bottles Earn Their Keep
Bottles look passive, but they sit in the middle of almost every lab workflow:
- Media preparation and storage. Autoclave media in the bottle, cool, and store. Glass resists the heat; the cap keeps it sterile.
- Reagent and buffer storage. A stable home for prepared buffers, mobile phases, and stock solutions.
- Solvent storage. Borosilicate glass with PTFE-lined caps for organic solvents.
- Filtration collection. GL45 necks accept bottle-top filters so filtrate drops straight into a sterile bottle — no transfer, no contamination risk.
- Dispensing. Pour rings and spouted caps turn a storage bottle into a controlled dispenser.
- Sample archiving. Barcoded bottles with documented contents make long-term sample storage auditable.
One pattern I see in well-run labs: they standardize on one bottle family (say, GL45 borosilicate) so caps, pouring rings, and filters are interchangeable across the whole lab. Standardization cuts inventory, prevents mismatched-cap chaos, and makes training trivial.
Special Cases: Mobile Phase, Cell Culture, and Field Samples
Three situations deserve their own bottles, and buying “just any media bottle” for them causes avoidable pain.
HPLC mobile phase. Solvents for chromatography should live in glass with PTFE-faced caps, never in plastic that can leach softeners into your mobile phase. GL45 bottles work with caps that have inlet ports, so you can run tubing straight from the reservoir to the pump without opening the bottle.
For cell culture, media bottles need the lowest possible extractables and a clean sterilization history. Many labs use dedicated bottles for each medium type and never swap them, which keeps cross-contamination near zero. For sterile single-use workflows, gamma-irradiated PETG bottles remove autoclaving from the equation entirely.
Field or transport samples. If bottles travel, consider safety-coated glass (which contains contents if the glass breaks) or impact-resistant plastic, and always confirm the cap seals leak-tight for the orientation the bottle will travel in.
Common Bottle Mistakes I See in Labs
After years around these bottles, the same errors keep showing up:
- Mismatched caps and threads. A whole shelf of orphan caps that fit nothing because nobody checked the GL size.
- Tightening hot caps. Cracked necks and imploded bottles from the post-autoclave vacuum.
- Glass for HF, plastic for strong solvents. Both are compatibility disasters in opposite directions.
- No pouring rings. Drippy necks that cross-contaminate the shelf and waste reagent.
- Reusing a “clean” bottle without cleaning validation. Especially dangerous after strong acids or dyes.
- Buying the biggest bottle available. Bigger headspace means more evaporation and more oxygen contact for the liquid you actually use daily.
- Ignoring the glass grade. “It’s just a bottle”… until pH drift ruins a stability study.
Most of these are fixed at the purchasing stage, which is why the checklist below matters more than any single product spec.
Cost and Sustainability: Reusable vs Single-Use
The economics of bottles have changed, and labs should make the glass-vs-plastic decision with both cost and waste in mind.
Reusable borosilicate glass costs more upfront but lasts for years when cared for. The true cost includes washing labor, detergent, purified water, and sterilization cycles, which is why some labs quietly pay more per use for glass than they’d admit.
Single-use plastic (especially PETG) shifts the cost to consumables but eliminates washing labor, cleaning validation, and the risk of a dirty bottle ruining a batch. For GMP or clinical workflows, the traceability of single-use certified bottles often justifies the price. The environmental trade-off is real, though: glass recycling beats plastic landfill, and some regions now charge heavily for lab plastic waste.
My honest advice: run the numbers for *your* wash labor. High-throughput media labs often find single-use cheaper and safer; low-volume research labs usually find reusable glass more economical.
How to Verify Bottle Quality on Delivery
Let’s say you’ve ordered a case of media bottles. Before you put them into service, a five-minute inspection catches most of the problems that cause trouble later. Here’s what I check on every incoming batch:
Glass. Hold each bottle to the light and look for cracks, chips on the neck or rim, and bubbles or stones in the glass. A chipped neck is a leak waiting to happen, and a crack that’s invisible when empty can open under autoclave heat. Check the finish (the neck surface where the cap seats) for roughness that would break the seal.
Markings and graduation. If the spec says graduated, verify the graduations are legible and, for the volumes you use most, reasonably accurate. The marking spot or patch should be large enough for a label that survives autoclaving.
Next, the cap fit. Screw a cap on and feel the thread engagement. It should run smooth with a firm stop, not wobble or cross-thread. If you ordered liners or pouring rings, confirm they’re present and seated correctly. Test one filled bottle upside down on a paper towel overnight, a leak check that takes seconds to set up and tells you more than any datasheet.
Finally, documentation. For analytical or pharma work, ask for the certificate of analysis or the batch documentation that states the glass grade, cap material, and autoclave rating. Suppliers who can’t produce documentation for a “Type I borosilicate” claim are usually selling something looser than the label suggests. Reputable distributors list this compliance detail openly on their product pages; it’s the kind of information you should be able to verify before you order, not after.
Lot consistency. If you run a regulated lab, keep the lot number recorded for each case you put into service. When a batch of media goes bad, the ability to trace it to a bottle lot, or rule the bottle out, is worth more than the label on the box.
Most quality issues with bottles are visible in that first inspection. The ones that aren’t visible (pH drift from marginal glass, extractables from a cheap liner) are exactly why the glass grade and cap spec matter at the purchasing stage.
How to Choose: My Buying Checklist
When I help labs spec bottles, I run through this checklist in order:
1. What’s the liquid? Solvent, aqueous buffer, media, or powder? This decides glass vs plastic and liner material. 2. Does it need protection? Light-sensitive → amber. Oxygen-sensitive → minimize headspace and use a good seal. 3. Does it need sterility? Sterile single-use workflow → PETG. Reusable + autoclave → borosilicate glass or PP. 4. Will you filter into it? If yes, confirm GL45 and round shape. 5. What volume, and how often do you pour? Pick the size you actually use daily, and add a pouring ring. 6. Which cap? Match the thread, choose the liner by chemical, and add venting if you autoclave sealed. 7. Check the glass grade. For analytical or pharma work, require certified Type I borosilicate. 8. Verify the supplier. Ask for the glass grade, the cap material, and the autoclave rating in writing before you order in bulk.
Conclusion
Reagent and media bottles are the least glamorous purchase in the lab and one of the most consequential. Get the material right (Type I borosilicate for most work), get the thread right (GL45 as your standard), get the cap right (PP body with a silicone/PTFE liner and a pouring ring), and you remove an entire class of evaporation, contamination, and compatibility problems. If your workflow is sterile, add vented caps or switch to gamma-sterilized PETG and never autoclave again.
Start by standardizing on one GL45 bottle family, then add amber, vented caps, and plastic variants only where your liquids demand them. That approach keeps inventory lean and every bottle on your shelf fit for its job. For deeper reading, start with my GL45 media bottles guide and the sterilization walkthrough.
Frequently Asked Questions
What is the difference between a reagent bottle and a media bottle?
Reagent bottles are designed for chemical storage, while media bottles are built for cell-culture media and sterile buffers. In practice they share the same borosilicate glass body and GL45 thread; the real difference is the cap, liner, and sterilization requirements of your contents.
Is GL45 the same on every bottle?
Yes; GL45 refers to a standardized 45 mm thread, so GL45 caps from different manufacturers generally fit GL45 bottles. Always confirm the thread rather than assuming a bottle and cap match by brand or shape.
Can you autoclave borosilicate glass media bottles?
Yes. Borosilicate glass media bottles survive repeated autoclave cycles at 121 °C. Loosen the cap before sterilizing and never tighten it while the bottle is hot, or the cooling vacuum can crack the glass.
When should I choose plastic over glass media bottles?
Choose polypropylene when you need an unbreakable, autoclavable bottle, HDPE for cheap general storage, and gamma-sterilized PETG for single-use sterile media workflows. Choose glass when you store organic solvents or need the lowest possible extractables.
Do media bottles need amber glass?
Only if your contents are light-sensitive. Buffers and routine media are fine in clear glass. Silver nitrate, certain vitamins, antibiotics, and light-sensitive reagents belong in amber bottles.