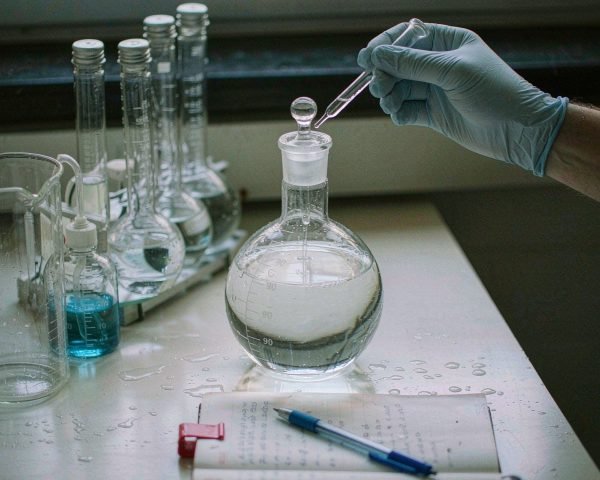

# What Is a Volumetric Flask and When Do Labs Use It?
Every lab has one piece of glassware that looks simple but carries enormous weight. The volumetric flask is that piece. When your method sheet says “make up to volume in a 100 mL volumetric flask,” the accuracy of the whole assay leans on a single line etched around the neck.
The Short Answer
A volumetric flask is laboratory glassware with a flat bottom, pear-shaped body, and long narrow neck, built to hold one exact volume, such as 100 mL, when filled to a single calibration mark. Labs use it to prepare standard solutions, dilutions, and mobile phases with tight, traceable accuracy.
Read on and I’ll show you what the tolerances mean in real numbers, how to read the meniscus so it actually counts, and the mistakes that quietly ruin otherwise good prep work.
What a Volumetric Flask Is and How the Mark Works
The design looks odd until you think about it for a second. A wide bulb holds most of the liquid, and the neck is deliberately narrow. That narrowness is the whole trick: because the neck has a small internal volume, a tiny change in liquid height is easy to see and easy to correct. One drop above or below the mark is visible to the eye.
That single etched line is the calibration mark. Volumetric flasks are made to contain (TC, sometimes marked “In”) their nominal volume, not to deliver it. So a 100 mL flask holds 100 mL inside when the bottom of the meniscus sits on the line. If you pour it out, a film of liquid stays behind and you deliver slightly less.
Two standards govern this glassware. ISO 1042 defines the requirements for one-mark volumetric flasks internationally, while ASTM E288 does the same job in the US. Both specify the accuracy classes printed on the flask, and manufacturers such as Duran note ISO 1042 compliance and the 20 °C “In” calibration right on their product documentation.
Class A and Class B are the two grades you’ll see. Class A carries the tighter tolerance. For a Class A 100 mL flask, that’s ±0.08 mL under ASTM E288, which works out to about 0.08% error. Class B is generally manufactured at double the Class A tolerance, so the same flask in Class B is roughly ±0.16 mL, a relationship Corning’s glassware care guide spells out alongside the ASTM E288, E694, and E542 references. For a 25 mL flask, Class A drops to ±0.03 mL.
Here’s my rule of thumb: use Class A for reference standards, QC release testing, and anything a regulator might read. Class B is fine for teaching labs and rough bulk dilutions where a fraction of a percent doesn’t move the needle. If your method says “Class A glassware,” don’t get clever. Buy the Class A flask.
When Labs Reach for One (and When They Don’t)
Where a volumetric flask shines
Preparation of standard solutions. Weigh a primary standard, dissolve it, make up to volume, and you have a solution with a known concentration you can defend in an audit. This is the classic use case.
Mobile phase and buffer prep. HPLC methods often call for volumes like 1000 mL of mobile phase. Making it in a volumetric flask keeps the composition reproducible from batch to batch.
Dilutions to a final volume. Serial dilutions for calibration curves need a known final volume, not a known cylinder reading. The flask gives you that in one step.
Where another tool wins
Measuring arbitrary volumes, like 37 mL, is not the flask’s job. It has one mark and one opinion. A graduated cylinder, which is accurate to about ±1% of its maximum volume, handles variable volumes better.
Skip the flask in a few other situations too. Don’t use it to deliver a volume, since it’s calibrated TC and holds liquid back. Don’t heat it or use it as a reaction vessel, because thermal expansion changes the contained volume. And don’t store solutions in it for weeks; transfer them to a proper storage bottle instead.
Using One Properly: Meniscus, Temperature, and Mixing
Read the meniscus like you mean it
For water and most aqueous solutions, the meniscus is concave, and the standard technique guides at LibreTexts walk through it the same way. The reading is taken at the bottom of the curve, and your eye must be level with the mark. Look from above and you’ll add too much; look from below and you’ll add too little. That’s parallax error, and it’s the most common way people waste a perfectly good flask.
A white card held behind the neck sharpens the line dramatically. Standard practice, documented in ASTM E542’s reading procedure, is to set the lowest point of the meniscus tangent to the upper edge of the graduation line. Add the last portion of solvent dropwise with a Pasteur pipette or a wash bottle with a fine tip.
If you overshoot the mark, there is no fix. You start over. I learned this the hard way during my first month on a QC bench: I overshot a 250 mL flask with a chloramphenicol standard, shrugged, and used it anyway. The calibration curve came back with an intercept nobody could explain, and we repeated the entire batch. Two minutes of dropwise patience beats an afternoon of rework.
Respect the 20 °C calibration temperature
Volumetric flasks are calibrated to contain their volume at 20 °C, which is printed right on the glass. If your solution is warm from dissolving with heat, the volume it occupies at the mark will shrink as it cools, leaving you with a more concentrated solution than the label says.
The fix is boring and effective: dissolve in a beaker first, let everything come to room temperature, then transfer and make up to the mark.
Mix thoroughly, then mix again
Homogeneity is where a lot of prep work quietly fails. After the mark, stopper the flask and invert it repeatedly with shaking. Lab technique guides recommend around 20 inversions to guarantee a uniform solution, since the narrow neck mixes slowly. It feels excessive. Do it anyway.
Glass or Plastic? Choosing the Right Flask
Borosilicate glass 3.3 is the default for analytical work. It’s chemically inert for nearly everything, dimensionally stable across temperature swings, and holds its calibration for years. Amber glass versions protect light-sensitive standards. One exception worth memorizing: hydrofluoric acid and strong alkali attack glass, so don’t prep those in a borosilicate flask.
Plastic flasks, usually polypropylene (PP) or polymethylpentene (PMP), earn their place in specific situations. Thermo Fisher’s plastic volumetric flask range is a good example of what’s on offer. They resist HF, they survive drops, and they’re useful near where people walk. Their tradeoffs are softer solvent compatibility and looser routine accuracy; most plastic lab flasks are offered to Class B tolerances. For solvents like methanol or acetonitrile at analytical accuracy, glass is still the safer pick, and our borosilicate reagent bottle guide explains why this material holds up so well over years of solvent exposure.
Care, Cleaning, and Calibration Checks
Clean glassware wets uniformly. That’s the test: rinse with purified water and watch whether the film drains evenly or gathers into droplets. Droplets mean residue, and residue means your volume, and your concentration, will drift.
Wash with mild detergent and a soft brush, then rinse thoroughly with deionized water. Manufacturers explicitly warn against applying direct heat to empty volumetric glassware; dry it inverted at room temperature or in an oven kept below about 80 to 90 °C. Keep each stopper with its own flask. A ground glass stopper swapped between flasks can leak or jam.
For calibration checks, most labs verify flasks gravimetrically: weigh the water the flask contains at 20 °C and compare against the tolerance. Class A flasks can come with batch or individual certificates, and if you work under an ISO 17025-accredited system, individual certificates with serial numbers make your traceability story easy.
Volumetric Flask vs Graduated Cylinder vs Pipette
| Feature | Volumetric flask | Graduated cylinder | Volumetric pipette |
|---|---|---|---|
| Markings | One mark | Many graduations | One mark |
| Purpose | Prepare a fixed final volume | Measure variable volumes | Deliver a fixed volume |
| 100 mL accuracy (typical) | ±0.08 mL (Class A) | about ±1 mL | ±0.08 mL delivered |
| Calibrated as | TC | TC | TD |
| Best for | Standards, dilutions, mobile phase | Rough measurement | Quantitative transfer |
For measuring many different volumes quickly, graduated cylinders and graduated vials do fine work. For delivering an exact volume into another vessel, use a TD pipette, not your flask.
Common Mistakes That Wreck Accuracy
Overshooting the mark. Adding solvent past the line means starting over. There’s no pipetting your way back.
Warm solutions. Making up to volume at 30 °C and using the solution at 20 °C shifts your concentration. Cool everything first.
Skipping inversions. Ten gentle swirls is not mixing. Without full inversion, the neck stays stratified and the first aliquots you draw are wrong.
Dissolving exothermic solutes in the flask. Sodium hydroxide dissolving in water gets hot, and heat inside a calibrated vessel distorts the volume you’re trusting. Dissolve in a beaker, cool, transfer.
Storing solutions in the flask long term. Solutes stratify on standing, and re-mixing inside the flask is unreliable. Transfer to a labeled reagent bottle right after prep.
Conclusion
A volumetric flask is a one-trick instrument, and that’s exactly why it’s trusted. It holds one volume, at one temperature, to a tolerance you can quote in an audit: ±0.08 mL for a Class A 100 mL flask. Use it for what it was built for, standard solutions, dilutions, and mobile phases, and reach for a cylinder or pipette when the job changes shape. The technique matters as much as the glass: read the bottom of the meniscus at eye level, respect the 20 °C calibration temperature, and invert until you’re sure the solution is uniform. If you’re stocking a bench, pair your flasks with proper storage glassware; our guide to reagent and media bottles covers how to keep prepared solutions stable, and our GL45 media bottle guide is worth a read if you work with HPLC mobile phases.
Frequently Asked Questions
Can you heat a volumetric flask?
No. Heating changes the glass volume and breaks the calibration, and sudden thermal stress can crack borosilicate too. Dissolve and heat solutes in a beaker, cool to room temperature, then transfer into the flask.
What is the difference between Class A and Class B volumetric flasks?
Class A flasks carry roughly half the tolerance of Class B, so a Class A 100 mL flask is good to ±0.08 mL while Class B is about ±0.16 mL. Choose Class A for analytical and regulated work, Class B for teaching and routine prep.
Why are volumetric flasks calibrated at 20 °C?
Liquid volume changes with temperature, so the mark only means something at a defined reference point. International standards settled on 20 °C, which is printed on the flask. Make up to volume only when the solution is near that temperature.
Can I store a solution in a volumetric flask?
Not for long. Solutes stratify on standing, stoppers can jam, and the flask is awkward to store safely. Transfer the solution to a labeled storage bottle right after mixing.
How do I dry a volumetric flask safely?
Invert it on a rack and let it air dry, or use an oven kept below about 80 to 90 °C. Never apply direct flame or high heat to empty volumetric glassware, since that damages the calibration and the glass.