
# What Are Weighing Bottles Used For?
Someone in your lab weighs a primary standard every week, and every assay that runs afterward depends on that one number. The weighing bottle exists to protect that number. It looks like a small glass jar with a lid, which is exactly why people underestimate it.
Weighing bottles are small glass containers with ground-glass or plastic stoppers, used to weigh solids accurately by difference. They suit hygroscopic powders, primary standards, and reference materials because they seal against moisture, resist static, and tare cleanly.
Read on if you want the working details: how analysts actually use them, why they beat weighing paper for damp or static-prone powders, and how to choose a size your balance will thank you for.
What a Weighing Bottle Actually Is
A weighing bottle is a short, wide-mouthed cylindrical vessel, usually made from borosilicate glass, with a ground-glass stopper that seats into a ground neck. The stopper is the whole point. It closes the vessel well enough that a powder sitting inside does not quietly gain or lose mass from the air around it while you work.
Two shapes cover most of the market. Low-form bottles are squat and wide, typically around 25×25 mm or 30×50 mm, and they sit low on the balance pan, which keeps the center of gravity down inside the draft shield. Tall-form bottles run slimmer and higher, something like 25×50 mm or 40×80 mm, and they hold more material in a smaller footprint. Tall form also gives you a longer ground joint, so the seal tends to be tighter.
Most are glass. Type 1 borosilicate glass is the standard choice because it barely reacts with anything you would weigh and its mass does not drift with humidity. Plastic versions in polystyrene or PMP exist for teaching labs and for samples where breakage risk matters more than a few tenths of a milligram. For regulated QC work, I stay with glass.
Stoppers come in two styles. A plug stopper fits inside a ground neck, and a cap-style stopper fits over an externally ground body. Manufacturers such as DWK Life Sciences machine these joints so the lid can be ground in for an airtight fit, and catalogue entries from Sigma-Aldrich still reference the old Federal Specification NNN-B-1493 for the classic styles. You do not need to remember the spec number. You just need a stopper that does not wobble.
Weighing by Difference: How the Method Works
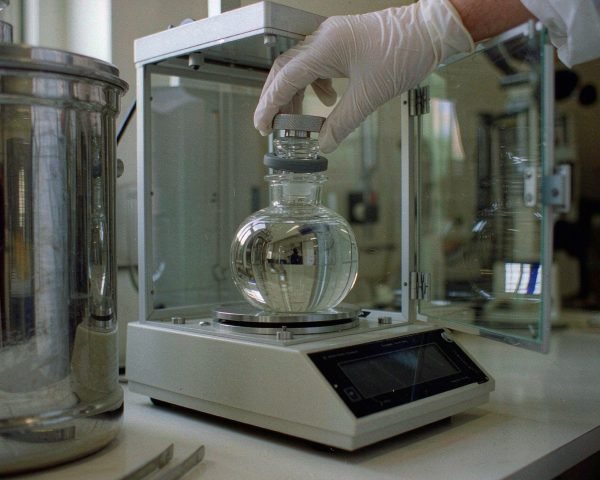
Weighing by difference is the reason the bottle exists. You weigh the stoppered bottle with sample inside, transfer part of the contents into your receiving flask, close it, weigh it again, and subtract. The mass you transferred is the mass that matters, and it never touches the balance pan directly.
The alternative, weighing by addition, tares an empty container and adds sample until the display shows your target. It is faster for routine work. It also leaves your sample exposed to the room for the entire weighing, which is fine for sodium chloride and terrible for anything that absorbs water in the time it takes to read a display.
USP General Chapter 〈1251〉 treats weighing by difference as the default procedure for analytical work and spends a full section on the problems of finely divided powders, including static charge that makes particles fly around and cling to everything nearby. A closed glass bottle sidesteps most of that. Glass does not charge up the way a scraped sheet of weighing paper does, and the sample never sits open under the balance’s desiccating airflow.
One practical note from Mettler-Toledo’s analytical balance guidance: the tare vessel is part of your measurement uncertainty. A heavy, non-absorbing, thermally stable container like a glass weighing bottle keeps that contribution small and repeatable.
Where They Earn Their Keep
The classic job is primary standards. When you weigh a 97.3 mg aliquot of potassium hydrogen phthalate to 0.01 mg for an HPLC mobile-phase standard, a sealed bottle is what stands between that number and the lab’s humidity. I once watched a colleague weigh roughly 200 mg of a deliquescent sodium acetate reference on weighing paper, and the mass kept climbing as she read it. The standard came back out of spec, we remade the solution, and the lab lost half a day. A weighing bottle would have prevented all of it.
Karl Fischer titration is another natural fit. Water determination by KF is famously sensitive to atmospheric moisture, and studies of systematic bias in Karl Fischer measurements show how easily small handling errors distort results. Sampling a hygroscopic solid into a stoppered bottle, weighing it, and transferring quickly keeps the moisture story under control until the moment the sample meets the reagent.
Beyond those two, the same bottle serves moisture content determinations by drying, gravimetric analysis, loss-on-drying checks, and any method where you need to know a solid’s mass to better than a milligram. If your SOP says “weigh accurately about X mg,” this is the container that phrase was written for.
Weighing Bottle vs Weighing Paper vs Weighing Funnel
Weighing paper is cheap, disposable, and perfectly good for stable, non-static powders in a hurry. Its weaknesses show up fast with real samples: it is light enough to drift with the slightest draft, it charges easily, powders skitter off its edges, and it offers zero protection from humid air. For hygroscopic or static-prone materials, my honest opinion is that weighing paper should not be in the conversation.
Weighing funnels solve a different problem. They combine a funnel body with a ground stopper, so you can weigh a solid into them and rinse it directly into a volumetric flask with barely any transfer loss. They shine when the sample must go quantitatively into solution. They are less convenient for repeated dispensing from the same charge, which is where a plain bottle wins.
So the default I would hand a new analyst is a bottle for anything hygroscopic or static-prone. A funnel when quantitative transfer into a flask is the goal. Paper only for forgiving samples and quick tares.
How to Weigh Hygroscopic Samples Without Losing Milligrams
Condition the bottle and sample together in a desiccator before weighing. A bottle that comes off a cold shelf will gain mass as it equilibrates on the pan, and so will the powder inside. Give both 30 to 60 minutes next to the balance and let the readings settle.
Handle the bottle with gloves or tongs. A bare fingerprint adds around 50 to 100 micrograms, which is noise on a two-decimal balance and a real error on a five-decimal one. Warm hands also heat the glass, and warm air rising off it reads as a lighter mass until things cool.
Work fast between weighings, keep the stopper on whenever the bottle is off the pan, and never leave a hygroscopic sample open while you answer a question from the next bench. If static is still an issue, a small antistatic ionizer near the balance helps more than most people expect.
Buying and Care Tips
Match the size to the balance and the sample. Small low-form bottles around 25×25 mm suit microbalances and small charges. Tall-form bottles in the 25×50 to 40×80 mm range cover most analytical work, and larger wide-mouth versions handle bulk powders on precision balances. Check that the bottle plus your typical charge sits comfortably under the balance capacity with room to spare.
Buy bottles whose stoppers are individually ground to their own neck. Interchangeable stoppers are convenient, but the tightest seals come from pairs ground together, so keep each stopper with its own bottle. Before a batch lands on your bench, inspect the ground surfaces for chips or scratches; our glass quality inspection guide covers what to look for.
Care is simple. Rinse with a compatible solvent, wash with mild detergent, rinse with purified water, and dry in an oven at modest temperature, then cool in a desiccator before the next use. Never grind a stopper while it is wet with sample. Store them stoppered, dust-free, and away from the crowded shelf edge; the lab consumables storage guide applies here too. Replace any bottle whose stopper no longer seats smoothly. A sloppy seal on a moisture-sensitive sample is a quiet way to fail an audit.
Conclusion
Weighing bottles are one of those tools that cost almost nothing and quietly decide whether your numbers hold up. They give moisture-sensitive powders and primary standards a sealed, static-resistant, cleanly tared home between the desiccator and the balance, and weighing by difference through a stoppered bottle removes most of the classic weighing errors in one move. Choose glass over plastic for regulated work, match the form to your balance, condition everything in a desiccator, and handle with gloves. If you take weighing accuracy seriously, a drawer of good borosilicate bottles pays for itself the first time it saves a failed standard. And since these are borosilicate vessels that live a hard bench life, it is worth understanding why borosilicate reagent bottles last as long as they do, because the same glass chemistry is protecting your weighing bottle too.
Frequently Asked Questions
What is the difference between a low-form and tall-form weighing bottle?
Low-form bottles are short and wide, which keeps them stable on the balance pan and suits small samples. Tall-form bottles are narrower and higher, hold more material in a smaller footprint, and usually have a longer ground joint for a tighter seal.
Can a weighing bottle be used for liquids?
Yes, for small quantities of nonvolatile liquids, because the stopper prevents evaporative loss during weighing. For volatile solvents, transfer quickly and keep the stopper on, or use a sealed vial designed for volatile samples.
Why is a weighing bottle better than weighing paper for hygroscopic samples?
The stoppered bottle shields the sample from humid air and static, while paper leaves it fully exposed. On a 0.1 mg balance, the moisture a powder gains during thirty seconds on paper can be a visible error.
How do you clean a weighing bottle?
Rinse with a compatible solvent, wash with mild detergent and water, then rinse with purified water. Dry in an oven, cool in a desiccator, and keep the stopper matched to its own neck.
What size weighing bottle should I buy?
For most analytical balances, a tall-form bottle around 25×50 mm is a safe first choice, with a 40×80 mm version for larger charges. Choose a size that keeps bottle plus sample well under your balance’s capacity.