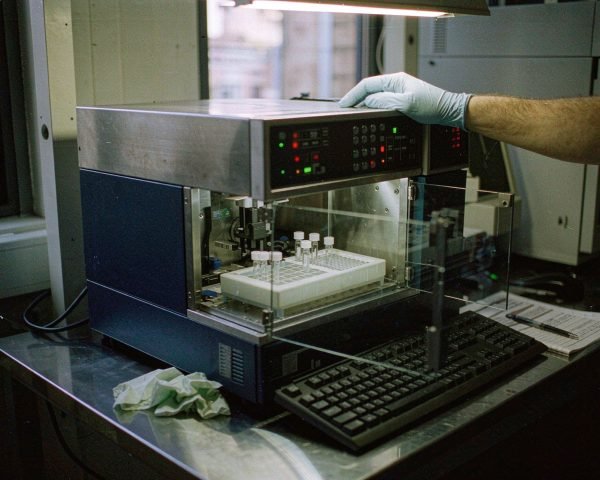

A vial that survives being filled, capped, and loaded can still crack inside the autosampler, and it always seems to happen overnight. I came back one morning to find solvent pooled under tray position 37 and a needle that had snapped on the glass fragments. The sequence had run fine for years. Nothing about the method had changed except the box of vials.
Answer: Vials break in the autosampler for five main reasons: caps overtightened until the glass neck cracks, crimped caps applied with a misadjusted tool, thermal stress from a cold tray or hot sample compartment, mechanical stress from mis-seated vials or a misaligned needle, and vials with pre-existing hairline flaws. Each cause has a specific fix, and all of them are cheaper than replacing a needle or cleaning solvent out of a tray.
Here’s what causes each failure and what I do about them.
Cause 1: You’re Tightening the Cap Too Hard
This is the most common one, and it feels counterintuitive. More torque should mean a better seal, so people crank screw caps down like they’re changing a tire. What actually happens is that the cap pulls unevenly on the glass finish, and a vial neck under that kind of local stress can develop a crack, sometimes right there on the bench, sometimes hours later when the tray arm nudges it.
The fix is embarrassingly simple. MicroSolv’s cap tightening guidance recommends tightening until snug, then about one-eighth of a turn more. That’s it. Excess torque doesn’t improve the seal; it distorts the septa, creates uneven sealing surfaces, and stresses the neck.
If your lab has several people filling vials, the torque varies by person. A capper tool removes the guesswork, but even a written “snug plus an eighth turn” rule cuts most of this problem out.
Cause 2: Crimp Caps Applied by a Misadjusted Crimper
Crimp-top vials fail differently. An under-crimped cap spins loose, but an over-crimped one concentrates force on the aluminum skirt and the glass underneath it. Over-crimping can deform the cap and damage the vial neck, creating micro-cracks that grow until the vial lets go, sometimes inside the instrument.
Crimpers also drift out of adjustment with use. If your lab bought one tool five years ago and nobody has checked the setting since, treat that as a suspect. Test every adjusted crimper on a sacrificial vial: the cap shouldn’t rotate after crimping, and the glass finish should show no white stress marks.
Cause 3: Thermal Shock
Glass handles steady heat well and sudden gradients badly. Loading room-temperature vials into a tray chilled to 4°C, or pulling a rack straight from the fridge into an autosampler set at 40°C, puts the glass under tension it wasn’t designed for. Thin-walled vials in cheaper lots are the usual casualties.
The fix costs nothing: let vials sit at tray temperature for a few minutes before loading, and don’t set the sample compartment colder than you need. If your method genuinely requires a cold tray, buy vials from a lot you’ve already stress-tested in those conditions, because lot-to-lot wall thickness variation is real.
Cause 4: Mechanical Stress From Mis-Seated Vials
Autosamplers assume a vial height. A vial that sits too high can contact the needle or tray lid; one that sits too low can tilt when the arm picks it up. Mixed inventories are the usual culprit: two brands with 0.5 mm of height difference, or vials loaded into the wrong insert adapters.
I also see this with worn trays. A cracked insert or a spring seat that has lost its tension tilts vials subtly, and a tilted vial plus a descending needle is how you get the sharp crack that ends a sequence. Walk the tray occasionally and feel for seats that don’t sit flat.
Cause 5: Hairline Flaws From Shipping and Handling
Some vials arrive damaged. A knock against a bench edge or a hard pour of glass from box to tray can start a flaw that holds until the tray’s vibration finishes it. This is why I inspect vials from any new supplier lot under the bench light before committing a full sequence to them. It takes two minutes for a tray of 60.
The same logic applies to reused vials. Washing and reusing glass is fine for many methods, but each wash cycle is a chance for edge chips, and a chipped rim concentrates stress exactly where the cap grips.
How I Troubleshoot Repeat Breakage
When breakage keeps happening, I narrow it down in this order:
1. Check the cap first. Overtightened screw caps and misadjusted crimpers cause most of what I see. Loosen the technique or recalibrate the tool and watch a week.
2. Check the vial geometry. Hold a current vial against the spec: total height, neck finish, base flatness. Switching lots or brands mid-investigation is a good way to chase ghosts.
3. Check the tray. Worn seats, loose inserts, and anything rattling under the tray plate.
4. Check the temperature path. Fridge to tray, tray to 40°C compartment, vials near the cooling fan that blasts one corner of the rack.
One more thing worth doing: log breakage by tray position for a couple of weeks. Patterns show up fast. Every break in positions 1 through 6 pointed me once to a warped tray plate that maintenance swore was fine.
What Breakage Actually Costs
A broken vial is a €0.30 loss on paper. In practice it’s a contaminated tray, a needle that may need replacement, a sequence that stopped mid-run, and an afternoon of re-preparation. Improperly sealed or damaged vials also let samples evaporate and concentrate between injections, which corrupts the data even when nothing visibly breaks.
And the failure can compound. Septa pushed through into a vial, or glass dust under the needle seat, produces injection errors that look like instrument faults. Several over-tightening failure modes end in bent needles or damaged rotor seals, which is maintenance you’ll feel for weeks.
Conclusion
Vials rarely break in the autosampler for mysterious reasons. The shortlist is overtightened caps, misadjusted crimpers, thermal shock, mechanical mis-seating, and vials that arrived with flaws. Walk that list in order and most repeat breakage resolves within a week. My standing advice: fix the torque habit first, because it’s free and it’s the most common, then inspect any new vial lot under a bench light before you trust it with an overnight sequence. If breakage keeps pairing with evaporation or injection problems, my guide to septa thickness explains how the cap and septa choice feeds into pierce force, and the piece on how often to replace septa helps you set a schedule that keeps worn septa from adding mechanical stress to the stack.
Frequently Asked Questions
Why do vials break more often overnight than during the day?
Overnight runs combine tray vibration with no one around to catch the early warning signs. Thermal equilibration issues also surface then, because vials loaded straight from a fridge spend their first hours expanding and contracting inside the instrument.
Can overtightening a cap really crack the glass?
Yes. Excess torque pulls the cap unevenly against the glass finish and compresses the septa beyond its design range. The stress can crack the neck immediately or leave a flaw that fails later under tray vibration.
Should I switch to plastic vials to stop breakage?
Polypropylene vials solve breakage but introduce adsorption and compatibility limits, so they suit some methods and ruin others. If breakage is your only problem, fix the mechanical causes first before changing the chemistry of your sample container.
How do I know if my crimper is misadjusted?
Test it on a sacrificial vial. A properly set crimper leaves a cap that cannot rotate and a glass finish with no white stress marks. If the cap spins or the neck shows stress rings, recalibrate before crimping any real samples.
Are broken vials in the autosampler dangerous?
They create sharp glass fragments and can release solvent or sample onto electronics and moving parts. Power down, wear gloves, and remove all fragments before restarting, and check the needle and tray seat for damage before you trust the next sequence.