
# What Is a Mortar and Pestle Used For in Sample Prep?
Ask a room full of analytical chemists which tool has survived every wave of lab automation, and the mortar and pestle will come up. It looks ancient, costs almost nothing, and it still does one job better than a thousand-dollar mill: grinding a few grams of one sample, right now, without wrecking the next one.
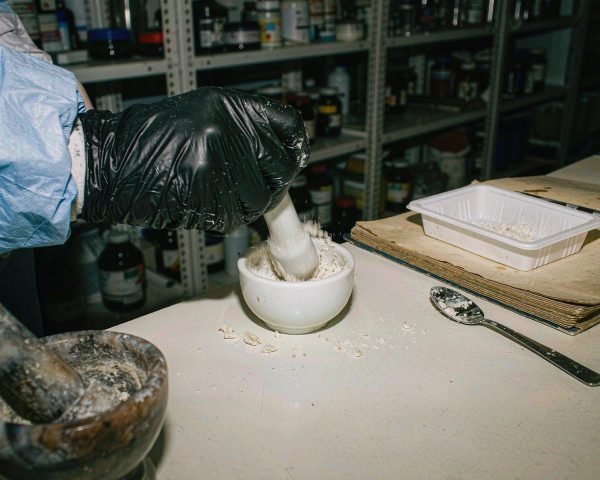
A mortar and pestle is used in sample prep to grind, crush, and homogenize small solid samples: breaking up aggregates before sieving, reducing particle size before acid digestion or XRF pellet pressing, and mixing powders by hand for compounding. The material you pick controls the contamination.
Below I’ll walk through why hand grinding survives, which mortar material matches your analyte, where the technique actually matters, and the point at which you should stop grinding by hand and buy a mill.
Why Labs Still Grind by Hand
Nobody buys an automated mill to process one 0.5 g sample. That’s the honest core of it. Most real-world sample loads arrive as occasional singles: a soil aliquot, a tablet blend, a few grams of metal turnings. For those, a mortar and pestle wins on four fronts.
The batches are tiny. A 90 mm agate mortar handles 10 to 20 g comfortably, and you can see exactly what’s happening to the powder as you work. You notice the clumps breaking up, the color evening out, the grit disappearing under the pestle. An enclosed mill hides all of that until you open the bowl.
Cleaning takes two minutes, so cross-contamination between samples is easy to control. A hard mill with a complex bowl and scraper takes longer to decontaminate than a smooth mortar you can rinse and wipe. For a lab running ten different matrices in a day, that matters more than grinding speed.
There’s also tradition with teeth behind it. Pharmaceutical compounding never stopped using mortars, and USP General Chapter <795>, the standard for nonsterile compounded preparations, still assumes manual tools like a mortar and pestle for mixing powders and preparing solid dosage forms USP General Chapter 795 on pharmaceutical compounding. When a pharmacist levigates a powder into an ointment base, a ball mill is not an option.
And the cost. A decent porcelain set runs tens of dollars. Even a natural agate set, the expensive end of the range, is a rounding error in most consumables budgets.
The Material Question You Should Answer First
Here’s where a lot of method blanks go wrong. Grinding is an abrasive contact between your sample and your tool, so the tool wears into the sample. The question is how much, and of what.
The evidence is not subtle. A recent ICP-MS study ground quartz sand in five types of mills and found the stainless steel grinder added significant Fe, Mo, Cu, and Ni to the powder, the hard porcelain grinder added Cs, and even agate contributed a little W Trace element contamination of sand samples by grinding. Another peer-reviewed study on silicon carbide prep for LA-ICP-MS makes the same point about hardness matching: grinding media softer than your sample sheds material into it trace elements in ultrapure silicon carbide by LA-ICP-MS.
So the rule I use: never grind with a material that contains your analyte, or anything near it.
Porcelain: the general-purpose default
Porcelain is cheap, hard, and chemically inert to most acids, which is why it’s the everyday choice for routine crushing and homogenizing where trace metals aren’t the target. Remember what it’s made of, though. Porcelain is a fired clay ceramic, rich in aluminum and silicon oxides, so it will contaminate your powder with Al and Si if you grind hard or long. Fine for organic work and digestion prep where you’re measuring something else. Bad news if Al is your analyte.
Agate: the trace analyst’s pick
Agate is a natural form of SiO2 with a Mohs hardness around 6.5 to 7, and it’s the classic recommendation for trace work because it introduces almost nothing relevant to most metal analyses. Suppliers position it exactly that way: Sigma-Aldrich describes its agate mortars as “excellent for preparing laboratory samples and high purity powders” Sigma-Aldrich agate mortar and pestle. The trade-off is silicon. Agate is silica, so if you’re measuring Si, or doing something like boron-sensitive semiconductor work, agate itself becomes the contamination source. It’s also brittle, so it hates hard, sharp samples and hates thermal shock (suppliers cap it around 350 °C).
Alumina and glass
Alumina (99.5% purity in most lab grades) is harder than agate and handles aggressive grinding of hard ceramics, with the obvious caveat that it contributes aluminum. Glass mortars are the budget option with a clear view of the sample, and they chip easily, so I’d keep them for soft materials and quick mixing only. Cole-Parmer’s own selection guidance sorts these materials by exactly this logic: agate for contamination-free work, alumina for precise elemental analysis, glass for visibility, porcelain for general use Cole-Parmer mortars and pestles selection.
Stainless steel: right tool, wrong analyte
Steel mortars are tough and crush hard samples fast, which is why metallurgy labs like them. But they shed Fe, Ni, and Cr, exactly the elements a trace-metal method cares about most. That ICP-MS grinding study put hard numbers on it: significant Fe2O3, Mo, Cu, and Ni contamination from the steel mill. If your method has an iron blank requirement, keep steel away from your powders.
PTFE and soft samples
For contamination-free work with soft, sticky materials (polymers, pharmaceutical excipients, biological solids), a PTFE mortar avoids metal and mineral contamination entirely. PTFE is soft, so it grinds slowly and abrades quickly, which means tiny fluoropolymer particles in your sample. That’s acceptable in organic analysis and usually not in elemental work at trace levels.
Where a Mortar and Pestle Shows Up in Real Methods
Grinding before acid digestion is the big one. Digestion kinetics depend on surface area, and a powder ground to a uniform fine particle size digests faster and more completely than a coarse one. Most published soil and sediment methods grind to pass a sieve (often 100-mesh, 0.149 mm) before aqua regia or HF digestion, and a hand mortar does this cleanly for small aliquots.
XRF pellet pressing has the same requirement. A pressed pellet with a heterogeneous particle size gives scattered results, so the powder gets ground and homogenized beforehand, sometimes with a binder, then pressed. Particle size and sample homogeneity are consumable- and prep-sensitive subjects, and I’ve covered the sibling topic before: see our guide to particle size analysis consumables.
Other recurring jobs: breaking up caked aggregates before sieving (a mortar is gentler than a mill and won’t shatter soft grains), homogenizing a small composite before you weigh out replicates, and prepping solid samples for Kjeldahl nitrogen or Karl Fischer moisture titration, where a coarse, uneven solid gives you slow, sloppy recovery. For solids heading into Karl Fischer oven work, grinding right before weighing also cuts the time the sample sits exposed to ambient humidity; pair that with tight weighing practice like weighing bottles.
Technique Tips That Protect Your Data
Grind small batches. Ten grams grinds better than forty, because a crowded mortar just pushes material around instead of shearing it. If you need a lot of powder, do several passes and combine.
Clean between samples like it’s part of the method, because it is. Rinse with an appropriate solvent (water for most powders, ethanol or acetone for greasy ones), scrub with the pestle and a bit of abrasive if residue clings, then dry fully. For trace work, run a blank grind through the clean mortar: grind a pinch of high-purity quartz sand, discard, and you’ve proven the vessel is carryover-free before your real sample goes in.
Dedicate mortars per sample type where you can. One agate mortar for the trace-metal soils, one porcelain set for the plant tissue, and never let the two swap jobs. I keep a strip of labeling tape on the underside of each one. It’s a cheap system and it survives.
One story to make the stakes real. I watched a lab’s low-level iron method fail its blank three runs in a row, and the eventual cause was a stainless steel mortar someone had “borrowed” to grind the soil standards. The fix cost nothing but a purchase order: one agate mortar, labeled, dedicated to that method, and the blanks went quiet. The mortar wasn’t on anyone’s troubleshooting list for two expensive weeks. It should have been first.
When to Graduate to a Ball Mill or Cryogenic Mill
Hand grinding has a throughput ceiling. Once you’re grinding dozens of samples per week, or you need every powder to hit the same particle size spec for reproducibility, automation wins. A ball mill also handles matrices that defeat a hand tool: very hard materials, tough polymers, elastic samples. For those, a cryogenic mill that freezes the sample with liquid nitrogen embrittles it, and that’s the standard answer for grinding plastics, rubber, and fresh biological tissue without heat degradation.
If your prep chain feeds thermal methods, note that particle size uniformity matters there too; our DSC and TGA consumables guide covers the pans and prep that go with those instruments.
My honest default: if a sample grinds in under five minutes and it’s the only one today, use the mortar. If the queue hits the bottom of the tray, buy the mill.
Conclusion
The mortar and pestle earns its place in a modern sample prep bench for reasons no mill has erased: small batches, fast visual control, easy decontamination between samples, and near-zero cost. The one decision that actually changes your data is the material. Match the mortar to your analyte, agate for trace metals, porcelain for general work, PTFE for contamination-free soft samples, and keep steel away from anything with a metals blank. Clean it like the method depends on it, because it does. And when the volume or hardness outgrows your wrist, that’s the moment for a ball or cryogenic mill, not before. If you’re building out your prep bench, the next two reads I’d point you to are particle size analysis consumables and handling viscous samples in HPLC work.
Frequently Asked Questions
Why use agate instead of porcelain?
Agate is a hard natural silicate that contributes almost nothing to most trace-metal analyses, while porcelain is aluminum- and silicon-rich and can add Al and Si to your powder. For routine, non-trace work, porcelain is cheaper and perfectly fine. For low-level elemental work, agate is the safer default.
Does grinding contaminate my sample?
Yes, always a little. The grinding surface wears into the sample, and peer-reviewed ICP-MS studies have measured significant Fe, Ni, Cr, Mo, and Cu contamination from steel grinding media, with smaller contributions from porcelain and even agate. Choose a mortar material that doesn’t contain your analyte and verify with a blank grind.
Can I use the same mortar for different samples?
You can if you clean thoroughly between them, but carryover risk climbs with every switch. Labs doing trace work get better results by dedicating one mortar per sample type and labeling it. A blank grind through the cleaned mortar is the cheapest way to confirm no carryover.
How fine can a hand mortar and pestle grind?
Realistically down to tens of microns with patience and small batches, and finer if the sample is soft and you grind long enough. It won’t match a ball mill’s repeatability on hard matrices, and hand grinding time becomes the bottleneck past a few grams.
When should I buy a ball mill instead?
When sample volume grows (dozens per week), when your method demands a reproducible particle size spec, or when the matrix is too hard or tough for hand grinding. For polymers and biological tissue, a cryogenic mill is the usual next step.