
# What Is a Cell Strainer and When Do Labs Use It?
Anyone who has watched a cell sorter abort mid-run because one clump slipped through knows why this cheap bit of nylon matters. A cell strainer costs a fraction of what the run itself costs, and it quietly decides whether your sample prep ends with clean data or a clogged nozzle. This guide covers what the device is, which mesh size fits which job, and the bench details most protocols skip.
A cell strainer is a single-use nylon mesh device, usually 40 or 70 µm, that fits on top of a 50 mL centrifuge tube. Labs use it to break digested tissue into a single-cell suspension and catch clumps and debris before counting or flow cytometry, so the instrument nozzle never clogs.
Keep reading for the 40 vs 70 µm decision, the workflows where a strainer is non-negotiable, a few technique tips I wish someone had told me earlier, and what to check before you order a case.
What a Cell Strainer Actually Is
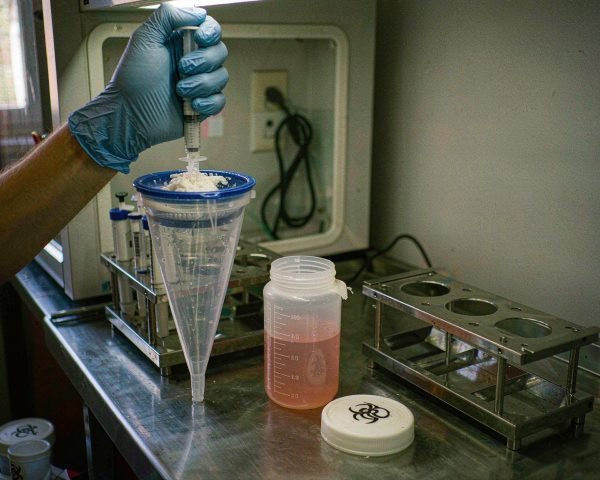
Picture a squat plastic funnel the diameter of a 50 mL tube. A rigid polypropylene frame holds a woven nylon mesh with a defined pore size, and the frame sits snugly in the tube neck. Drop your suspension in, and everything smaller than the pores drips through while clumps and tissue debris stay on top.
The catalog is more standardized than most consumables. Falcon strainers come in 40 µm (blue frame), 70 µm (white), and 100 µm (yellow), and those color codes carry across most manufacturers, which helps when you are grabbing one mid-task with gloves on. Corning’s own product sheet lists the three nylon mesh sizes, notes they fit all major brands of 50 mL conical tubes, and describes each as gamma-irradiated, noncytotoxic, and individually packed (Corning cell strainer sheet).
Vendors position strainers as a faster, cleaner replacement for the folded sterile gauze labs once stretched over a beaker. Thermo Fisher’s Nalgene strainer page describes the same core job: filter cell suspensions and tissue samples to get a uniform target-cell suspension for culture, flow cytometry, and tissue dissociation workflows.
40 µm or 70 µm? Choosing the Mesh
Pick 70 µm for rough jobs and 40 µm for fine ones. A 70 µm strainer handles spleen, lymph nodes, and thick enzymatic digests; it catches the big fragments while letting cells flood through quickly. A 40 µm strainer is the final polish, and most flow cores expect your sample to have passed one before it hits the instrument.
The cleanest evidence for this comes from published cytometry protocols. One Current Protocols method for preparing viable single cells from human tumors strains the digest through 70 µm first, then runs the flow-through through 40 µm as a second pass (Leelatian et al., Curr Protoc Mol Biol). STEMCELL Technologies specifies its 40 µm strainer for enzymatic digests of mammary tissue and organoids, plus single-cell prep for flow cytometry (STEMCELL product information sheet).
There is also a 100 µm version. It is too coarse for flow cytometry, but useful when you want to pre-filter a chunky digest or, in organoid work, hold back intact organoid structures while letting single cells pass. If your lab does both rough and fine filtration, keeping all three sizes in the drawer is not extravagance; it saves sample.
Where Labs Actually Use Them
Tissue dissociation is the classic case. After you mince a tissue and digest it with collagenase and DNase, you pour the slurry through a strainer set on a 50 mL tube and rinse the mesh with buffer. A leukocyte-isolation protocol in PMC describes exactly this: transfer the digest to a 50 mL tube with a 70 µm strainer in the opening, pipette up and down to loosen clumps, pour slowly, then fill with PBS and discard the strainer (PMC2860280).
Flow cytometry is the second big one. Clumps and dead-cell aggregates distort scatter gating and physically clog the nozzle of a sorter, and the cited protocol is explicit that filtration exists to remove debris that could clog the cytometer. If you are building out a full sample-prep bench, my article on flow cytometry consumables lists the rest of the kit that sits next to the strainers.
Other jobs show up more often than people expect:
• Mouse spleen and solid tumor preps, where gentle pressure against the mesh with a plunger disperses the tissue.
• Organoid cultures, where a 40 µm mesh recovers single cells after digestion.
• Cleaning a suspension before cell counting, so aggregates do not inflate your concentration and wreck your downstream seeding numbers.
• Primary cell culture setup, where clumps left in the flask attach unevenly and grow badly.
Technique Tips from the Bench
Wet the mesh before you pour. Dry nylon binds cells, especially at low cell numbers, so add a few milliliters of buffer or medium first and let it drain through. It takes ten seconds and it protects your yield.
Then grind gently. The standard move is to press the tissue against the mesh with the rubber plunger of a 5 mL syringe and work it in small circles. Let the mesh do the cutting. I learned this the hard way early in my career, when I got impatient with a mouse spleen digest, bore down hard, and watched a Friday afternoon prep turn into a tub of debris with a viability that barely cleared 50 percent. That sample never made it onto the sorter, and the mouse was not coming back.
Two more habits worth copying. Rinse the mesh afterward with 10 mL or so of cold buffer to recover the cells still sitting in it, since that rinse often carries a surprising share of your yield. And after digestion, keep everything on ice; warm, dense digests clump faster than you can filter them. If you are triturating instead of grinding, the same tumor protocol uses a plain 10 mL serological pipette, pipetting up and down 25 to 50 times until no visible pieces remain.
Buying Notes
Sterility is table stakes: every major brand gamma-irradiates and ships strainers noncytotoxic, one per peel-open pouch, as the Corning sheet cited earlier confirms.
Beyond that, three checks matter. If your downstream work is RNA or DNA based, buy the DNase/RNase-free certified versions rather than gambling on a generic. Confirm the mesh material and pore size on the spec sheet rather than the color alone; nylon (polyamide) is standard, but pore tolerances vary by vendor. And check packaging: individually wrapped strainers survive a busy bench far better than bulk packs, because once someone reaches into a shared sleeve with a used glove, the rest of the pack is compromised.
One practical note on logistics. Filtering rinses go through buffer fast, so it pays to keep sterile PBS on ice in a couple of media bottles for cell culture rather than opening a new one every prep.
Common Mistakes That Cost Cells
Pressing too hard is the top offender. Force shoves debris through the mesh and lyses fragile cells. The free DNA then makes the filtrate viscous and clumpy. Firm, patient circles beat muscle.
Reusing a strainer is the second. The mesh is nylon, not a reusable membrane, and trapped debris never fully washes out. At the price these sell for, a reuse attempt risks a whole prep to save pennies.
Wrong mesh size causes the two failure modes people complain about most. A 40 µm strainer fed a thick, undigested slurry will filter at a crawl and trap viable cells on top. A 70 µm strainer used as the last step before a sort will let through the aggregates that clog the nozzle. Match the mesh to the stage, and when in doubt, do the two-stage 70-then-40 pass.
Conclusion
A cell strainer is a small, single-use nylon mesh seated on a 50 mL tube, and it earns its spot in the workflow any time a sample needs to become a true single-cell suspension: after enzymatic tissue digestion, before flow cytometry, before counting, and in organoid work. Choose 70 µm for rough digests, 40 µm for the final pass, wet the mesh, grind gently, and rinse it through. Those habits cost nothing and they protect both your yield and the instrument downstream of you. If you are stocking a new cell-culture bench, pair the strainers with the right pipette tips and a good counting setup, and most sample-prep headaches disappear before they start.
Frequently Asked Questions
Can you reuse a cell strainer?
No. Manufacturers mark them single-use, and the woven nylon traps debris and cells that washing will not fully remove. Given the low unit price, reuse puts an entire prep and possibly a sorting run at risk to save very little.
What is the difference between 40 µm and 70 µm strainers?
The pore size of the mesh. Seventy microns suits coarse digests like spleen or enzymatically dispersed tumor; forty microns catches finer debris and small aggregates, which is why most flow cytometry protocols finish with it. Many published methods use both in sequence.
Do I need a cell strainer for flow cytometry?
In practice, yes. Aggregates and tissue debris clog sorter nozzles and distort scatter-based gating. Cores routinely reject unfiltered samples, and straining takes two minutes versus the hours a clog costs you.
Does a cell strainer sterilize my suspension?
It does not. A 40 or 70 µm mesh removes clumps and fragments, not bacteria, so it is no substitute for a 0.22 µm sterile filter. Always start with sterile components and aseptic technique.
Why is my filtration so slow?
Usually the digest is too thick or too fragmentary for the mesh you chose. Drop to a coarser mesh first, or dilute and triturate the suspension more before straining. Pressing harder only forces debris through and lyses cells.