
The Short Answer
Most sample prep time goes to filtering, capping, labeling, and re-doing failed samples. Swap a few consumables: syringeless filter vials, preassembled vial-and-cap kits, bottle-top dispensers, wide-mouth vials for viscous samples, and prefilters ahead of your membrane. Vendors report processing speeds up to three times faster with the right single-unit devices.
None of these upgrades need a capital request. That’s the point.
Read On
I once timed my own bench work out of pure spite. Twenty-four samples, hand-filtered with syringes and separate vials: 52 minutes, plus two re-filters for clogged membranes. The same 24 samples with filter vials: 19 minutes. Nobody asked me to measure it. I was just tired.
Here are the ten upgrades that actually move the clock, roughly in order of payback.
1. Syringeless Filter Vials (Filter and Vial in One)
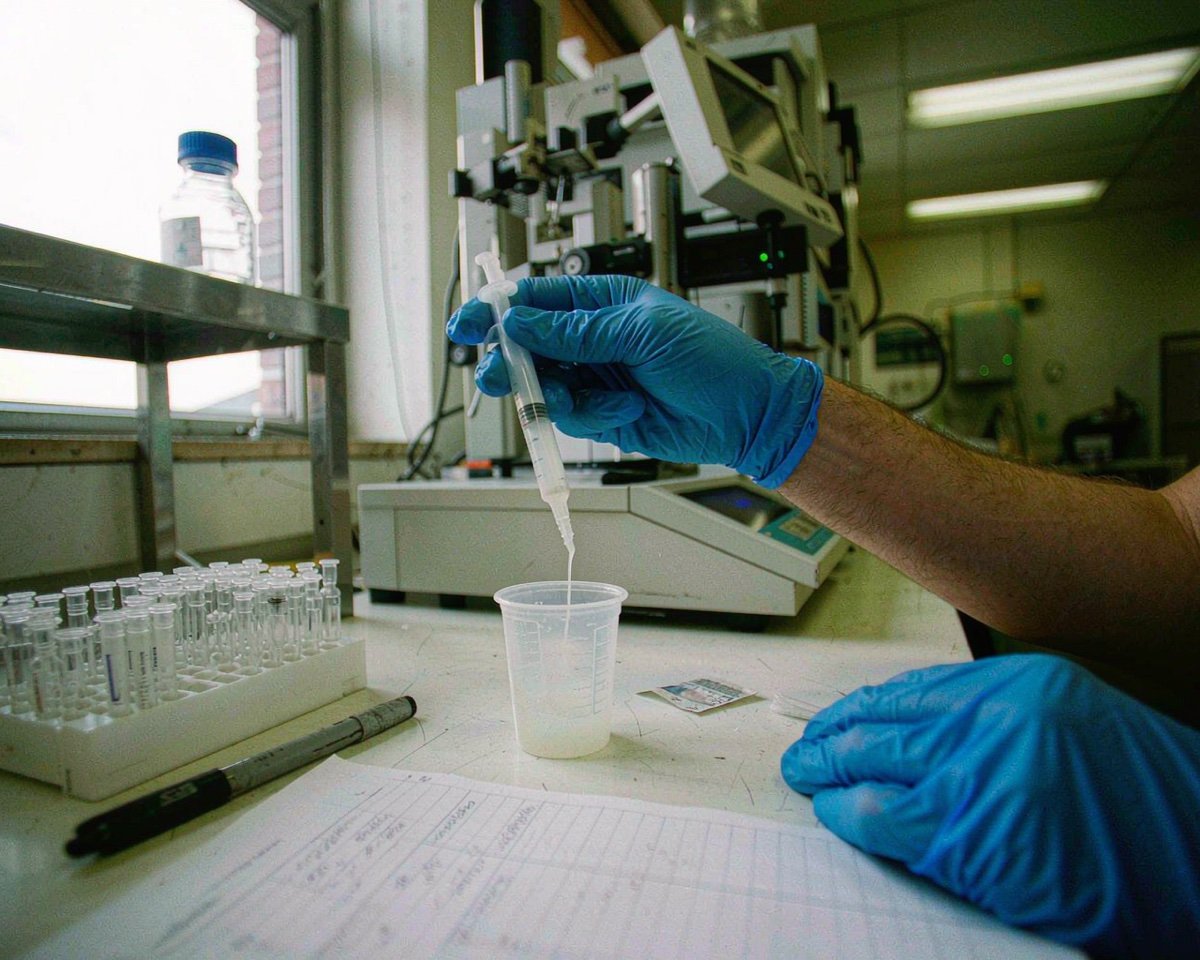
The single biggest time sink in HPLC prep is the filter-syringe-vial-cap assembly line. A syringeless filter vial collapses it: you pour sample into the outer chamber, insert the plunger that has the membrane on its end, press, and you’re done. The filtered sample sits in a device shaped exactly like a 12 x 32 mm autosampler vial.
Cytiva’s Whatman Mini-UniPrep documentation claims one-third the processing time of conventional syringe filtration, and independent supplier pages report the same figure. Membrane Solutions’ syringeless filter guide lists the same 1/3 time saving along with amber versions for light-sensitive samples.
Our complete syringe filter buyer’s guide explains when the traditional route still wins, mainly for larger volumes and dirty matrices.
2. Preassembled Vial-and-Cap Kits
If your lab still picks caps from one jar and vials from another and seats septa by hand, you’re paying someone to assemble consumables. Preassembled kits arrive sealed and ready. The time saving per vial is small, maybe 10-15 seconds. Across a 200-vial sequence, that’s an hour of technician time you get back, every time.
There’s a quality angle too: factory-sealed caps seat uniformly, which reduces the loose-cap leaks that force re-runs. And the assembly step is where cross-threading and tilted septa happen, the kind of small defects that turn into a mid-sequence pressure error and a lost afternoon.
One caution: match the kit to your method. If your method needs a specific septa (pre-slit, low-bleed PTFE/silicone, high-temperature), confirm the kit’s septa before bulk ordering. We compared the economics in vial-and-cap kits vs buying separately.
3. Bottle-Top Dispensers for Mobile Phase and Buffers
Every 2 mL aliquot poured from a heavy 2.5 L solvent bottle is a spill risk with a stopwatch on it. A bottle-top dispenser screws onto your reagent bottle and meters fixed volumes with the turn of a knob. Filling forty mobile-phase bottles goes from a careful-sipping exercise to minutes.
They shine for buffers and aqueous mobile phases where accuracy of ±0.5% is plenty. The workflow win is bigger than the seconds: no lifting a glass-stoppered 2.5 L bottle over a narrow bottle neck, which is the exact motion that ends with broken glass on the floor of a fume hood.
Our bottle-top dispenser guide covers solvent compatibility limits, because not every dispenser seal loves neat acetonitrile.
4. Wide-Mouth Vials for Viscous Samples
Serum, extracts, resins, oils. With a standard narrow vial you funnel, wait, tap, and wipe. Wide-mouth vials accept a pipette or a spatula directly, fill faster, and trap fewer air bubbles that later wreck autosampler pickup.
For anything above roughly 100 cP, the format change alone can halve filling time. See when wide-mouth vials beat standard vials for the details.
5. Glass Fiber Prefilters Ahead of Your Membrane
Dirty samples clog 0.45 µm membranes, and every clog means a new filter, a new syringe, and sometimes a re-prepared sample. A cheap glass fiber prefilter (1-2 µm) stacked in front of the membrane takes the punishment instead.
The arithmetic is simple: if one in five samples forces a re-filter, a prefilter that costs cents pays for itself on the first plate of samples. It pairs well with the syringeless devices from item 1 when your matrix is extra ugly.
There’s a second benefit that doesn’t show up on the stopwatch: fewer clogged filters means fewer interrupted sequences. A re-prepared sample doesn’t just cost its prep time, it costs the analyst’s attention while they remember where they were in the batch. Context switching is the hidden tax of dirty samples.
6. A Multi-Sample Compressor Press
Syringeless filter vials get even faster with a compressor that presses six at once. The Fisher Scientific Mini-UniPrep product page documents the six-sample compressor option. For labs that prep 100+ samples daily, the press costs less than a week of saved technician hours.
It’s the rare “instrument” purchase on this list, but it’s bench-top, unregulated, and boring in the best way.
The press also standardizes the seal. Hand-pressing six devices gives you six slightly different compressions; a compressor gives every vial the same stroke, which shows up later as tighter injection reproducibility on tricky needles. Labs with robotics get the same benefit from the pre-slit septa versions.
7. Color-Coded Filter Families
Ten seconds per sample doesn’t sound like much until you multiply it by 10,000 samples a year. Color-coded caps by membrane type and pore size mean you grab the right filter without reading a label or, worse, discovering the wrong one after it’s wet.
The bigger saving is avoided re-work. A nylon filter on a strong acid sample can leak extractables into your chromatogram, and nobody finds out until the peak appears where it shouldn’t.
Color coding also survives staff turnover. A new hire who was trained on “blue cap means PTFE, orange means PVDF” stops making membrane mistakes on day one, whereas a drawer of identical white filters relies on reading tiny font labels with wet gloves on.
8. Low Hold-Up Volume Filters
Hold-up volume is the filtrate your membrane and housing trap and never release. A standard 25 mm filter can hold 100 µL or more. If your extraction yields 800 µL and the filter eats 150 µL, you’re re-filtering small volumes, centrifuging, or accepting a short vial.
Low hold-up designs (smaller diameters, low-volume housings) return more of what you filtered. Less top-up, fewer re-extractions, fewer “below minimum volume” autosampler errors at 2 AM.
The time saving hides in the re-extraction you never do. When a filter eats 150 µL of a 700 µL extract and your method needs 500 µL minimum, the fix costs another weighing, another extraction, another hour. A low hold-up filter turns that near-miss into a non-event.
9. Filtration Manifolds for Batch Work
If the daily load is three samples, filter them one by one. If it’s forty, a vacuum manifold processes six or twelve positions simultaneously while you label the next rack.
The time math: hand-filtering 40 samples at 90 seconds each is an hour. A manifold does it in parallel in 10-12 minutes of active work. The consumables change nothing; the workflow does.
Manifolds suit aqueous and buffer-heavy work best. For neat organic solvents, check the vacuum compatibility of the seals first, and remember that volatile solvents evaporate faster under vacuum than under hand pressure.
10. Ready-Made Amber Vials Instead of Foil Wrapping
Light-sensitive samples get wrapped in foil in most labs. It’s slow, it’s inconsistent, and the foil flakes into your caps sometimes. Amber glass vials deliver the light protection as part of the container, with zero added bench time.
You give up a little visibility of fill level; autosamplers don’t care. For standards and samples that sit in a tray all afternoon under lab lights, amber is the upgrade that costs nothing per vial and saves a wrapping step entirely.
Amber glass also parks the argument about whether the lights were on. If a stability sample degrades, “was it light or chemistry” is a question amber vials delete from the investigation.
How to Measure the Savings Honestly
Before you buy anything, measure your baseline. One afternoon, one stopwatch, one notebook.
Pick a representative batch and record four numbers for each sample: filtration time, vial filling time, capping time, and any re-work caused by clogs, leaks or short volumes. Total it. That’s your prep cost per batch, and it’s probably worse than you think because re-work hides inside “miscellaneous bench time.”
Then change exactly one variable. Run the same matrix, same analyst, same day if possible, and time it again. If syringeless vials cut filtration from 90 seconds to 25, that’s your number, and it survives skeptical managers because you measured it twice.
Two honesty rules: don’t time your best technician on the new method and your average one on the old, and don’t count the learning curve week as the steady state. Give any new consumable five batches before you judge it. In my experience the second batch is always slower than the first (fumbling) and the fifth is always faster than the baseline (habit).
The Cost Counter: What a Saved Hour Actually Buys
Time savings sound abstract until you price them. A technician hour, fully loaded with benefits and overhead, runs $35-60 in most markets. If the numbers above save two technician-hours per day across a five-day week, that’s 500 hours a year, or roughly $17,500-30,000 of labor capacity returned to the bench.
Set against that:
| Upgrade | Typical cost | Break-even |
|---|---|---|
| Syringeless filter vials | ~$0.60-1.00 vs ~$0.30 for filter+syringe+vial | Days |
| Preassembled cap kits | ~$0.05-0.10 per vial premium | 1-2 weeks |
| Bottle-top dispenser | $150-400 one-off | 2-4 weeks |
| Compressor press | $500-900 one-off | 1-2 months |
| Glass fiber prefilters | ~$0.10 each | Immediate |
The exact figures vary by vendor and region, but the shape doesn’t: single-unit devices cost more per piece and win on total labor. If your lab bills for sample throughput, or if QC is the gate on product release, the saved hour is worth even more than the wage math suggests, because it moves product.
What Doesn’t Save Time
A few popular shortcuts fail the stopwatch test, and it’s worth naming them.
Reusing syringe filters to “save” consumables usually costs more than it saves. The second and third push run slower as the membrane loads, recovery drops, and the carryover risk forces re-runs on flagged samples. There are narrow cases where a rinse-and-reuse routine is defensible, but routine QC isn’t one of them.
Diluting instead of filtering is another false economy. It works on paper, but the extra dilution step, the extra pipetting, and the sensitivity loss at the detector usually erase the savings.
And the biggest one: skipping filtration entirely for “clean-looking” samples. The column doesn’t care how the sample looks, only what’s dissolved in it. One clogged guard column costs more consumables than a month of filters.
Which Upgrades First?
Start with whatever generates your re-runs.
Clogs dominate? Items 1 and 5. Leaks and loose caps? Item 2. Filling time? Items 3 and 4. Wrong-filter mix-ups? Item 7. One honest afternoon with a stopwatch and your batch log will rank these for your lab better than any article can, including this one.
A 30-Day Rollout Plan
If you want to implement this without disrupting a running schedule, spread it across a month.
Week 1: measure the baseline. Stopwatch, notebook, one representative batch. Order single boxes of the two upgrades your data points at hardest, usually syringeless vials and prefilters.
Week 2: run the new consumables on non-critical samples alongside the old method. Check recovery and reproducibility before you trust them with real data. Order the bulk quantities for whichever upgrade cleared validation.
Week 3: switch the workflow. Update the SOP, train the bench for 15 minutes, and move the old supplies out of arm’s reach. Partial adoption is where upgrades die; half the team filtering the old way keeps the stopwatch honest for nobody.
Week 4: re-time the batch. Compare against week 1 with the same matrix and analyst, then decide what’s next on the list. Most labs find the second upgrade is easier to justify once the first one has a measured payback attached to it.
The whole exercise costs one box of each candidate consumable and maybe four hours of a technician’s time across the month. That’s the cheapest process-improvement study your lab will run this year.
Conclusion
Frequently Asked Questions
Are syringeless filter vials compatible with all autosamplers?
How much time does a bottle-top dispenser actually save?
Do prefilters affect analyte recovery?
What is filter hold-up volume?
Is it worth buying amber vials if I already wrap samples in foil?
Usually yes. Amber vials remove a manual step, give consistent light protection, and eliminate foil flakes in your caps. The cost difference per vial is a few cents, which is cheaper than the labor you spend cutting and wrapping foil.