
Why Consumables Decide Whether Your Biobank Survives
A biobank lives or dies on the boring stuff. Sequencers, mass specs, and -80°C freezers get the budget line items, but the plastic between the sample and the cold is what actually protects a specimen that took a nurse twenty minutes to draw and a courier two days to deliver. Get the consumables wrong and the damage is silent: a cracked vial, a label that floated off in the tank, an analyte that drifted after its ninth freeze-thaw cycle. You find out a year later, when the paper is under review.
That’s why I wrote this guide. It covers every consumable category that matters in biobanking, from cryogenic storage vials and freezer boxes to cryo gloves, labels, LN2 handling gear, and the shipping materials that get frozen samples from one continent to another. I’ll also cover the standards people wave at you in audits (ISBER, ISBT 128, USP <659>) and how to pick a supplier who can prove what’s in the box.
One honest note up front. Biobanking consumables look like commodity plastic, and at a glance they are. The differences that matter only show up at -196°C, in liquid nitrogen vapor, three years into storage, when a budget tube that seemed fine starts to fail. This guide is about buying the right plastic the first time.
The Storage Temperature Ladder
Every consumable decision starts with one question: what temperature does your sample live at? There’s no universal cryo vial. A tube that’s fine in a -20°C freezer can crack or leak in liquid nitrogen, and a vial rated for vapor-phase LN2 is overkill (and over budget) for short-term freezer storage.
Here’s the ladder most biobanks work with:
| Storage temperature | Typical specimens | Consumables that fit |
|---|---|---|
| +4°C (refrigerated) | Media, reagents, short-hold samples | Standard PP tubes, sterile sampling bags |
| -20°C | Enzymes, aliquots of reagents, urine | Polypropylene tubes, standard labels |
| -80°C (ULT freezer) | Plasma, serum, DNA, RNA, tissue lysates | Externally threaded PP cryovials, freezer boxes, low-temperature labels |
| -150°C to -190°C (vapor-phase LN2) | Cell lines, primary cells, tissue | Vials rated to -196°C, SBS-format racks, cryo gloves and face shield |
| Dry ice (-78.5°C, transit) | Anything frozen, en route | Insulated shippers, dry ice-rated packaging, temperature loggers |
Match the plastic to the coldest point in the sample’s life, not its average day. A vial might spend 11 months at -80°C and then one afternoon in a LN2 vapor shipper. It’s the coldest hour that determines whether the vial survives.
Cryogenic Storage Vials: The Core Consumable
The cryogenic vial is the unit of trust in a biobank. Everything else exists to keep vials organized, identified, and cold. So let’s spend the most time here.
External vs Internal Threads
Cryovials come in two thread styles, and the choice matters more than most people expect. Externally threaded vials keep the screw threads outside the sealing zone, so nothing that touched the outside of the vial can contact the sample when you open it. That makes them the default for clinical and sterile work. Internal threads put the thread inside the cap skirt, which gives a slightly smoother profile for racks and automation but can trap residue near the seal.
My default is external thread for anything going into LN2 vapor or being opened on a sterile bench. Internal thread is fine for -80°C storage of non-critical material. Both styles, from any serious manufacturer, use polypropylene caps and vials with a silicone or TPE gasket inside the cap. When you’re comparing quotes, that gasket is worth asking about. A cheap one-piece cap without a separate gasket is where slow leaks come from.
2D Barcoded Vials and SBS-Format Racks
If your inventory has more than a few thousand samples, or more than one person touching it, consider 2D barcoded tubes. The barcode is laser-etched on the bottom of the tube, unique to the tube, and readable without pulling it out of the rack. You scan a whole SBS-format rack (that’s the 8 × 12 microplate footprint, ANSI/SLAS standard) in one pass and every tube position is logged automatically.
The alternative, handwritten or labeled 1D codes, works fine at small scale and fails quietly at large scale. Someone transposes two digits in a logbook, or a label in the back of a box peels at the corner, and you have a mystery tube. With 2D codes the tube itself carries the identity. Systems like the Nunc Coded Cryobank Vial Systems pair etched 2D tubes with readers and capping equipment, and most automated storage platforms assume this format. If automation is in your future, buying SBS-format racks now saves a painful migration later.
Polypropylene vs Glass at -80°C and -196°C
Polypropylene wins in the cryo world, and it isn’t close. PP stays tough at -196°C, it won’t shatter if a vial takes a knock, and it’s what virtually every cryovial manufacturer builds around. Corning makes this explicit in its cryovial documentation: polypropylene cryogenic vials are rated to -196°C, and they carry a blunt warning against storing vials submerged in the liquid phase of LN2. Glass ampoules can handle the temperature too, but a cracked glass ampoule inside a LN2 tank is a genuinely dangerous object. It can explode on warming when liquid nitrogen seeps into the crack. Some blood banks still use glass, but a new biobank has no reason to start there.
At -80°C, you could argue glass HPLC vials work for certain aliquots, and we’ve covered the tradeoffs in can you freeze samples in HPLC vials. Short answer: possible for short-term, risky long-term, and never in liquid nitrogen.
Sterile and Certified DNase/RNase-Free Options
For nucleic acid work, “sterile” alone isn’t the claim you need. You want tubes certified DNase-free and RNase-free, with the certification stated per lot, because nuclease contamination ruins RNA and trace DNA experiments in ways you can’t see until the assay fails. Look for tubes that are also non-pyrogenic and tested for endotoxin if your samples feed into cell culture or immunoassays. Any manufacturer taking biobanking seriously publishes a CoA with those claims. If a supplier can’t produce one per lot, keep walking.
Freezer Boxes and Racks: Cheap Insurance
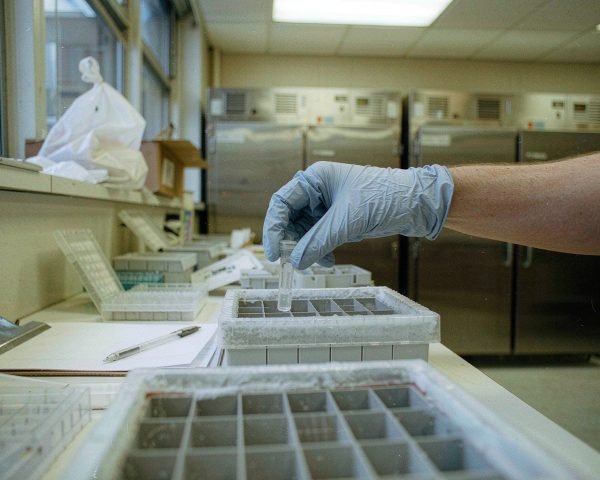
A freezer box costs less than a takeaway lunch and does two jobs: it stops vials from rattling loose, and it turns a chaotic freezer into a grid you can navigate at speed. Cardboard boxes are fine for -80°C and they’re cheap and stackable, but they shed fibers and wick up condensation over the years. Polypropylene and polycarbonate boxes survive longer, handle LN2 vapor, and survive the occasional autoclave. I’d buy plastic for anything long-term and cardboard only where volume and cost dominate.
Two details worth checking before you buy a few hundred boxes. Grid layout is the first: 9 × 9 (81 vials) fits 1.2 to 2 mL vials, while 10 × 10 (100 places) fits slimmer tubes, and a mismatch means pulling boxes apart to retrieve one tube. Then think about how vials, boxes, and racks fit together as a cryogenic vial and storage box system rather than as separate purchases, since vial height, box depth, and rack pitch all have to line up.
Racks matter just as much inside an ULT freezer. Aluminum racks conduct cold efficiently and cut recovery time after door openings, and many manufacturers now color-code racks and print barcodes on the rack sides so freezers can be mapped in the LIMS without opening anything.
A small habit extends the life of both boxes and freezers: plan where a box goes before the freezer door opens. Every minute of searching with the door ajar warms the front row of samples, frosts the evaporator, and trips the compressor into a longer cycle. Labs that pre-plan the slot, grab the box, and shut the door in fifteen seconds see measurably fewer temperature excursions on their logger data. It costs nothing and it protects the freezer as much as the samples.
Boxes also fail in ways nobody photographs. I’ve seen a polycarbonate box that sat at the back of a -80°C freezer for six years come out brittle as a biscuit, its hinge snapping on the first open. Cheap insurance still needs replacing eventually, so budget for it. A box that cracks inside a freezer drops vials onto the floor of the unit, and vials that fall behind the evaporator housing are a two-hour retrieval job involving gloves, a flashlight, and bad language.
Labels and Ink: The Part That Fails First
Here’s the failure I see most often in older collections: the tube is intact, the sample is fine, and the label has slipped off or faded to nothing. Standard lab tape and ordinary solvent markers are not rated for -80°C, never mind LN2 vapor. The adhesive stiffens and lets go, or the ink becomes illegible. When that happens, you don’t have a sample anymore; you have frozen liquid of unknown origin.
Cryo labels use adhesives engineered to stay tacky at cryogenic temperatures and inks that survive both the cold and the solvents in your workflow (DMSO, ethanol, xylene). Write on them with a dedicated cryo-marker, not a regular Sharpie. Better still, print thermal-transfer labels with a resin ribbon, which is the standard for anything barcode-based. We’ve gone deep on this in how to pick vial labels that survive freezers and solvents, but the summary is simple: test the label on your actual vial in your actual freezer for a month before you commit to a thousand rolls.
One more habit worth stealing from clinical labs: put the critical identifier in two places. A label on the cap plus a label on the vial body, or a 2D code plus a human-readable number. Redundancy is the only defense against a single point of failure.
PPE: Cryo Gloves, Face Shield, and the Rules That Keep Faces
Liquid nitrogen is -196°C, and it does not negotiate. The PPE list for cryogenic work is short and non-negotiable, and I’d rather sound like a safety officer than describe the alternative.
Cryo gloves are the first item. They’re loose-fitting, insulated gloves designed for handling frozen racks and vials, and their loose fit is deliberate: if liquid splashes into a glove, you can throw it off in a second. They protect against brief contact and splashes, not immersion. Nobody should ever have a gloved hand inside liquid nitrogen, ever. Face protection is the second item. A full face shield over safety glasses, because pulling a frozen rack out of vapor-phase storage releases a plume of cold vapor straight upward, and cold burns on the cornea are an injury you don’t come back from. Closed shoes and long trousers without cuffs round out the kit, so nothing can pool against skin.
The CDC has reported on cryogen and dry ice hazards in detail, including an MMWR case where a driver lost consciousness from CO2 buildup in a closed vehicle cab (CDC MMWR on dry ice exposure). Same physics, same lesson: cryogens and confined spaces don’t mix.
One detail about gloves that training tends to skip: they’re not sterile and they’re not permanent. A cryo glove that has absorbed LN2 splashes over months loses its insulating value and stays cold long after the task is done. Inspect them for stiffening and cracking, replace them yearly at minimum, and never wash them in a machine (the detergent breaks down the insulation). And keep a spare pair at the tank, because the pair you need is always the pair you left in the next room.
LN2 Dosing and Transfer: Getting Cold Where It Needs to Be
Vapor-phase LN2 storage depends on a steady, controlled dose of liquid nitrogen into the tank’s reservoir, and the transfer hardware is where labs get sloppy. A few things I’ve learned watching tanks get filled:
Use proper transfer hoses and dispensing equipment, not improvised tubing. Hoses made for cryogens are insulated and rated for the thermal cycling; the wrong tubing gets brittle, cracks, and turns a routine fill into a spill event. Fill slowly. Rapid fills splash liquid into the vapor-phase storage zone, where your vials live, and splash-back is how cold burns happen. Watch the fill line and respect the manufacturer’s maximum fill level; a tank filled past its level will vent hard during transfer, and venting nitrogen in a small room is an asphyxiation hazard.
That hazard deserves its own sentence: nitrogen displaces oxygen without any smell or color, and 700 to 800 times its liquid volume as it warms. Every LN2 room should have an oxygen monitor, and staff should know what the alarm sounds like from outside the room. I once toured a biobank where the LN2 room had a monitor with a dead battery and a note saying “ignore chirps.” The note did not survive the safety visit.
A 2 a.m. freezer alarm is also a good argument for auto-fill systems. A tank that tops itself up from a bulk dewar removes the human dependency on someone remembering to check the level on a Friday. Auto-fill systems need their own level sensors and alarms checked, but they fail more gracefully than a busy technician’s memory.
Freeze-Thaw Cycles: Why Aliquoting Is a Consumables Decision
Every freeze-thaw cycle damages a sample. Ice crystals pierce membranes, proteins conformationally rearrange, and labile analytes degrade. The defense is boring and effective: aliquot at the start, into enough small units that each thawed vial is used once and thrown away.
The evidence for how much damage happens is more nuanced than folklore suggests. One well-known study from the Norwegian Mother and Child Cohort biobank subjected plasma to up to 100 freeze-thaw cycles and found that most measured analytes stayed stable for 10 cycles, and many until 30, though free fatty acids shifted +32% and AST +21% after 30 cycles (freeze-thaw study on stored plasma). A 2025 study of 42 analytes in plasma and serum pools found most stable through four -80°C cycles, with HDL cholesterol, chloride, and sodium as the outliers. So the honest summary is: some analytes are tough, some fall apart after one cycle, and you won’t know which until it’s too late.
The consumables angle: aliquoting 500 µL into ten 50 µL aliquots in 0.5 mL externally threaded vials costs a few dollars and preserves options forever. Storing one 5 mL vial and thawing it nine times to use 500 µL total is false economy. When you plan aliquot sizes, buy vials slightly larger than the aliquot so fills are 70 to 90% of nominal volume. Overfilled vials crack when the contents expand; underfilled ones accumulate condensation and lose label legibility faster.
Inventory Management and 2D Barcode Scanning
An inventory system is only as good as the identity of each tube, and this is where 2D barcoding earns its price. The workflow is simple to describe: each tube’s etched 2D code maps to a record in the LIMS (location, extraction date, consent status, freeze-thaw count). A benchtop reader decodes single tubes; a rack reader decodes an entire SBS rack at once, including tube orientation.
Without that infrastructure, inventory means transcribing box maps by hand, and hand transcription at scale has an error rate you will pay for eventually. The other half of the equation is discipline: every movement of a tube in or out gets scanned, including the thaw-and-discard. That’s how freeze-thaw counts stay real instead of aspirational. If your LIMS can track a cycle count per vial, enforce it at checkout. If it can’t, the box map and a tube of red ink dots is your fallback, and it’s a weak fallback.
Scanning also changes what you can measure. Once every checkout is logged, you can see which collections get pulled often, which boxes sit untouched for four years, and where the freezer real estate is actually earning its electricity. I know one lab manager who freed an entire ULT freezer by consolidating half-empty boxes flagged in a two-hour rack scan, which delayed a 20,000-euro freezer purchase by two years. The reader paid for itself that afternoon.
Standards You’ll Hear About: ISBER, ISBT 128, and USP <659>
Three sets of standards come up constantly in biobanking, and they answer different questions.
ISBER’s Best Practices is the field’s main playbook. The fifth edition covers collection, processing, storage, distribution, and quality management for biological and environmental repositories, and auditors treat it as the reference for what “good” looks like (ISBER Best Practices for Repositories). If you’re setting up a biobank, read it before you buy your first freezer.
ISBT 128 is the barcode and labeling standard from the International Society of Blood Transfusion, used in blood banks and transfusion medicine worldwide. If your biobank handles blood products intended for clinical use, ISBT 128 labeling is likely required, and that constrains your label stock and printer choices early.
USP General Chapter <659> sets packaging and storage requirements for pharmaceutical articles, including definitions of storage conditions and expectations that packaging not interact with the contents. For biobanks supporting GMP or clinical programs, USP <659> Packaging and Storage Requirements is the document your quality unit will quote when they ask why your container is qualified. The practical takeaway: buy consumables with documented material specs (USP Class VI testing for plastics is the common benchmark) and keep the CoAs on file.
Cold-Chain Shipping: Frozen Samples on the Road
A sample’s coldest and riskiest day is usually a Tuesday in a courier van. Shipping frozen biomaterials means dry ice (for -78.5°C transit), insulated shippers, and packaging that satisfies IATA rules, because dry ice is a dangerous good for air transport and shipments get rejected at check-in for packaging that fails inspection.
The consumables that matter here: validated insulated shippers that hold temperature for your transit time (72 hours is a common design target), dry ice rated for the journey length plus a buffer for delays, and absorbent material plus sealed secondary containment inside, so a thawed specimen can’t leak. Temperature loggers are cheap now and answer the only question a recipient really has: did it stay frozen? We cover the general packing workflow in how to ship lab samples safely, and the cryo-specific additions are just dry ice quantity, ventilation, and the IATA paperwork.
One trap worth naming: dry ice in a sealed cooler inside a closed vehicle is a CO2 asphyxiation hazard, for couriers and for you. Shipments need venting, and drivers need to know what’s in the box.
Choosing a Supplier: Lot Traceability, CoAs, and the Questions That Matter
Biobanking consumables from an unknown factory look identical to qualified ones on a product photo. The difference shows up in the paperwork, so ask for the paperwork before you order.
The questions I’d ask any prospective supplier, in order: Can you provide a Certificate of Analysis per lot, with nuclease-free, sterility, and endotoxin claims where relevant? Is the manufacturing environment controlled (many serious manufacturers run Class 7 cleanrooms)? Is there lot-level traceability from raw resin to finished vial? What temperature is the vial rated for, and is that rating vapor-phase LN2 rated or just -80°C? Can you supply samples for validation before I commit to a case quantity?
That last one is where most evaluations go right. Run a validation: fill vials with your buffer, freeze to your target temperature, hold a month, thaw, and check for leaks, cracking, and extractables. It costs a few weeks and settles the decision with your own data, which is the only kind an auditor respects.
Lead times deserve a word too. Cryovials are rarely a one-time purchase; a collection that grows for five years will reorder the same SKU a dozen times, and a vial changed mid-study (different mold, different cap gasket) is a variation your quality system should catch. Ask the supplier to commit in writing that the part number maps to a fixed spec, and to notify you before any mold or material change. Receiving an emailed photo of “the new version” after the pallet has arrived is not notification.
Price matters, of course. But in biobanking, the cost of a failed vial is measured in the sample, not the plastic. A vial that costs 40% more and comes with a CoA per lot is the cheaper product the moment you compute the replacement cost of an irreplaceable specimen.
Conclusion
Biobanking consumables are the cheapest component in your cold chain and the only component in direct contact with the sample. That asymmetry is the whole argument of this guide. Choose externally threaded polypropylene vials rated for your coldest storage point, match your boxes and racks to your vials as a system, spend real attention on labels and ink, and treat aliquoting as an insurance policy you buy once at the bench. Add the PPE and LN2 handling discipline that keep staff safe, and buy from a supplier who can hand you a lot-specific CoA without being asked twice. Do those things and your biobank becomes boring in the best way: samples go in, samples come out years later, and every one of them is exactly what the label says. If you’re starting a collection from scratch, the cryogenic vials and storage boxes starter guide is the natural next read.
Frequently Asked Questions
Can I store cryogenic vials in liquid nitrogen?
No. Polypropylene cryovials are rated for the vapor phase above liquid nitrogen, not for submersion. Liquid can seep past the cap seal during cooling and cause the vial to rupture violently on warming, which is why every major manufacturer warns against liquid-phase storage.
What’s the difference between -80°C and LN2 storage for samples?
At -80°C, most proteins, DNA, and RNA are stable for years, which is why ULT freezers dominate for plasma and extracted nucleic acids. Vapor-phase LN2 (below about -150°C) is preferred for live cells, tissue, and anything where even slow metabolic or chemical change matters, since ice recrystallization essentially stops there.
How many freeze-thaw cycles can a sample survive?
It depends entirely on the analyte. Studies show many plasma analytes survive three or more cycles with minimal change, while sensitive markers can shift after a single cycle. The safe practice is to aliquot so that each vial is thawed once and discarded.
Do cryo labels really need special adhesive?
Yes. Standard adhesives lose tack below -20°C and peel at cryogenic temperatures, especially after condensation cycles. Cryo labels use adhesives and inks formulated to stay bonded and legible at -80°C and in LN2 vapor.
What does DNase/RNase-free certification actually mean?
It means the manufacturer has tested the product, per lot, for nuclease contamination and can supply documentation of that test. For RNA and trace DNA work, the per-lot claim is what protects you, so ask for the CoA rather than accepting “DNase-free” printed on a box.