
# What Is a Desiccator and Which Consumables Does It Need?
A desiccator keeps moisture away from your samples, reagents, and consumables, but the box itself is only half the story. The parts that actually do the drying, the desiccator consumables, decide whether your hygroscopic standards stay free-flowing or quietly turn into paste. Get them wrong and everything inside the chamber is compromised.
A desiccator is a sealed chamber that holds a desiccant to absorb moisture from the air inside it. The consumables it needs are the drying agent (silica gel, molecular sieve, or calcium sulfate), a color-change indicator, humidity indicator cards, and seals or vacuum grease.
Below I’ll cover which desiccator suits your lab, which desiccant to load it with, and how to tell when that desiccant is spent. I’ll also share my oven regeneration routine, because buying fresh beads every month gets expensive fast.
What a desiccator actually does
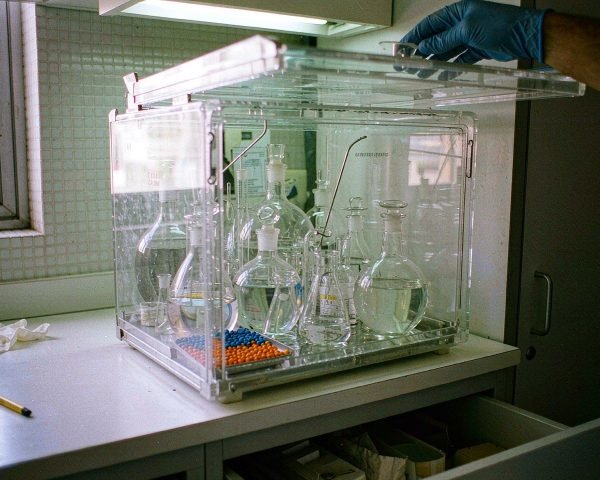
The body is simple: a chamber, a perforated plate, and space underneath for drying agent. You place your samples or consumables on the plate and the desiccant below pulls water vapor out of the trapped air. Most bench models work passively; vacuum models drop the pressure so wet items dry faster. DWK’s DURAN borosilicate desiccators, for example, are built to hold a full vacuum through precision-ground joints, with the desiccant sitting under a sieve plate (DWK Life Sciences DURAN desiccator specifications).
Why bother? Because water drives degradation. Removing moisture from biospecimens slows water-dependent enzymatic activity, including the nucleases that chew up DNA and RNA, which is why dry storage shows up in reviews of room-temperature biobanking (PMC review of room-temperature biospecimen storage). The same logic applies to hygroscopic reference standards and Karl Fischer reagents.
In my experience, a desiccator earns its bench space by cooling hot crucibles without letting them reabsorb water, storing anything hygroscopic, and guarding dried components before weighing. If your lab runs gravimetric moisture work, the desiccator is not optional equipment.
Glass or polycarbonate?
Glass desiccators are the classic choice. Borosilicate bodies handle full vacuum, tolerate heat, and last for decades if nobody knocks them off the bench. The trade-off is weight and fragility, and the ground-glass flange needs a thin layer of vacuum grease to seal and to let you open the lid after evacuation.
Polycarbonate and polypropylene models solve the weight problem. In my experience they cost noticeably less than the glass equivalent and can be carried one-handed between workstations, which matters more than spec sheets suggest. Bel-Art’s cabinet-style polycarbonate vacuum desiccators hold 29 in.-Hg for over 72 hours and come in amber versions that block UV for light-sensitive contents (Bel-Art’s desiccator selection guide (PDF)).
One caution: check the material before loading. Polypropylene bodies are rated for room temperature only, while glass shrugs off hot items straight from the oven. My default for a shared bench is polycarbonate with a gasket seal, since it needs no grease and survives clumsy hands.
The desiccants you can load it with
So which desiccant should you pick? Here’s how the common options compare:
| Desiccant | Drying power | Signal it’s spent | Best for |
|---|---|---|---|
| Silica gel | General purpose, moderate | Beads turn blue to light pink | Everyday dry storage, regenerable |
| Molecular sieve | Aggressive, very low residual humidity | Indicator paper turns pink or white | FTIR optics, Karl Fischer work, deep drying |
| Calcium sulfate (Drierite-type) | Fast, chemically neutral | Indicator crystals change color | Quick drying of robust items |
Silica gel is what most labs run because it is inert, non-corrosive, and regenerable. Indicating grades carry a moisture indicator that shifts from blue to light pink once the beads are saturated and can no longer absorb water. Molecular sieve, a hydrated metal aluminosilicate, dries far harder; the FTIR spectrometers I’ve worked with pack it into sealed desiccant canisters because even trace moisture ruins their optics (Thermo Fisher FTIR desiccant replacement guide).
Calcium sulfate rounds out the list as a fast, neutral option for general drying, and many benches use it alongside silica without issues. Most labs get away with a single choice for years; the bigger mistake is a full cartridge nobody has checked since last spring.
How to tell when the desiccant is spent
Watch the color. Indicating silica gel gives you a built-in signal: blue means dry, pink means saturated, and dark brown or stubborn pink means replace rather than regenerate. For non-indicating gel or sieve, use a humidity indicator card inside the chamber; the dot changes color once humidity climbs past its rated value, say 10% RH.
A few practical checks that have saved me more than once:
• Put the card where you can read it through the wall, not buried under racks.
• Date the desiccant tray with a grease pencil when you change it; check weekly in humid summers, monthly otherwise.
• If an auto-desiccator cabinet is running, trust its hygrometer reading over your calendar.
I once watched a Karl Fischer drift check fail three times in a row because the desiccator on the gravimetry bench had gone pink a week earlier and nobody noticed. That ten-cent piece of indicator paper cost us a Friday afternoon.
Regenerating desiccant in the oven
You don’t need to bin saturated silica gel. Loose beads come back to life at 150 °C for about an hour in a glass or porcelain dish, while sealed cartridges must stay much cooler, around 50 °C overnight, because the plastic dish will melt at higher temperatures. Sigma-Aldrich’s regeneration notes for its cartridges spell out both limits, and the same page confirms the beads turn pink when saturated (desiccator cartridge regeneration instructions, Sigma-Aldrich).
My routine, which I’d suggest copying:
1. Pour the beads into a labeled glass dish. Never reuse the foil pouch.
2. Bake at 150 °C for one hour for loose gel. Cartridges only: 50 °C overnight.
3. Cool them in a closed container, then return them while still warm-ish so they don’t grab humidity from the room.
4. Swap the humidity indicator card at the same time; if it doesn’t return to its dry color, replace the card itself.
Regenerated gel loses a little capacity each cycle, so I rotate two trays and retire beads after maybe five or six bakes. That habit also fits a wider principle: drying agent is a consumable with a service life, and the same thinking applies to how you store lab consumables for maximum shelf life (how to store lab consumables for maximum shelf life).
Extra consumables for vacuum desiccators and dry cabinets
Vacuum models add their own wear parts. Ground-glass joints need periodic re-greasing, gaskets and O-rings harden and leak, and pump oil degrades if you pull moist air through it regularly. Budget for all three up front, not only the chamber.
Dry cabinets and auto-desiccator cabinets are the low-maintenance end of the range. Units like the Secador line regenerate their own beads automatically, with a hygrometer in the door showing the actual reading. Even there, gaskets and the occasional replacement module remain on your consumables list.
Where these devices really pay off is after a package is opened. Sterile packs, membrane filters, and reagent bottles all pull humidity the moment the seal breaks, so pair your desiccator with a plan for storing opened packs of sterile consumables (how to store opened packs of sterile consumables).
Buying notes: what to actually order
When you spec a desiccator setup, order the chamber, then add consumables as a line item. A sensible starter kit is 1 kg of indicating silica gel, a spare cartridge, ten humidity indicator cards, and vacuum grease if you chose glass. That covers a year of routine use for a single 250 mm desiccator in most climates.
Two buying tips from my own reorder history. Buy indicating and non-indicating gel separately and mix them: the indicating beads show status while cheap non-indicating gel does the bulk work. And check compatibility; some desiccator plastics carry temperature limits, and loading hot items into a polycarbonate dome warps it permanently.
If you’re auditing an existing stockpile at the same time, remember that dried-out consumables aren’t automatically waste. It depends on the item and what you’ll use it for, which I’ve covered in more detail in our guide to expired consumables and whether to throw out, downgrade, or use them anyway (expired consumables: throw out, downgrade, or use anyway). And if vial storage is your main concern, moisture is only one of the clocks ticking; our guide to HPLC vial shelf life covers the rest (do HPLC vials expire? shelf life and storage).
For labs doing moisture method work, desiccation is only as trustworthy as your measurement behind it. If you need a number you can defend, pair dry storage with a validated titration method such as ASTM E203 for volumetric Karl Fischer water determination (ASTM E203-24, Karl Fischer titration standard).
Conclusion
A desiccator is a simple sealed chamber, but its performance lives or dies with the desiccator consumables you feed it. Silica gel with a blue-to-pink indicator covers most everyday storage, molecular sieve handles the aggressive drying that optics and titration reagents demand, and humidity indicator cards catch the failures your eyes miss. Regenerate beads in the oven instead of replacing them, keep spare indicators on the shelf, and treat gaskets and grease as the wear parts they are. If you want to go deeper on protecting what’s inside the chamber, start with our guide to storing lab consumables for maximum shelf life, then follow up with the piece on opened sterile packs. Your samples, your reagents, and your Friday afternoons will thank you.
Frequently Asked Questions
What is the most common desiccant used in a laboratory desiccator?
Silica gel, usually the indicating grade. It’s inert, non-corrosive, regenerable in a standard oven, and the blue-to-pink color change tells you when it’s saturated without any instruments.
How often should I change the desiccant in a desiccator?
There’s no fixed interval; watch the indicator instead. In most labs, indicating silica gel lasts one to three months per charge, but a humid summer or frequent lid openings can exhaust it in days.
Can I regenerate silica gel in a regular lab oven?
Yes. Loose beads regenerate at 150 °C for about an hour, while plastic cartridges should only see around 50 °C overnight or the dish melts. Cool the beads in a closed container before returning them to service.
What’s the difference between silica gel and molecular sieve?
Molecular sieve dries to a much lower residual humidity than silica gel and is the choice for demanding applications like FTIR optics. Silica gel is cheaper, easier to regenerate, and perfectly adequate for general dry storage.
Do humidity indicator cards need replacing?
Yes, they’re single-use consumables in most cases. Replace the card whenever you regenerate or replace the desiccant, since the indicating spots lose accuracy after repeated humidity exposure.