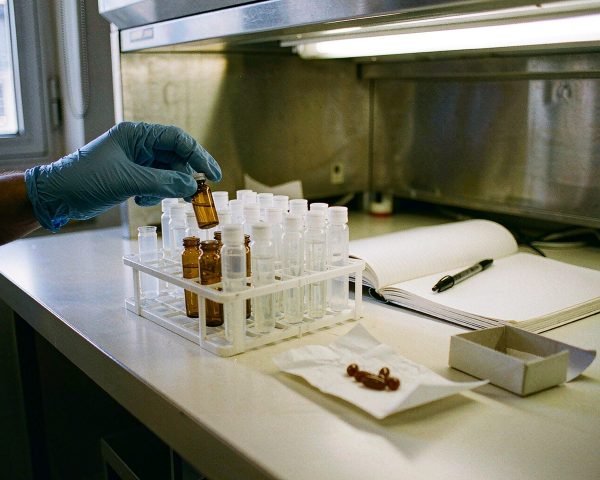

Run a supplement testing lab and your results are only as good as the consumables touching the sample. A $40,000 column cannot save an assay if the analyte adsorbed to the wrong vial wall overnight. In this guide, I want to walk through what nutraceutical testing actually involves, what the regulations demand, and then go technique by technique through the consumables that decide whether your data holds up under audit.
What Nutraceutical Testing Actually Involves
“Nutraceutical” is a marketing-era word, but in the lab it maps to dietary supplements: vitamins, minerals, botanicals, amino acids, enzymes, probiotics, and everything sold as a capsule, tablet, gummy, softgel, powder, or tincture. The NIH Office of Dietary Supplements maintains fact sheets on most of these ingredient categories if you want ingredient-level background. Testing work falls into six buckets, and each one leans on different consumables.
Identity and potency (assay)
Identity confirms you got the ingredient you paid for. Potency (the assay) confirms how much of the labeled active is actually in the product. For a curcumin softgel, that might mean extracting a 250 mg softgel, diluting it, filtering it, and running it on HPLC against a curcuminoid reference standard. FDA data cited by Agilent puts the number of supplement products on the US market around 85,000, which tells you how diverse these matrices get: oils, gummies, herbal extracts, protein powders, effervescent tablets.
Heavy metals
Lead, arsenic, cadmium, and mercury (the “big four”) come in with botanicals grown in soil. This is ICP-MS territory, and the whole workflow is unforgiving about contamination.
Microbial limits
Total aerobic count, yeast and mold, and objectionable pathogens like Salmonella and Staphylococcus aureus. Botanical powders and gummies are frequent offenders here.
Pesticide residues and other chemical contaminants
Botanical supplements inherit the pesticide burden of the crops they came from. Multi-residue methods (usually QuEChERS extraction followed by LC-MS/MS or GC-MS/MS) screen hundreds of compounds at once. Residual solvents and mycotoxins often ride along in the same contaminant panel.
Adulterant screening
This is the uncomfortable one. Supplements get spiked with undeclared pharmaceutical analogs: sildenafil in “male enhancement” products, synthetic stimulants in weight-loss blends. Screening usually means LC-MS/MS with targeted libraries, and the consumables demand is simple but strict: LC-MS-grade low-extractable vials and filters, because a spurious peak from a cheap membrane housing looks exactly like a novel adulterant on a full-scan chromatogram. I once spent two days chasing a “new” peak in a pre-workout sample that turned out to be a plasticizer from a low-grade cap liner. The instrument was innocent; the consumable was the story.
Stability
A product must meet its label claim through its full shelf life. That means time-point pulls, sometimes forced degradation under light and heat, and the same assay methods run months apart. Any consumable drift between month 0 and month 24 becomes a data integrity problem.
The Regulatory Frame: 21 CFR Part 111 and USP
If you test supplements for the US market, 21 CFR Part 111 is the rulebook. Section 111.70 requires manufacturers to establish specifications for identity, purity, strength, and composition of components and finished batches, plus limits on contamination that could adulterate the product. Two practical consequences for labs:
1. You cannot just trust a supplier’s certificate of analysis. The regulation expects verification through your own testing or a properly qualified supplier program, so your methods and consumables need to be defensible.
2. Test methods must be “scientifically valid” for each specification. Compendial USP or AOAC methods are generally considered validated; homemade methods need full validation.
USP supplies the how. General Chapter <2232> sets permitted daily exposure (PDE) limits for elemental contaminants in dietary supplements, and <233> describes the ICP-OES and ICP-MS procedures used to measure them. For context, the PDE limits per day are 15 µg for inorganic arsenic, 5 µg for cadmium, 5 µg for lead, and 15 µg for mercury, values spelled out in this Thermo Fisher application note on USP compliance.
The chapter pair also gives you two ways to prove compliance: test the finished product, or use the component-level option for products with a maximum daily dose under 10 grams and prove each ingredient stays under its target. The component route saves work when one botanical extract feeds a dozen formulas, but it only works if your incoming testing is rigorous, which loops right back to consumables and method quality.
Microbial work has its own compendial anchors: USP <61> and <62> for enumeration and objectionable organisms, with harmonized equivalents in the Ph. Eur. and JP. If you serve multi-market brands, plan consumable volumes around the strictest of the three, because they differ in details like incubation conditions and media.
Now let’s get to the part you came for: the consumables, technique by technique.
HPLC and UPLC Potency Assays: The Vial Decisions That Matter
Most potency work in a supplement lab runs through reversed-phase HPLC or UPLC: vitamins, curcuminoids, omega-3 fatty acid derivatives, botanical marker compounds, caffeine, creatine. The column and the method get all the attention, but the 2 mL autosampler vial is where samples quietly win or lose.
Amber vs. clear glass
Light-sensitive actives are everywhere in this industry. Curcumin, carotenoids (beta-carotene, lutein, astaxanthin), retinol, riboflavin, and many polyphenols degrade under UV and blue light, and analytical methods for carotenoids routinely specify amber glassware and subdued light handling, as Agilent’s dietary supplement testing solutions documentation shows across its carotenoid and vitamin method library.
I once watched a curcumin assay drift by nearly 4% across an afternoon because the samples sat in clear vials on a bench next to a south-facing window. Same extract, same instrument, standards prepared identically. The tell was that the drift tracked with tray position: the first vial injected lost the least, and the third vial in the tray, which had baked in the sun longest while the sequence ran, lost the most. We switched to amber vials and covered the tray, and the drift vanished. Since then, amber is my default for anything botanical, pigmented, or fat-soluble, and clear glass only for analytes where I have stability data proving it does not matter. If you are weighing the trade-offs in detail, see our guide on clear vs. amber glass vials.
A quick comparison:
| Attribute | Amber glass vial | Clear glass vial |
|---|---|---|
| Light protection | Blocks most UV and much visible light below ~450 nm | None; full transmission |
| Best for | Curcumin, carotenoids, retinol, riboflavin, polyphenols | Water-soluble vitamins, minerals, analytes with proven stability |
| Visual check of sample | Harder to see color, particles, or phase separation | Easy visual inspection |
| Autosampler compatibility | Identical formats (9 mm, 8-425, 11 mm crimp, etc.) | Identical formats |
| Cost | Roughly the same | Roughly the same |
The cost being equal is the part I always emphasize. There is no economic reason to run a light-sensitive assay in clear glass.
Septa choice for supplement extracts
Supplement extracts are solvent-heavy. Oil-based softgel dilutions may be mostly hexane or isopropanol; botanical extracts often involve methanol, acetonitrile, or acidified solvents. Two septa rules:
• PTFE-lined caps handle aggressive solvents well and are the default for HPLC. PTFE/silicone laminates add resealability for multiple injections through the same septum, which matters when you re-inject standards from the same vial all day.
• Pre-slit septa reduce coring and needle-drawn vacuum, but avoid them for volatile analytes or long storage hold times, since the slit is an open path for evaporation.
If your sequence holds overnight before injection, evaporation through the septum becomes measurable, especially with small fill volumes. Write your hold-time limits into the method rather than discovering them in the data.
Low-adsorption and insert considerations for hydrophobic analytes
Hydrophobic analytes (fat-soluble vitamins, carotenoids, curcuminoids) can adsorb to glass silanol sites and to certain plastics. When recovery from the vial runs low or reproducibility between replicate vials is poor, look at three fixes:
1. Silanized (deactivated) glass, which masks surface silanols.
2. Polypropylene vials or low-bind plastics, though you must verify the solvent compatibility first (oil-heavy diluents can swell some plastics, and leachables can ghost into LC-MS runs).
3. Vial inserts or conical-bottom vials to keep the meniscus reachable at low volumes, so the needle does not aspirate air on the last injection.
Waters has documented how metal-analyte interactions in the flow path degrade recovery for water-soluble vitamins, which their vitamin testing solutions page addresses with inert-surface hardware; the same adsorption logic applies at the vial level. The lesson generalizes: recovery problems you blame on the method are often a surface chemistry problem, and the vial is the surface your sample spends the most time on.
Filtration before injection
Every injection should be filtered. Gummy and tablet matrices shed particulates that clog frits and shred column lifetime. Practical guidance:
• 0.45 µm PTFE filters for most organic-solvent dilutions (oil-based softgel extracts, botanical extracts in methanol). PTFE is broadly solvent-compatible and low-extractable.
• 0.22 µm when you run UPLC with sub-2 µm particles, finer frits, or LC-MS, where particulates and ghost peaks hurt more.
• Regenerated cellulose (RC) or PVDF for aqueous dilutions, since PTFE is hydrophobic and can be slow with pure water.
• Nylon dissolves or swells in some high-pH and alcohol-rich systems; check compatibility before committing a batch of samples to it.
One more habit worth building: discard the first 1-2 drops through any syringe filter. Extractables from the membrane are highest in the first few drops, and on a UV detector at 254 nm they can show up as ghost peaks that send you chasing a contamination that came from the filter housing, not the sample.
Fill volume deserves a mention too. A 2 mL vial holding 200 µL of extract loses solvent to headspace faster than one filled to 1.5 mL, and volatile diluents (dichloromethane for omega-3 work, for example) will concentrate noticeably over a long sequence. If your method needs small volumes, use inserts rather than half-empty vials, and cap the sequence length or re-dilute rather than letting tray time do your concentration step for you.
ICP-MS Heavy Metal Testing: Where Contamination Control Is Everything
ICP-MS measures parts per billion and below, which means every surface your digest contacts is a potential source of lead, arsenic, cadmium, or mercury. USP <233> describes the plasma spectrometry procedures and expects you to control the full preparation chain. Consumables here deserve their own discipline.
Digestion vessels and tubes
Sample digestion for supplements usually runs in closed-vessel microwave systems with PTFE or PFA vessels. For the smaller volumes and dilutions afterward:
• Use 15 mL and 50 mL polypropylene centrifuge tubes rated for trace metal work, ideally lot-tested for heavy metals.
• For mercury and ultra-trace work, PFA tubes and vials are worth the cost. Standard polypropylene can carry background contamination, and adsorption losses for mercury are a known headache.
• Never reuse digestion vessels between a high-contaminant botanical digest and your blank without a validated cleaning cycle. I have seen a garlic-extract digest contaminate the next three samples’ blanks through an inadequately rinsed vessel. The pattern (elevated arsenic in every subsequent sample, declining run order) is unmistakable once you have seen it once.
For a deeper comparison of the vial decision specifically, see our breakdown of PFA vs. glass vials for trace metal analysis.
Acid cleaning
A common practice: soak tubes and vials in 5-10% nitric acid for 24 hours, rinse with 18.2 MΩ·cm water, and dry in a clean environment. Some labs buy pre-cleaned, certified consumables instead and skip the labor. Either way, the acceptance criterion is a method blank below your reporting limit. If your blanks run high, the cheapest fix is usually a better consumable, not more instrument optimization.
Vials for the autosampler
For the ICP-MS sample introduction side, most labs use 15 mL polypropylene autosampler tubes with caps, or PFA vials when trace levels demand it. Match the tube to the acid concentration in your final digest: strong acid matrices attack weaker plastics over time, and a stress-cracked tube in the sampler is a spill waiting for the worst possible week.
Pesticide Residues: QuEChERS Supplies Done Right
QuEChERS (pronounced “catchers”) stands for Quick, Easy, Cheap, Effective, Rugged, and Safe. It was developed for fruits and vegetables, and it has become the workhorse extraction for pesticide residues in botanical supplements: ginseng, turmeric, ashwagandha, green tea extract. The workflow is simple in outline: extract the homogenized sample with acetonitrile plus salt packets, then clean the extract with dispersive SPE (dSPE) sorbents in centrifuge tubes, then analyze by LC-MS/MS or GC-MS/MS.
What the method actually consumes:
• 50 mL centrifuge tubes with pre-weighed extraction salts (the AOAC 2007.01 formulation uses 6 g MgSO4 plus 1.5 g sodium acetate; the European EN 15662 version uses citrate salts instead).
• dSPE tubes with MgSO4 plus sorbents: PSA removes organic acids and sugars, while C18 removes fats and waxes. Graphitized carbon black (GCB) strips pigments, at the cost of planar pesticide recovery.
• Vials and filters for the final extract, same logic as any LC-MS run.
Sorbent choice is matrix-driven. A dry herbal powder needs different cleanup than an oil softgel. Restek’s QuEChERS product line documents which dSPE blends suit which matrices (fatty samples get C18, heavily pigmented ones get GCB or chlorophyll-specific sorbents), and it is a useful reference even if you buy elsewhere. One caution from experience: GCB will strip planar pesticides like chlorothalonil along with the pigment, so if your target list includes planar analytes, either avoid GCB or compensate with analyte protectants and verify recoveries.
For the full consumables picture method by method, our QuEChERS guide covers what the method actually needs.
Microbial Limits Testing: Sterile Consumables and Where They Fit
Microbial limits testing (USP <61> for enumeration and <62> for objectionable organisms, or the pharmacopoeial equivalents in your market) consumes a different set of plastics entirely.
• Sterile sampling bags and bottles for pulling representative samples from bulk powder drums or liquid batches. Bags with write-on strips survive the warehouse better than loose labels.
• Diluent bottles (buffered peptone water, Butterfield’s phosphate buffer) pre-filled or prepared in-house in sterile media bottles.
• Sterile petri dishes, membrane filter funnels, and base units for membrane filtration counts.
Two contamination-control notes. Sterile claims on consumables are not interchangeable: a gamma-irradiated bag and an autoclaved bottle carry different sterility assurance levels and different documentation, and your audit file should say which is which. On top of that, anything touching the sample before plating must be sterile, and your diluents and filtration setups must neutralize residual antimicrobial activity or your counts will read artificially low. Preserved products (anything with preservatives or high sugar content) are the classic trap. The product preserves itself on the plate and you report a beautiful, meaningless zero. Validation of neutralization is a method problem, but the consumable side matters too: media bottles that have been autoclaved a few too many times can leach alkali into buffered diluents and shift pH enough to matter for recovery. Track autoclave cycles on your glass media bottles the way you track column injections.
Reference Standards Handling: Crimp Vials and the Purity of Your Yardstick
Everything in an assay is measured against reference standards, so their storage is not a detail. USP reference standards arrive as tiny quantities of crystalline powder or solution, and reconstituted stock solutions degrade with oxygen and light, and with every puncture of the septum.
My preferences here:
• Crimp-top vials with PTFE/silicone septa for stored standard solutions. The crimp seal is more evaporation-resistant than most screw caps, and for a week-old curcuminoid stock that margin matters.
• Amber crimp vials for anything photolabile. Same rule as samples.
• Headspace-style crimping discipline: a proper crimper gives a seal you can verify by feel and by the absence of a rotating septum. A badly crimped cap on a standard vial loses solvent slowly and concentrates the solution, corrupting your calibration without any visible sign.
• Label everything with open date and concentration. In every lab I have worked with, unlabeled standard vials are the single most common audit finding hiding in a freezer door.
One nuance: for standards that are injected repeatedly over days, pre-slit PTFE/silicone septa reduce coring debris falling into the standard. For long storage, use an unslit septum and a fresh puncture at each use. The trade-off is resealability versus evaporation, and the right answer depends on how fast you consume the vial.
Stability Studies: Consumables for the Long Haul
Stability work multiplies every consumables decision by time. A 24-month study with pulls at 0, 3, 6, 9, 12, 18, and 24 months means the vials from month 24 must be comparable to month 0. Practical rules:
• Buy the same vial lot for the whole study where possible, or qualify each new lot against the old one before switching. Lot-to-lot differences in glass hydrolytic resistance and septa extractables are real, if small.
• For light-forced studies, the vial is part of the test condition: clear vials in a photostability chamber are the experimental design, not an accident. Be deliberate about which chamber gets which vial color.
• Use low-adsorption or silanized vials when the analyte is hydrophobic and the degradation pathway includes surface interaction. A 2% adsorption loss looks exactly like a 2% degradation on a stability trend if you are not careful.
• Store retained samples in crimped vials at labeled storage conditions, and track the third vial in every tray the same way you track the first. (Audit reviewers do sample-by-sample reconciliation, and “we kept month 12 but the tray only held 40” is not a sentence you want to say.)
Buying and Spec Considerations: What to Demand from a Consumables Supplier
Supplement labs live or die on defensible data, so procurement is part of the quality system. When we quote consumables to QC labs, these are the spec lines that matter most.
Certifications and documentation
• ISO 9001 for the manufacturing site at minimum; ISO 13485 or ISO 17025 alignment is a bonus depending on your market.
• Certificate of Analysis (CoA) per lot, not per product family. A CoA that names the lot number of the exact box you received, with actual measured values (not specification limits copy-pasted), is the standard. Pair it with a certificate of conformance so you know which document claims what.
• USP Type 1 glass classification for glass vials. Type 1 borosilicate (typically 33 expansion) is the hydrolytic resistance class you want for HPLC work; soda-lime glass sheds more alkali into acidic samples and should be reserved for non-critical uses. Ask which glass tubing lot your vials were formed from, since hydrolytic resistance is tested per melt.
• Lot traceability back to resin or glass melt, which is what lets you bracket a suspect lot instead of quarantining an entire storeroom.
Practical buying notes
| Consideration | What to ask for | Why it matters |
|---|---|---|
| Glass vials | USP Type 1 borosilicate, amber or clear | Low leachables, predictable adsorption |
| Septa | PTFE/silicone laminate, bonded caps for HPLC | Solvent resistance, no coring debris |
| Syringe filters | Membrane named per chemistry (PTFE, RC, PVDF), low-extractable housing | Prevents spurious peaks and analyte loss |
| QuEChERS kits | Pre-weighed salts, lot-tested sorbents | Method repeatability, less balance time |
| ICP-MS consumables | Trace-metal tested or certified tubes/vials | Blanks below reporting limit |
| Sterile products | Sterility claim with method (gamma, autoclave), lot documentation | Audit defense for micro testing |
Two purchasing habits that pay off. Request samples and run a lot-qualification comparison against your current consumable before committing, especially for filters and vials where adsorption differences hide in replicate data. And consolidate: buying vials, caps, filters, and QuEChERS consumables from one qualified supplier simplifies your supplier audit file and usually improves pricing at real volumes. Before you switch, walk a 12-point supplier checklist covering the factory, the documentation chain, and the packaging line, because a cheap quote from an unqualified line is the most expensive consumable you can buy.
Conclusion
Nutraceutical testing is regulated like pharmaceutical work in the ways that count: scientifically valid methods, verified specifications, and records that survive inspection. The consumables behind those methods are cheap relative to the instruments, yet they decide whether your data is reproducible and whether your month-24 stability point means anything. Pick amber glass for anything photolabile, PTFE-silicone septa for solvent-heavy extracts, PFA or trace-metal-tested plastics for ICP-MS, and demand a real per-lot CoA on everything. None of this is complicated, but all of it compounds: a small recovery loss here, a drifting standard there, and one day your data file stops telling one coherent story.
If you are building out a supplement lab, the next read I would suggest is our complete guide to food testing lab consumables, which overlaps heavily with botanical work and covers the contaminant side in more depth. Get the consumables right and the instruments will take care of themselves.
Frequently Asked Questions
What consumables do supplement testing labs need?
The core list: 2 mL autosampler vials (amber and clear) with PTFE/silicone caps, syringe filters in 0.22 and 0.45 µm across several membrane chemistries, QuEChERS extraction and dSPE kits, trace-metal-tested centrifuge tubes and PFA vials for ICP-MS, sterile sampling bags and diluent bottles for micro testing, and crimp vials for reference standard storage.
Do nutraceutical labs need USP Type 1 glass vials?
For HPLC assays and anything with an acidic or nonpolar matrix, yes. Type 1 borosilicate glass has low hydrolytic resistance, meaning minimal leaching into your sample, which protects both your analyte recovery and your chromatography baseline. Soda-lime glass is acceptable only for non-critical storage.
Should curcumin and carotenoid samples go in amber vials?
Absolutely. Both compound classes photodegrade measurably in clear glass under normal lab lighting, and the loss shows up as assay drift. Amber vials cost the same as clear, so there is no trade-off.
Which syringe filter membrane is best for supplement extracts?
PTFE 0.45 µm for organic-rich dilutions like oil softgel extracts, PTFE 0.22 µm for UPLC and LC-MS work, and regenerated cellulose or PVDF for aqueous dilutions. Always discard the first few drops through a fresh filter to remove membrane extractables.
Are PFA vials really necessary for ICP-MS heavy metal testing?
Not always, but for mercury and ultra-trace work they often are. Standard polypropylene carries background contamination and can adsorb certain metals, so labs doing USP <2232> compliance work at low reporting limits standardize on PFA or certified trace-metal-tested consumables to keep blanks clean.