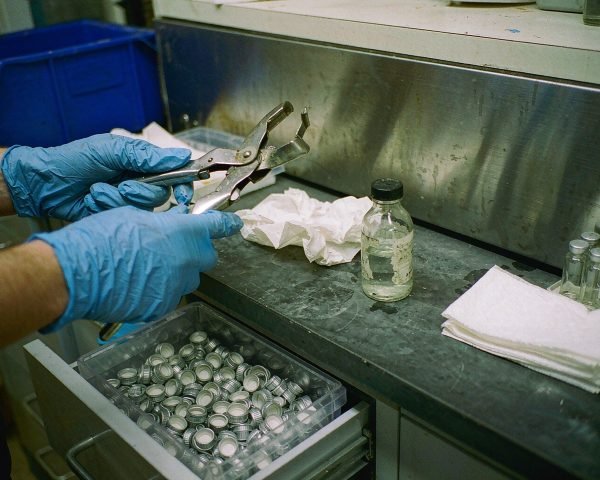

# How to Clean and Maintain a Vial Crimper
A hand crimper is one of those tools labs buy once and never think about again. That works fine until the day half a tray of caps spins loose and you go hunting for a leak in your inlet instead. A few minutes of cleaning and inspection every couple of months keeps a good crimper good for years.
Short answer: Yes. Wipe the jaws and anvil with lint-free wipes and isopropyl alcohol, blow out metal dust with compressed air, and inspect the jaws for flats or out-of-round wear every few months. Verify crimp quality after any maintenance, and replace jaws once crimps drift out of spec.
Read on for the routine I use on my own bench, and how to tell “needs a clean” from “needs replacing.”
Why a Neglected Crimper Costs You Real Data
A hand crimper is a lever, a set of jaws, and an anvil. Squeeze the handles and the jaws pull inward, folding the aluminum skirt of the cap down around the vial’s flange while the anvil behind the septum backs everything up. Every problem traces back to one of those three parts.
The cost of neglect shows up downstream first:
• Leaks and evaporation. A worn jaw set crimps unevenly, and an uneven crimp lets volatiles escape. In headspace work, that’s low response on early injections and drifting internal standard areas.
• Failed crimps. Caps that spin freely or sit proud of the neck. If a cap passes only because the septum is thick, your next lot of caps may not seal at all.
• Septa damage. Jaws with a raised burr can fold the septum into the cap’s center hole, which feeds coring into your inlet liner.
I learned this the expensive way. A colleague of mine ran a six-month accelerated stability study at 40 °C with a crimper nobody had looked at since purchase. At the three-month pull, roughly one vial in five had lost measurable solvent through slow leaks. The timepoints couldn’t be re-crimped and re-run; they were simply gone. The lab repeated the entire study. A crimper rated for 100,000 crimps can fail at 10,000 if you never clean it.
Routine Cleaning, Step by Step
How often
• Daily or heavy use (100+ vials a day): quick wipe-down of the jaws at the end of the week.
• Moderate use: a proper clean and inspection every 2 to 3 months.
• Any time crimps look off: clean first, then diagnose. Dust and aluminum pickup cause most “mystery” crimp problems.
Materials
You need very little: lint-free wipes, 70% isopropyl alcohol, a can of compressed air, and a soft brush (an old toothbrush works). Stick to IPA. Acetone and similar aggressive solvents can attack plastic handle inserts, grip coatings, and anodized finishes. And never immerse the tool; Thermo Fisher’s crimper literature is explicit that crimping tools must not be dunked in water or solvent, and that advice applies just as much to manual tools with spring assemblies inside.
The steps
1. Open the jaws fully. Squeeze and lock or wedge them open so both jaw faces are exposed.
2. Blow out debris. Compressed air first, from the jaw end and the anvil recess. You’ll be surprised how much glass dust and aluminum flake comes out.
3. Brush the jaw faces. Gently, along the grooves where the cap skirt sits.
4. Wipe with IPA-dampened lint-free wipe. Run the wipe between the jaws and across the anvil, flipping to a clean section often so you’re lifting metal dust off rather than smearing it.
5. Dry and cycle. Wipe dry, then squeeze the handles ten times to work anything loose out of the mechanism.
6. One drop of oil, once a year. A tiny amount of light machine oil on the pivot pin only. Oil on the jaw faces attracts grit and transfers it to your caps.
The whole routine takes about ten minutes. Do it before a big batch, not after, so a bad crimp never makes it to the autosampler.
Inspecting the Jaws and the Anvil
Cleaning is also your inspection window. Hold the jaws under good light and look for three things.
Flats. The grooved faces that grip the cap skirt wear smooth over time. A polished band down the middle of a jaw face means the jaws are no longer gripping the full skirt, and crimps come out with shiny, flattened panels. My rule of thumb: a jaw flat of 0.2 mm is enough to wrinkle an 11mm septa on a 2 mL vial, because the cap no longer folds concentrically around the flange.
Out-of-round wear. Close the jaws on a spare vial neck or a gauge pin and check for gaps. If one jaw has worn more than the other, the cap gets pulled off-center and the skirt folds asymmetrically. That’s the classic cause of caps that grip on one side and lift on the other.
Metal pickup. Aluminum caps shed material. Look for bright smears of aluminum welded onto the jaw grooves, and pick them off carefully with a wooden toothpick. Never scrape with steel; you’ll create the flats you were trying to prevent.
Also check the anvil, the flat surface behind the jaws that the septum presses against. A pitted or glued-up anvil marks the septum and can press a dimple right where your autosampler needle will pierce.
One more thing to verify while you’re in there: the jaw size actually matches the caps you’re running. Mixing up 11mm and 20mm setup details is a classic source of “inconsistent crimps,” and the trade-offs between the two formats are covered in our 11mm vs 20mm crimp caps comparison.
Checking Crimp Quality After Maintenance
Every clean, adjustment, or jaw swap should end with a verification, not a shrug. The tools on Wheaton’s E-Z crimper page show the standard design: polished jaws plus an adjustable stop screw that sets a repeatable crimp depth. After maintenance, reset that stop and prove it with three checks.
Crimp height. For 20mm headspace caps, measure from the vial rim to the top of the finished cap with calipers. Most sealing systems target roughly 7.5 to 8.0 mm; check your cap supplier’s spec. Record the number. When the same measurement next quarter reads 8.4 mm, you’ve caught jaw wear before it costs you a sequence.
Wrinkle check. Look at the septum from underneath. It should show a slight, even depression from compression, with no dents, no folds pulled into the center hole, and no doming. The cap skirt should hug the neck with smooth sides and no creases.
Leak and spin check. Agilent’s crimping tool operation guide notes that the common twist test has limits; a well-compressed seal can hold pressure even when a cap still turns slightly, and PTFE-laminated septa turn freely even on good crimps. So treat the spin test as a screen, not a verdict. For anything volatile or precious, do a real check: the septum should not press in easily, and a leak detector on a sacrificial headspace vial settles the question. If a vial fails, decap it and start with a fresh cap; re-crimping a deformed skirt rarely produces a good seal. Our step-by-step headspace vial crimping guide covers the sealing motion itself, and CHROMacademy’s GC channel includes a short video on avoiding common crimping errors if you’re training new operators.
When to Adjust vs Replace
Most “bad crimper” complaints are a loose stop screw, not dead jaws. Work down this table before you order anything:
| Symptom | Likely cause | Fix |
|---|---|---|
| Caps spin freely | Stop screw set too loose | Tighten stop 1/4 turn, test on fresh cap |
| Septum dented or domed | Stop set too tight, over-crimp | Back stop off, retest |
| One side of skirt crimps, other doesn’t | One jaw worn or out-of-round | Inspect jaws; replace jaw set |
| Crimps drifted tighter over months | Normal jaw wear-in | Readjust stop, verify height |
| Handles gritty, jaws stiff after cleaning | Debris inside spring assembly or worn pivot | Service per manufacturer, or retire the tool |
| Crimp height keeps drifting after adjustment | Jaws past useful life | Replace jaws or crimper |
Adjust first. If you can hit a correct crimp height, a flat septum, and a passed leak test with a fresh cap, the tool is fine. Replace when adjustment no longer holds: crimp height that drifts between checks, jaws you can see flats on, or any visible crack in a jaw. Replacement jaws cost a fraction of a new crimper, and swapping them is usually a two-minute job. Agilent rates its manual crimpers for at least 100,000 crimps at 11mm and 60,000 at 20mm, so a lab sealing 200 vials a week wears out 20mm jaws in a few years.
One warning from my own bench. I once “saved” a tired 20mm crimper by cranking the stop screw until caps stopped spinning. The crimps were so tight the septa domed, and we chased phantom coring in the inlet for two weeks before someone measured a crimp height. Adjust to the spec, not to the feel.
Storage Habits That Add Years
Storage is where a ten-year tool quietly becomes a twenty-year tool.
• Cap the jaws. A rubber jaw guard or a folded wipe held with a small band keeps glass dust out of the grooves. Restek’s crimper operation guide recommends a protective cap over the jaws whenever the tool is stored or shipped, mostly to prevent accidental cycling, and it doubles as dust protection.
• Dry drawer, away from solvents. Corrosive vapor from a solvent cabinet pits jaw faces and stiffens the spring. A bench drawer with your vial supplies beats a fume hood shelf.
• Never store it squeezed. Leave the handles relaxed so the spring doesn’t take a set. A spring held closed for months delivers weak, sluggish crimps.
• Record the setting. Once you’ve verified a stop screw position, note it on a strip of tape on the handle. If someone borrows the tool and fiddles with it, you’ll know where to return it.
Conclusion
A vial crimper has maybe a dozen moving parts, and every one of them can be checked in the time it takes to run a blank. Blow the dust out, wipe the jaws and anvil with IPA, look for flats and metal pickup under a light, then prove the tool with a measured crimp height and a flat septum before the next batch. Clean on a schedule, adjust the stop screw to spec rather than to feel, and replace the jaw set the moment crimps stop holding their target height. That’s the entire maintenance program, and it protects your septa, your inlet, and every sample you seal. If you’re building out the rest of your bench, our list of 12 consumables every HPLC lab should keep as spares is a sensible next read, because a spare jaw set belongs on that list too.
Frequently Asked Questions
How often should I replace crimper jaws?
It depends on volume, not the calendar. At light use (a few hundred crimps a month), jaws can last five years or more; at several hundred crimps a day, plan on replacing them every one to two years. Replace them when crimp height drifts between adjustments or when you can see flats on the jaw faces.
Can I use acetone or stronger solvents to clean the jaws?
It’s not worth the risk. Acetone can damage plastic handle inserts and coatings, and residual solvent will wick toward your caps and septa. Isopropyl alcohol on a lint-free wipe cleans aluminum dust and grease just as well and evaporates cleanly.
Why are my crimps uneven even after a thorough cleaning?
Uneven crimps after cleaning usually mean mechanical wear, not dirt. Check the jaws for flats, out-of-round closure, and loose pivot. If the cap is being pulled off-center or the skirt folds asymmetrically, the jaw set has reached the end of its life.
Is it okay to autoclave my crimper?
No, unless the manufacturer explicitly allows it. Some stainless steel models tolerate autoclaving, but DWK notes that autoclaving can change the appearance and reduce the life of their crimpers. Heat cycles also soften springs and degrade handle grips. Wipe-down with IPA is the safer standard.
How do I check crimp height without a dedicated gauge?
A digital caliper works fine. Measure from the top of the vial’s neck flange to the top of the crimped cap, and compare against your cap supplier’s specification, typically around 7.5 to 8.0 mm for 20mm headspace caps. What matters most is consistency: track the number over time and investigate any drift.